


When it comes to managing your server, there are quite a few things that might seem daunting to a person without prior experience regardless of how straightforward they might seem.
One such action is file transferring. In general, there are a plethora of different ways that you can use in order to get files from your local machine to your Windows VPS, but in this tutorial, we are going to be focusing on the 3 most popular methods.
Direct Copy and Paste (Clipboard Redirection)
The easiest way to move files between your computer and a Windows VPS server is by using the standard copy (Ctrl+C) and paste (Ctrl+V) commands through the Remote Desktop Connection (RDP) client on your personal Windows computer.
This method is ideal for transferring individual files as well for moving small groups of files quickly without any complex setup. In order to move files this way, you must first make sure to connect through RDP:
On your local machine, search for and open the Remote Desktop Connection application: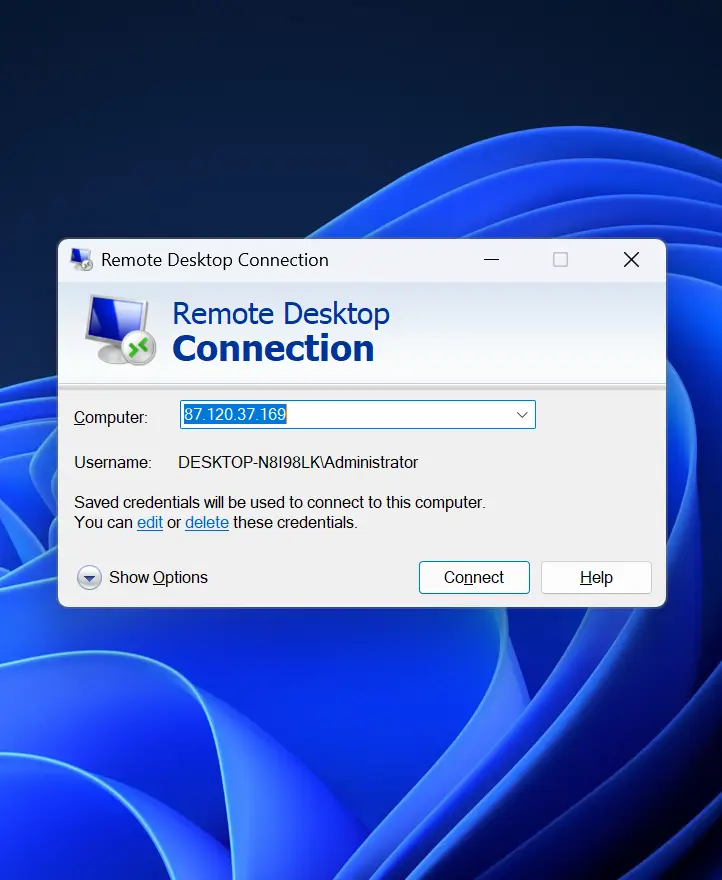
Next, click on Show Options.
Afterwards, navigate to the Local Resources tab. Ensure that the Clipboard checkbox is ticked.
This allows you to share your clipboard between your local computer and your Windows VPS.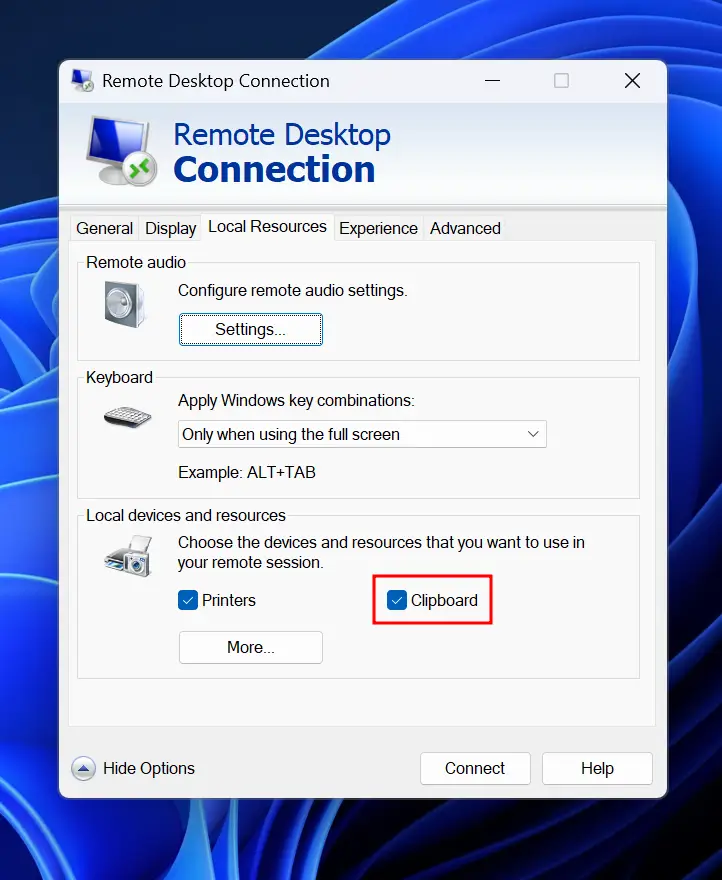
Click Connect to start your session. This will ensure that you are connected to your server through RDP.
Once you ensure that you have connected and have enabled clipboard sharing, it’s time to start transferring files.
On your local machine, find the file or folder you want to copy to your VPS. Right-click and select Copy, or simply select the files and press Ctrl+C.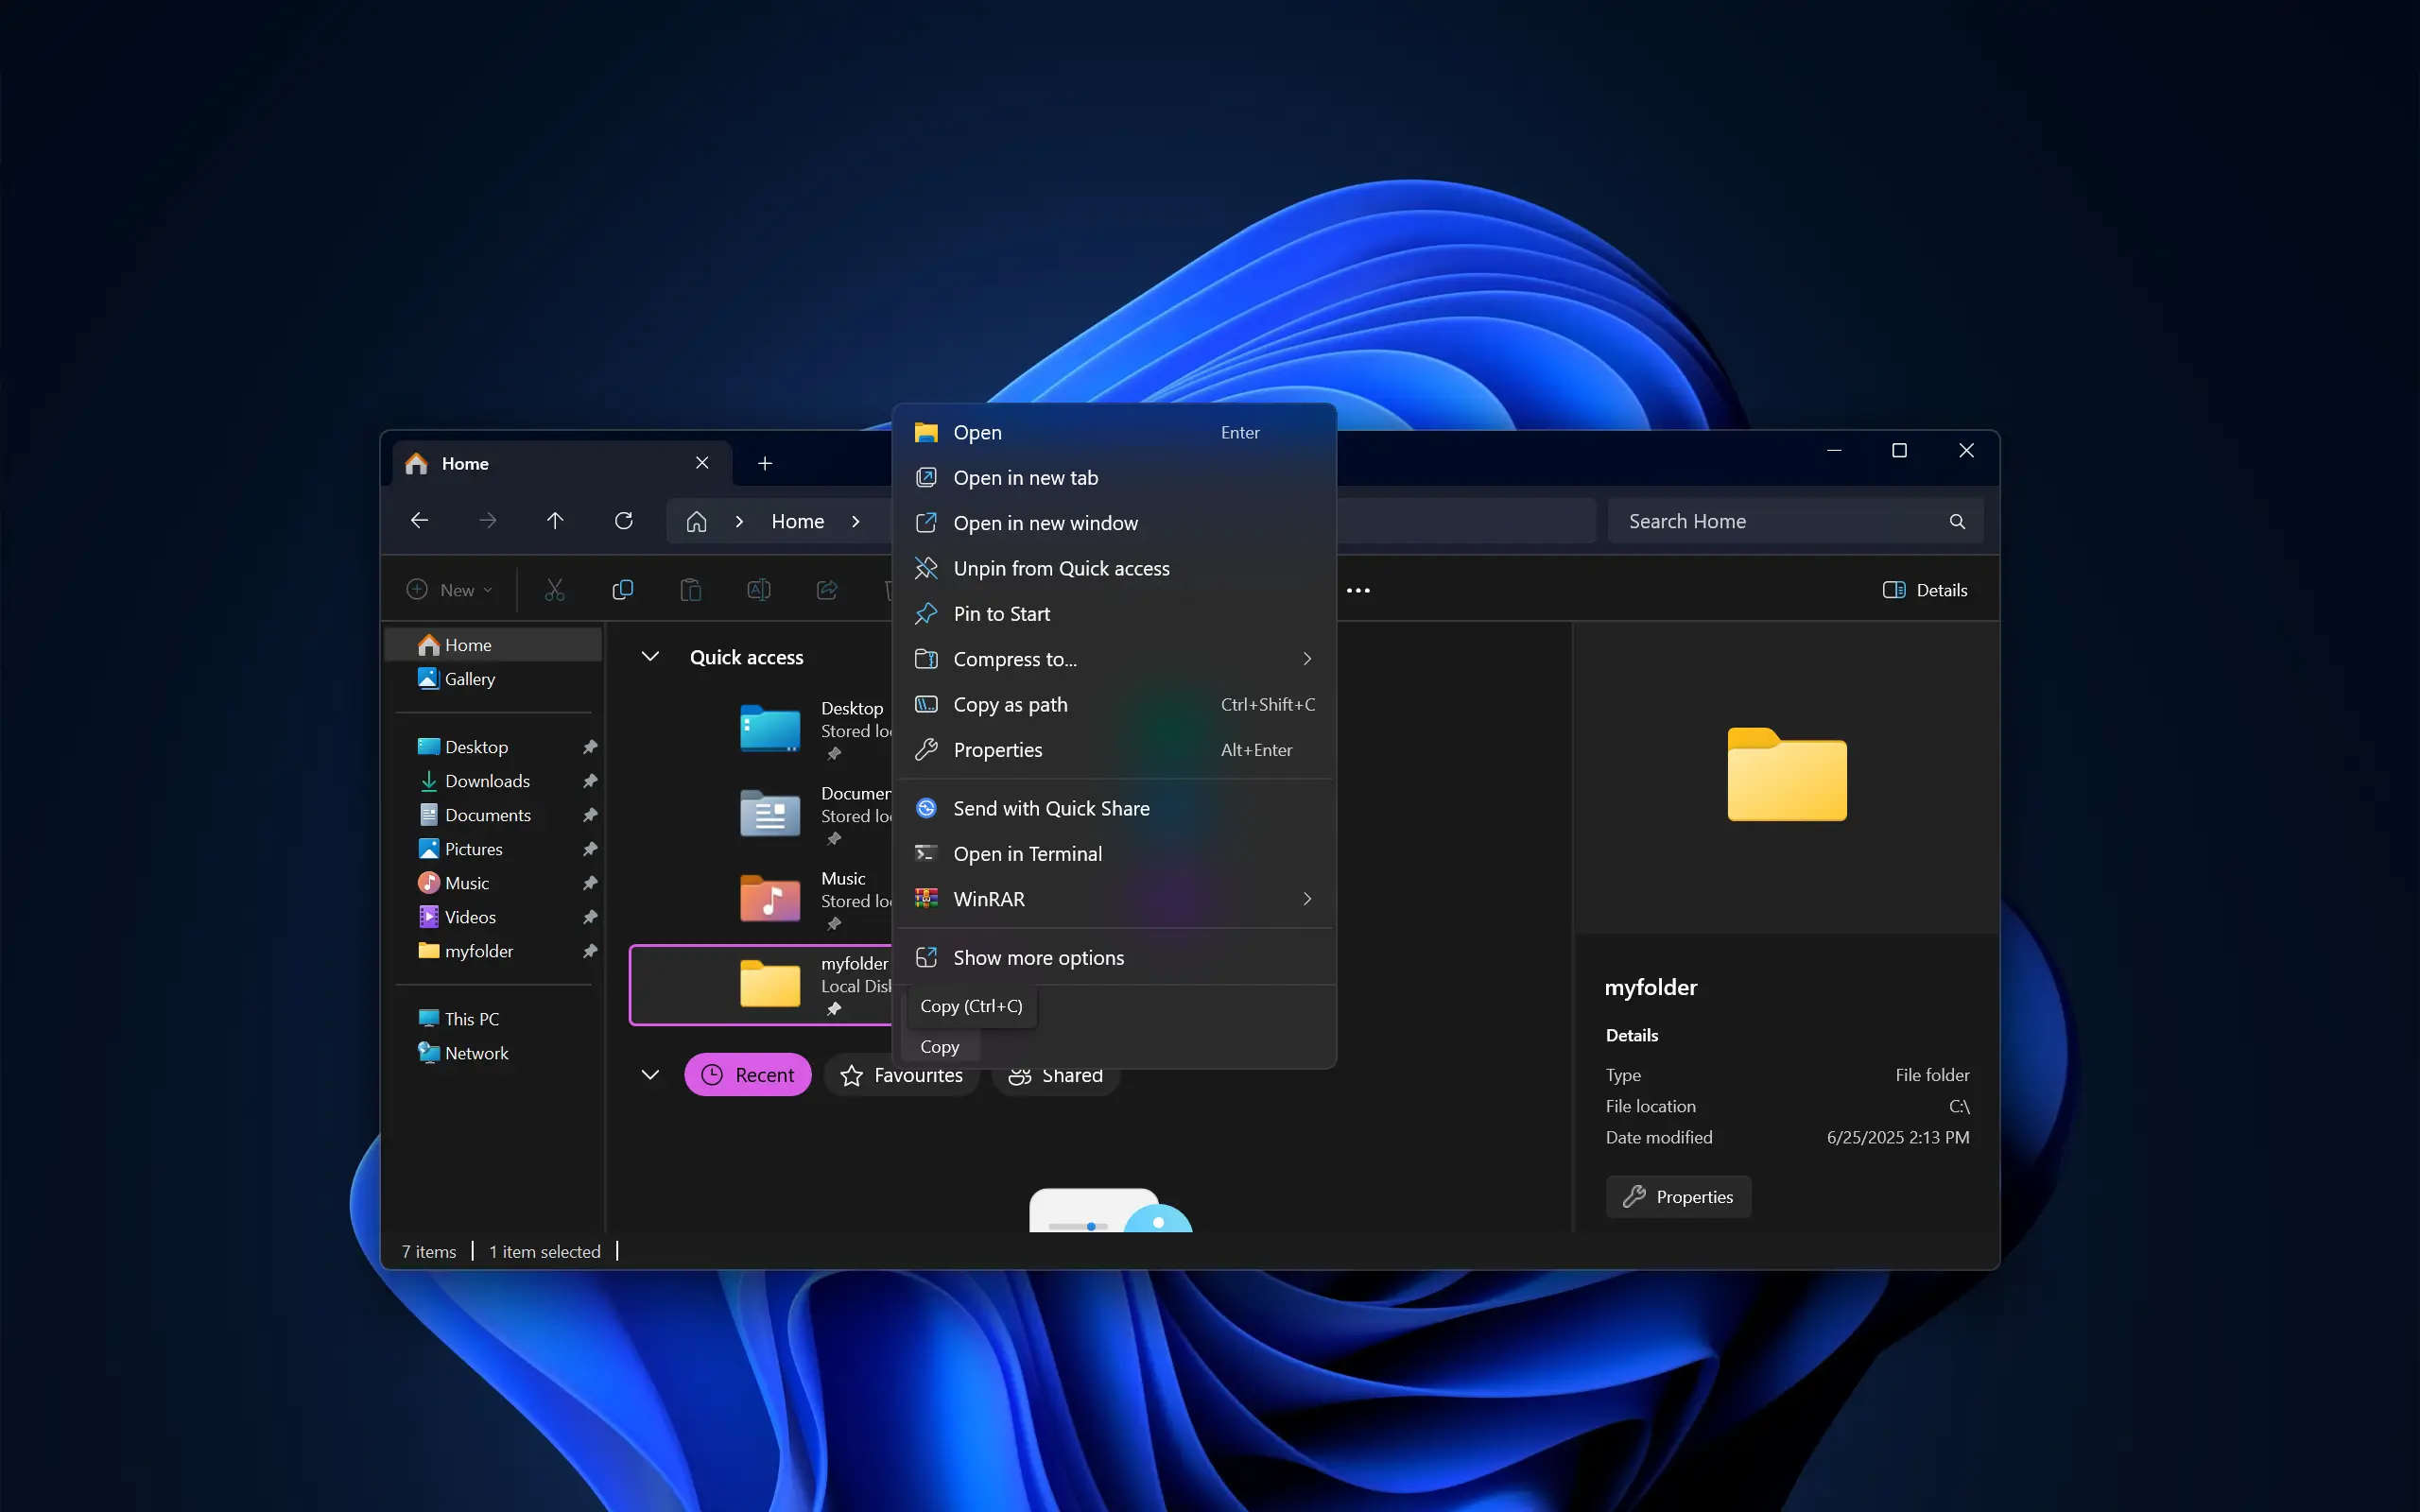
Next, switch over to your active Remote Desktop window and navigate to the folder on the VPS server where you want to place the file. Then, right-click and select Paste, or just hold Ctrl+V.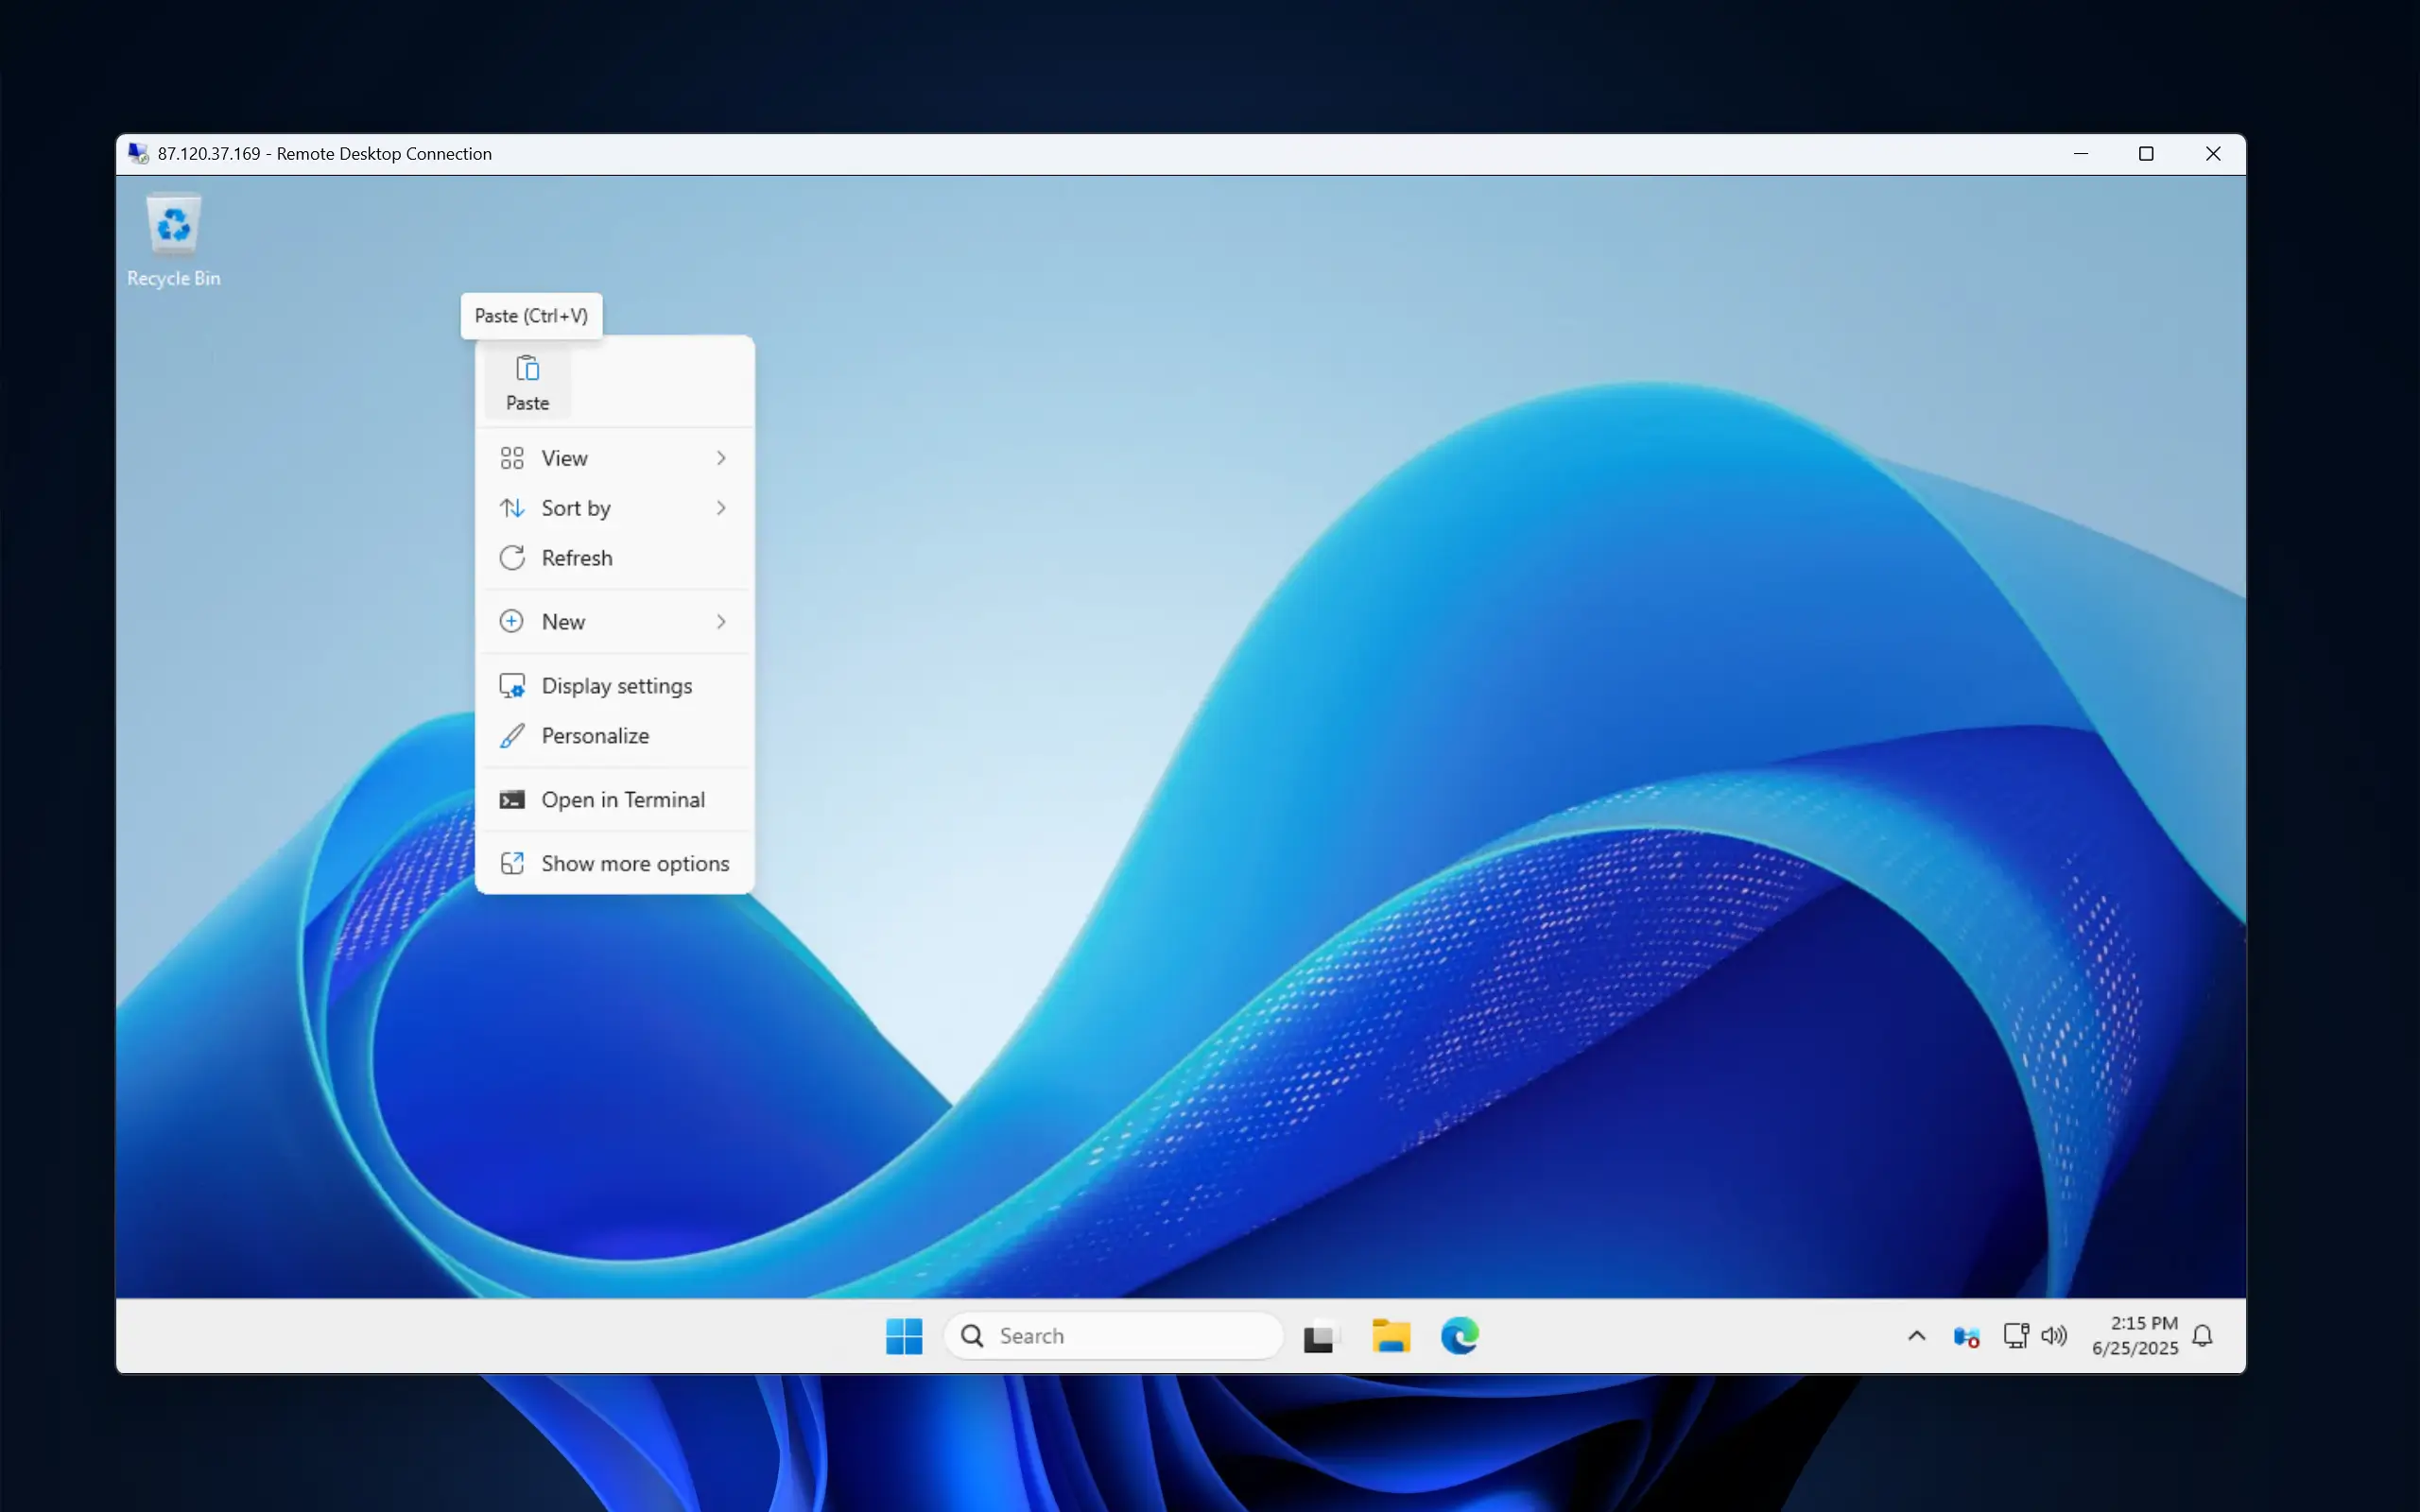
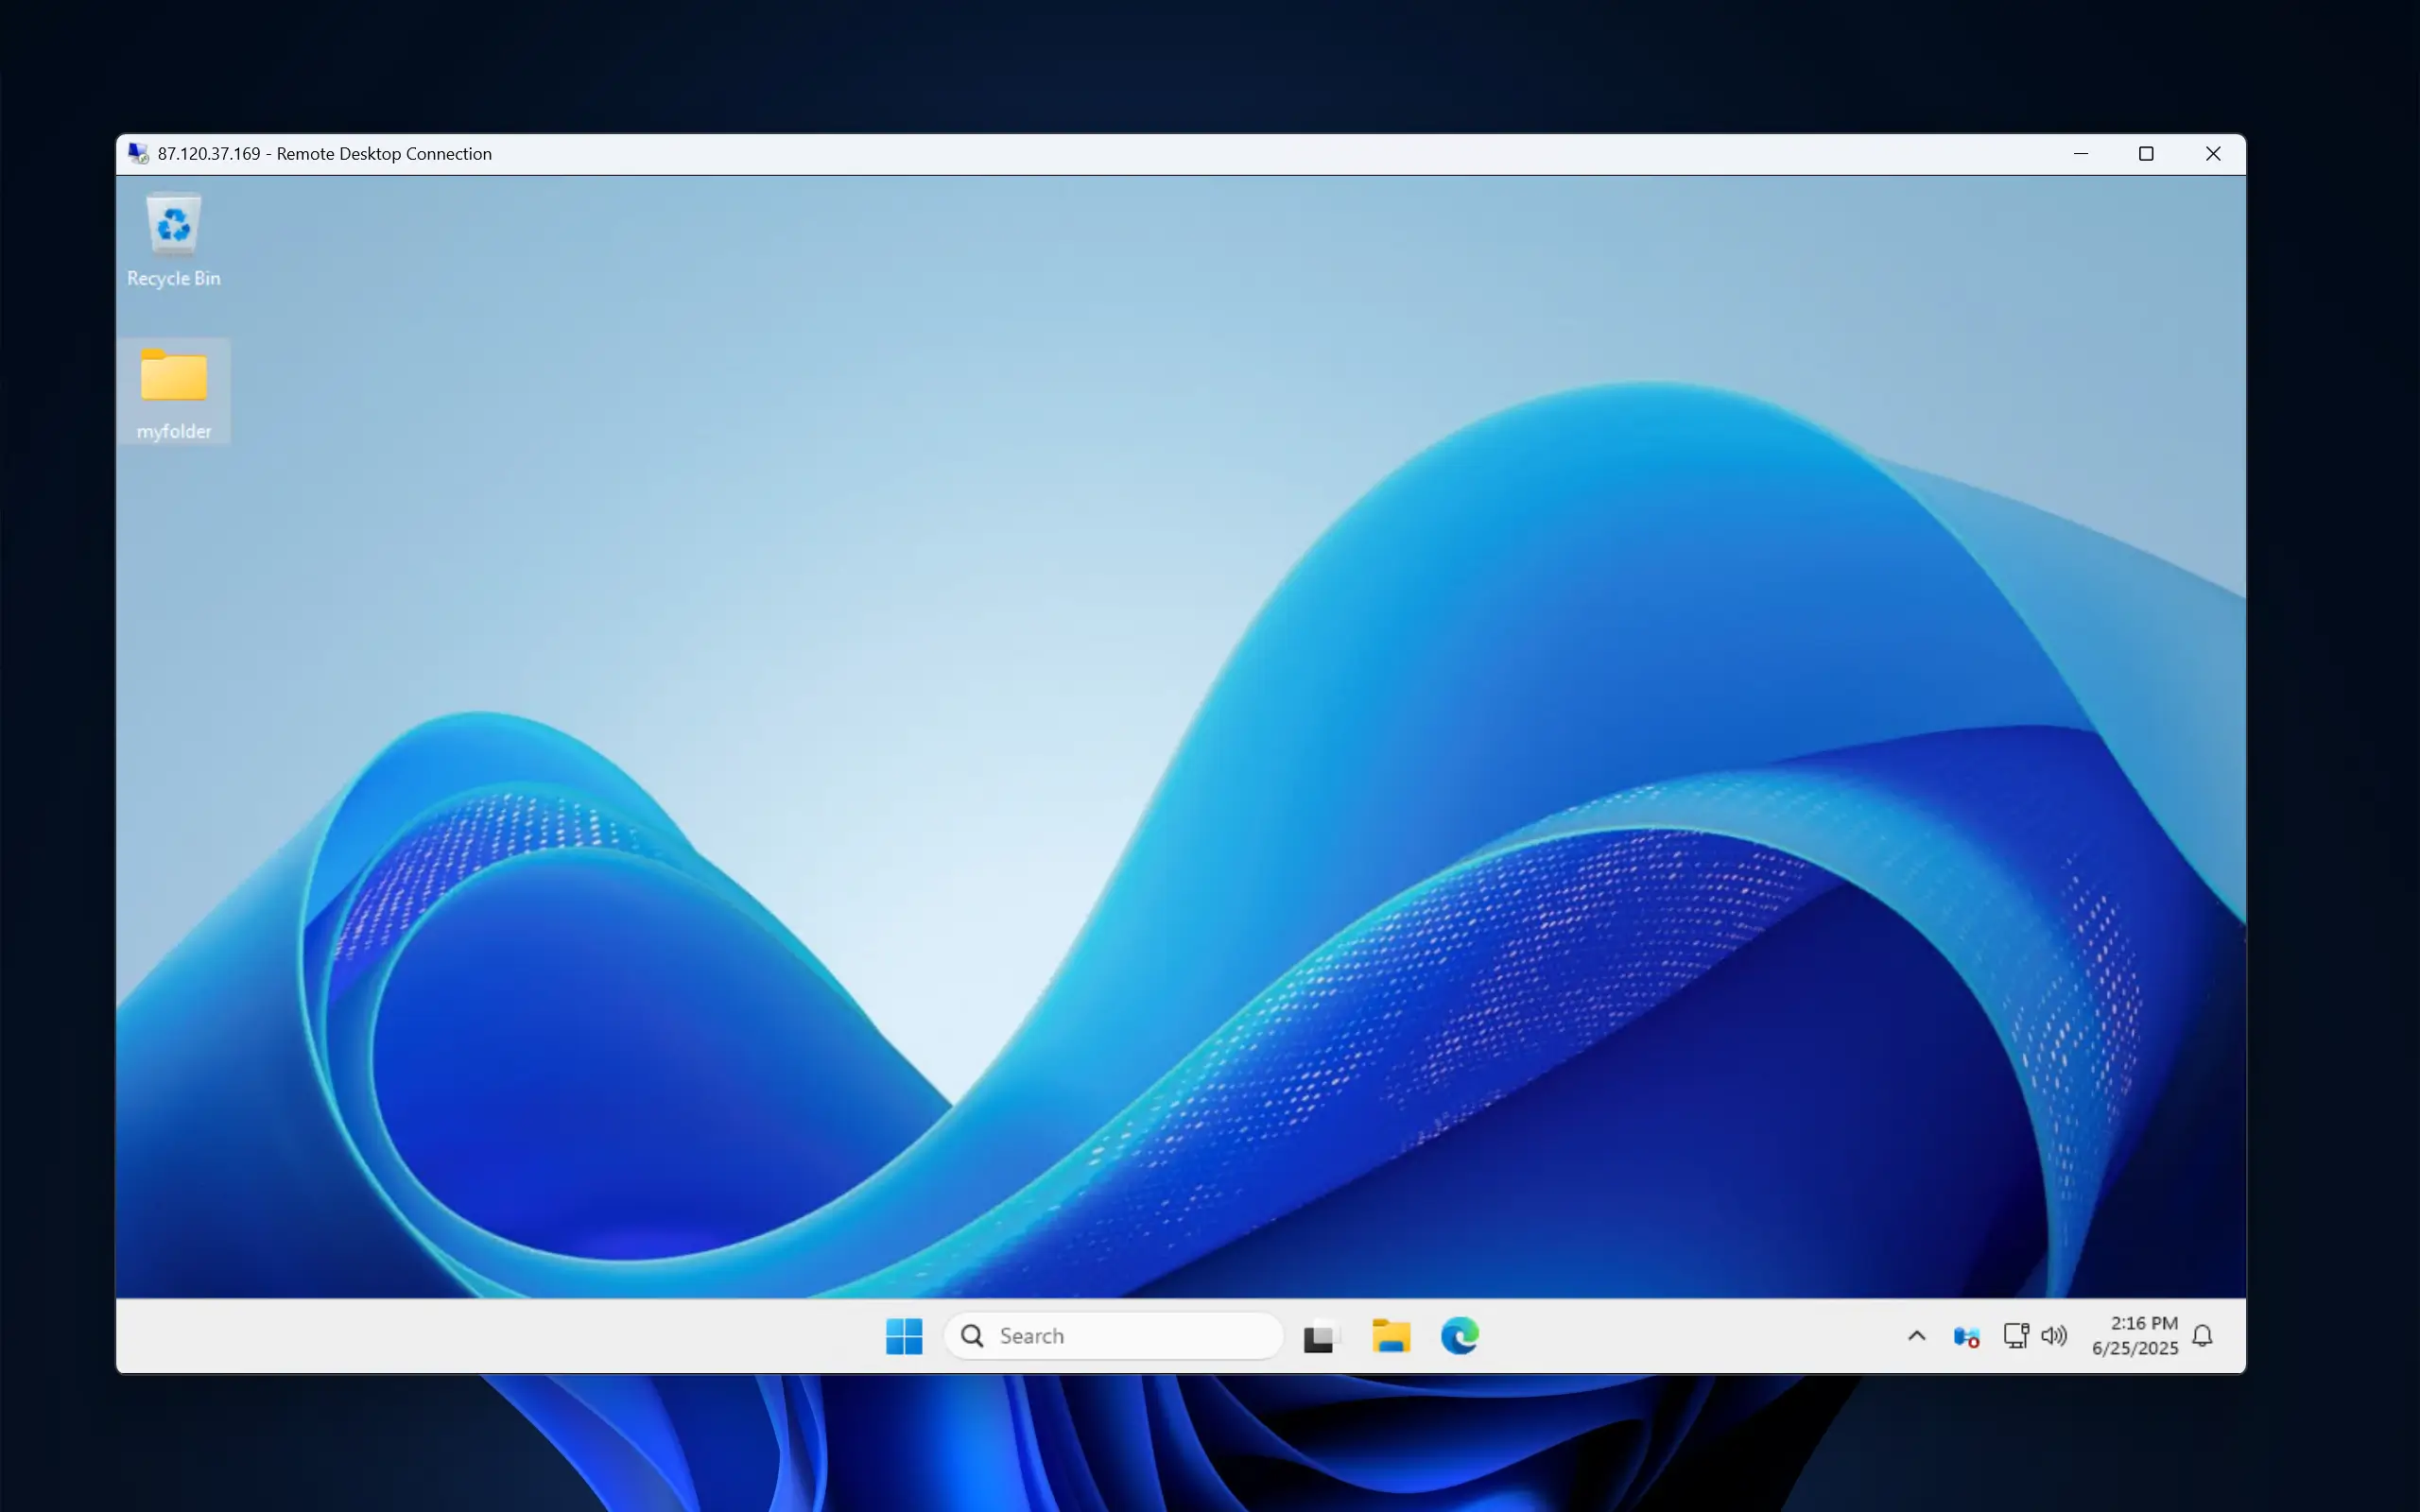
A "Copying..." dialog will appear, showing the progress of the file transfer over your network connection. Finally, the folder will appear in your Windows VPS:
If you wish to transfer a file from your VPS to your local machine, you can also utilize the same process, just in reverse - inside the Remote Desktop session, find the files or folder on your server that you want to move, copy them and paste them into the desired folder on your local PC.
This clipboard method is incredibly convenient and is best suited for single or smaller file transfers. For moving large files (like several gigabytes) or a big number of files at once, other methods are more reliable.
Transfer Files via File Explorer (Drive Redirection)
In cases when you will need to transfer larger files or when you require a more stable and integrated experience than the clipboard offers, drive redirection is the best solution.
The drive redirection feature "maps" the drives from your local computer so they appear directly inside the File Explorer on your VPS. This allows you to browse and manage local PC files using the familiar File Explorer interface inside of your Windows VPS.
Here's how to set it up:
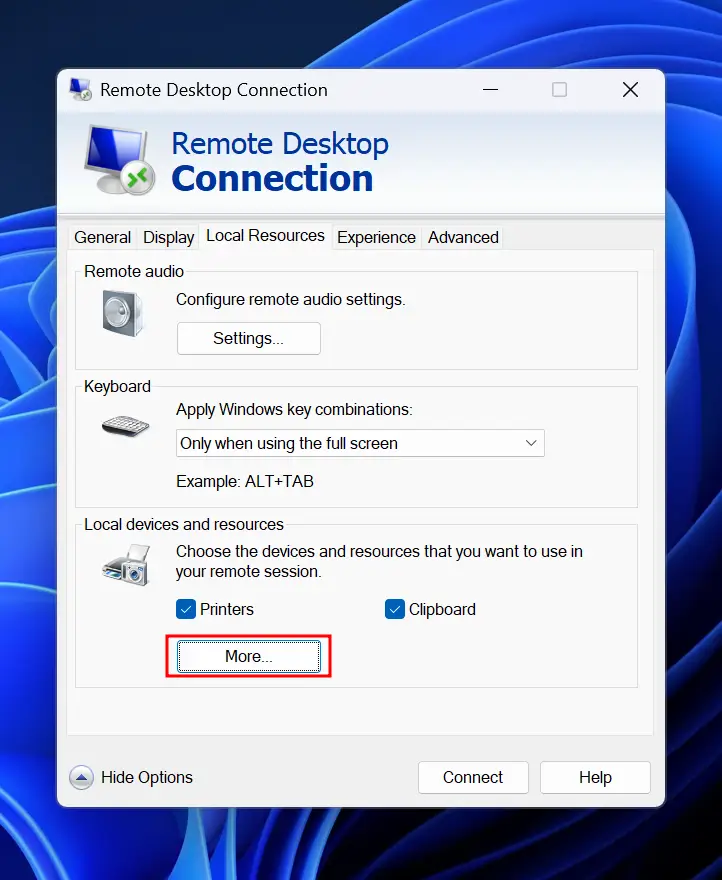
First, open the Remote Desktop Connection app on your local PC and click Show Options and navigate to the Local Resources tab, just like in the previous method.
Under the "Local devices and resources" section, click the More… button as shown:
In the new window that appears, expand the Drives list. You can either check the top-level Drives box to share all of your local drives or select specific drives that you want to access on the Windows VPS. Then simply click OK when you're done.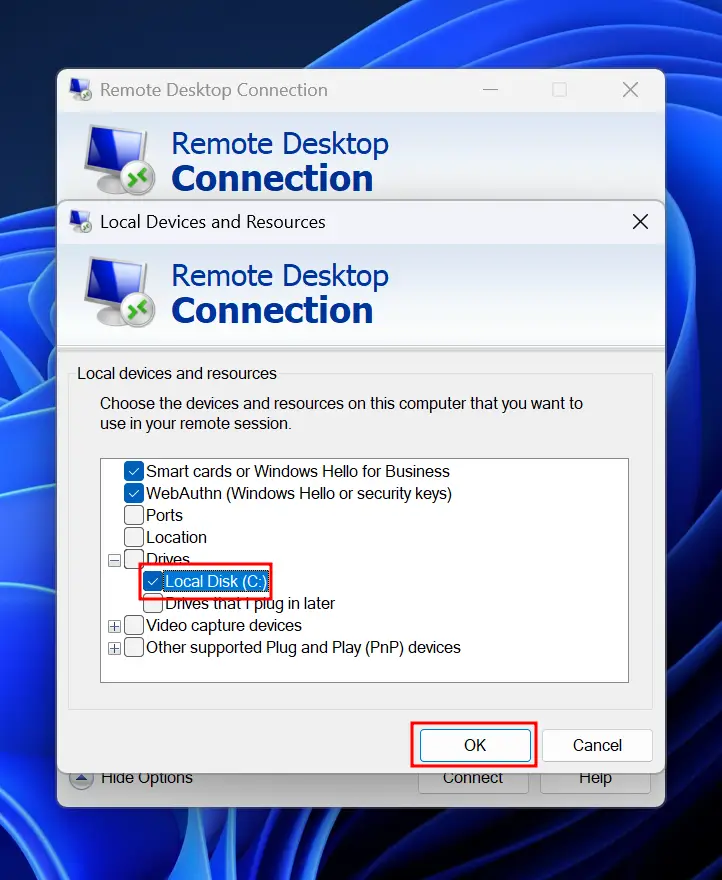
Return to the General tab and click Connect to log in to your VPS. Due to the fact that you will be redirecting data from your local computer, you will be prompted to confirm that you trust the remote VPS. Proceed by clicking Connect.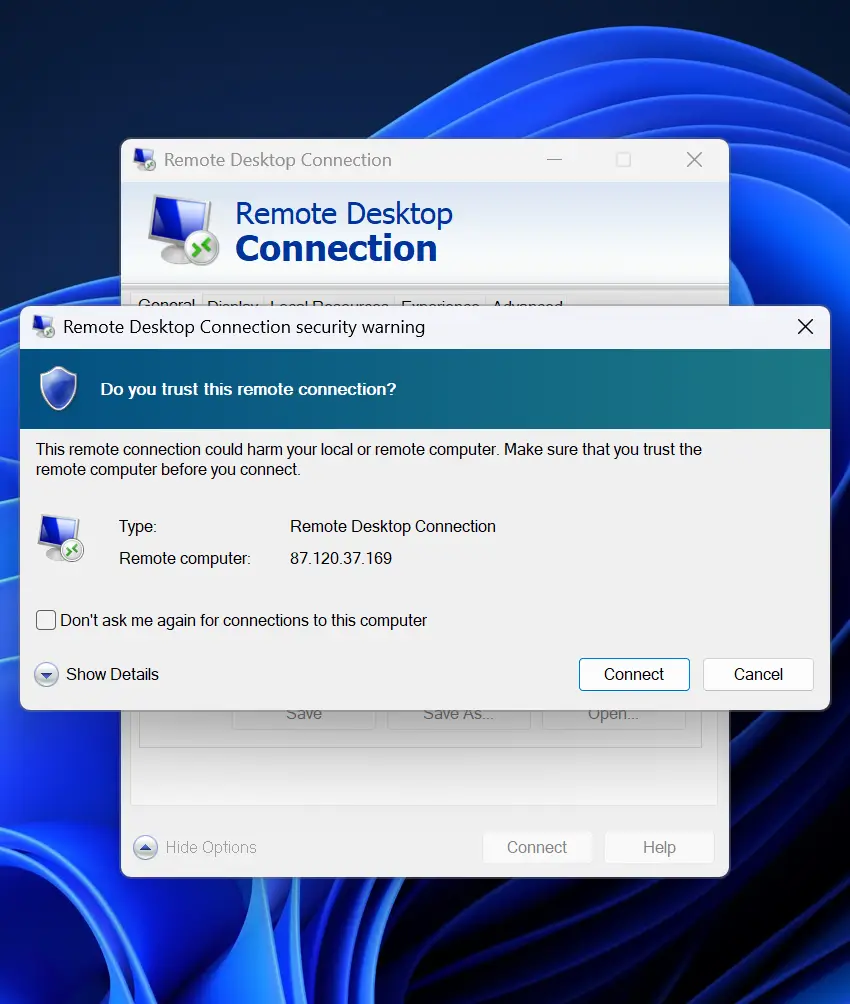
Once you are logged into your Windows VPS, open File Explorer.
In the navigation panel, look under the This PC section. You will now see your redirected local drives listed, typically labeled with your local computer's name (for example, C on DESKTOP-ABC123)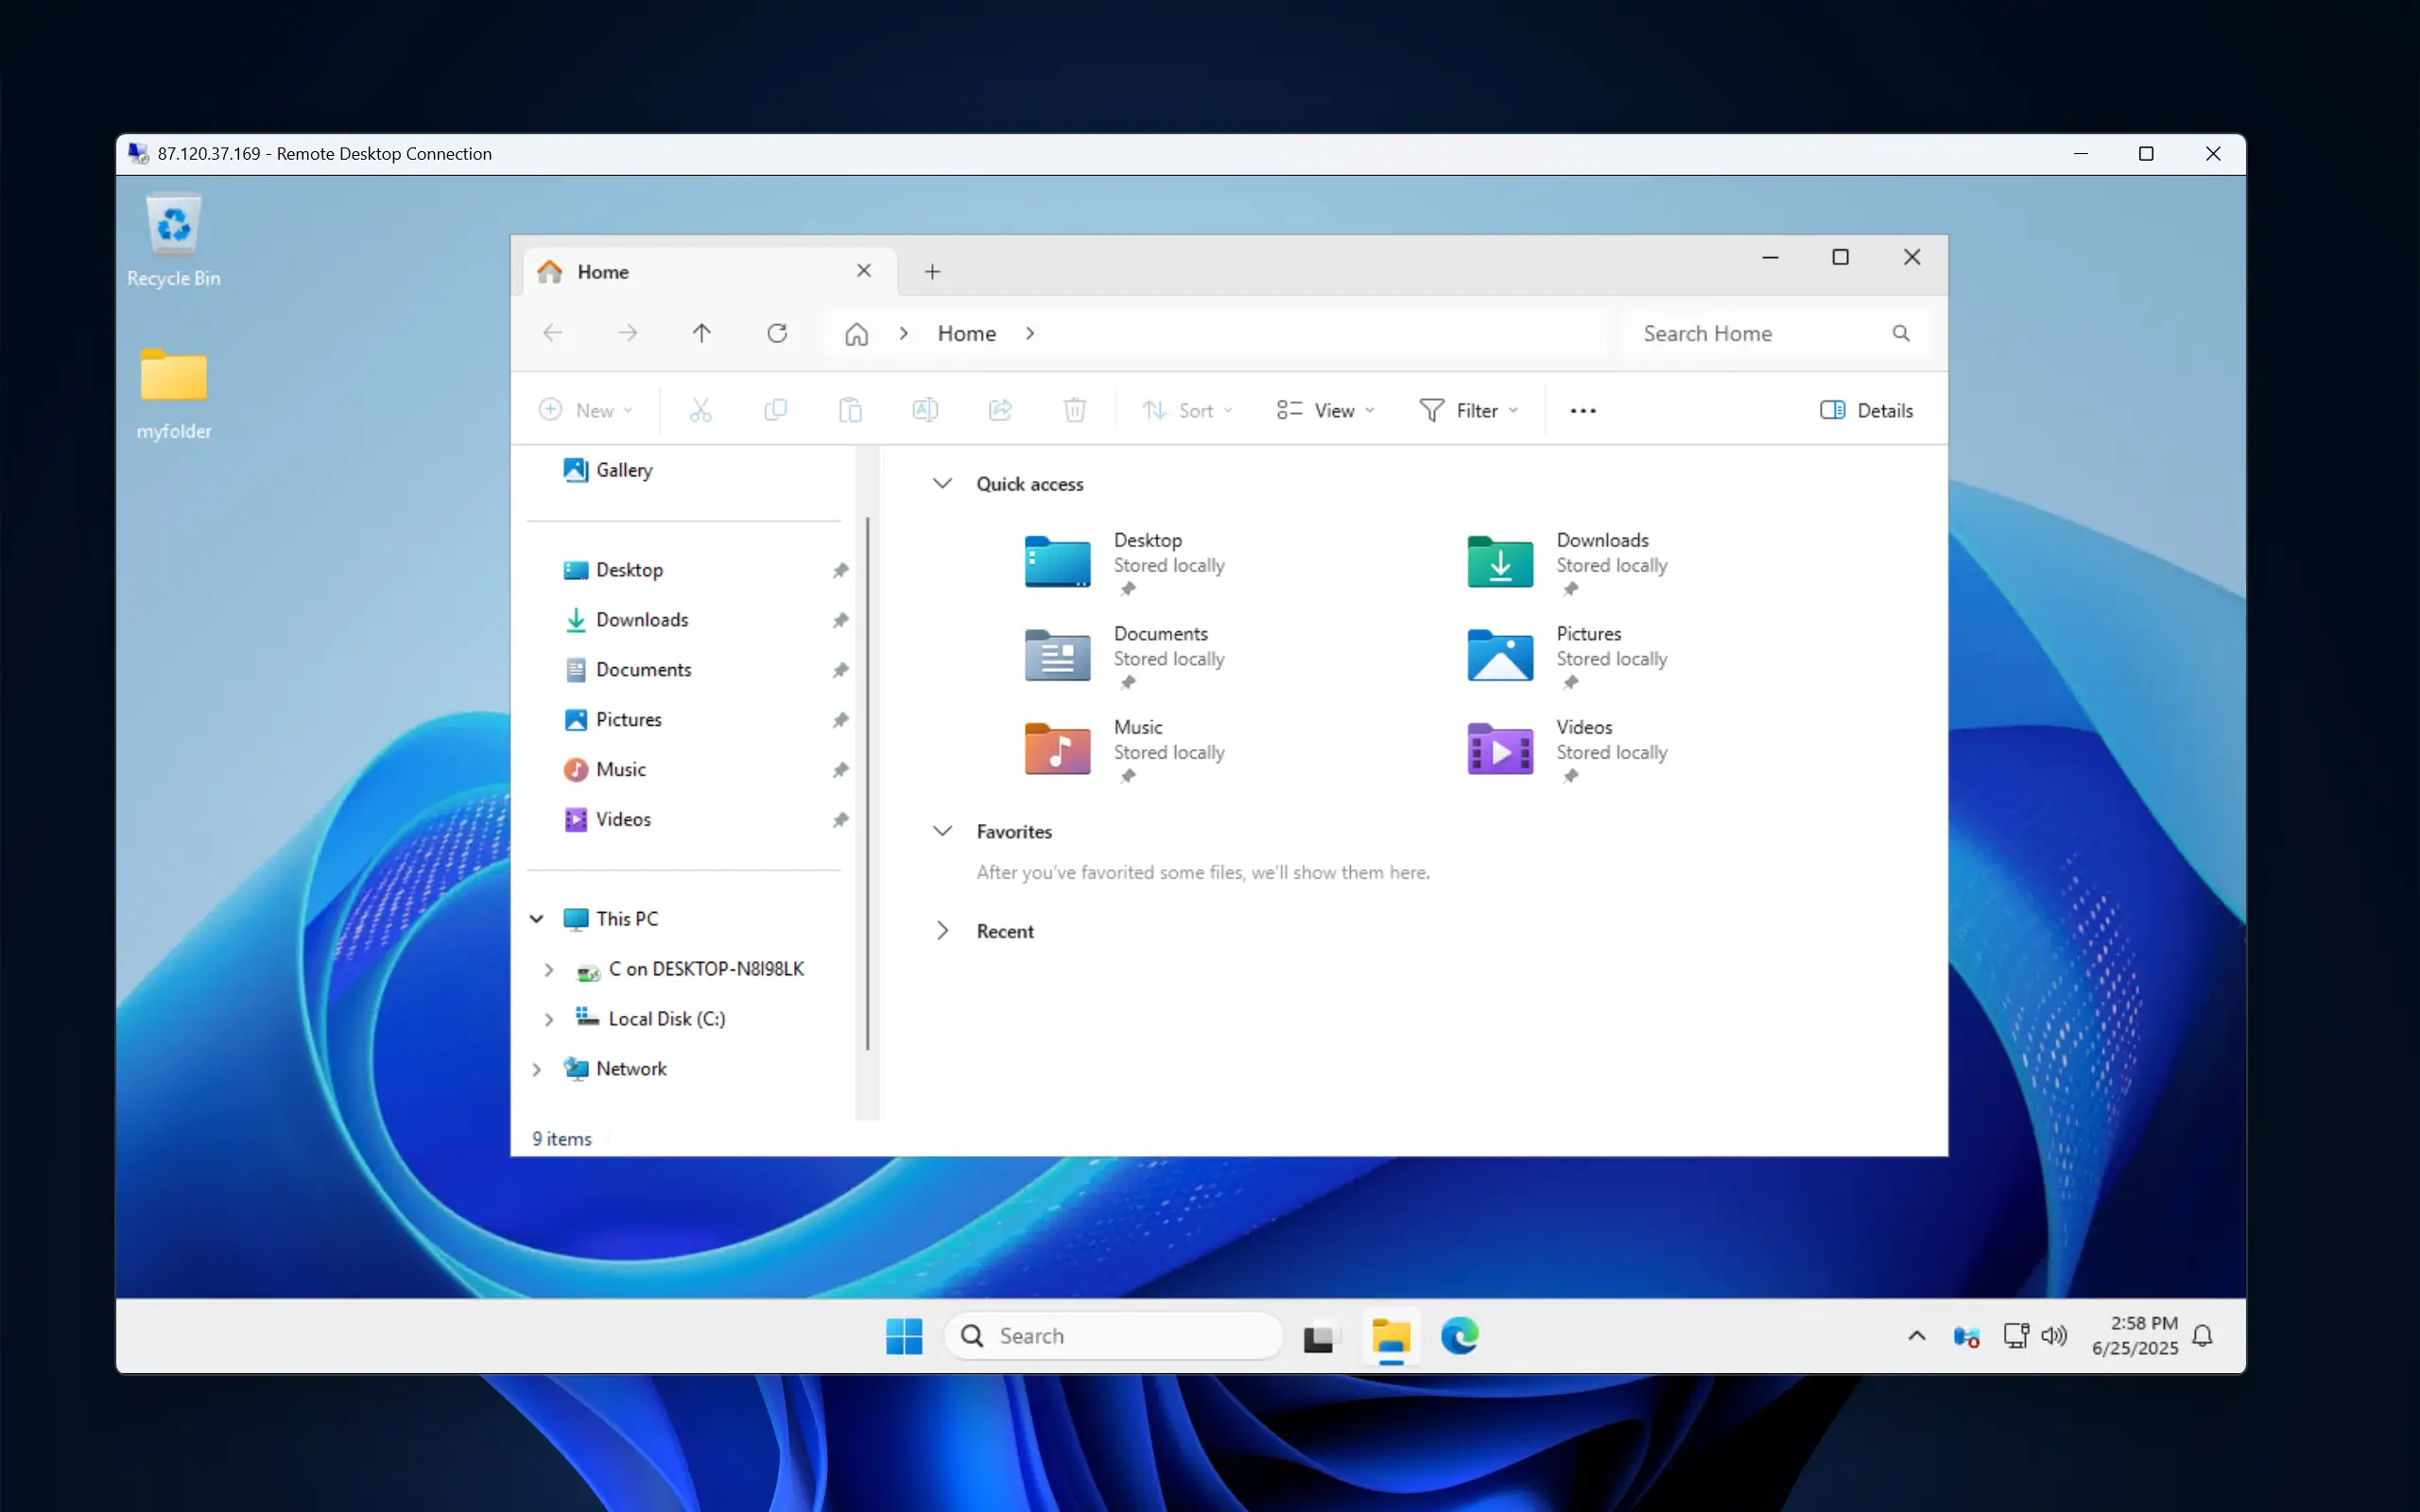
That’s it! You can now interact with your local files and folders from within the File Explorer of your VPS. This method is highly recommended for its stability and ease of use when managing multiple files or large amounts of data, especially when done automatically via custom scripts on your VPS.
Set Up an FTP Server for Universal Access
While fast and easy, the previous 2 methods can only work if your local machine also has Windows as its operating system. If your local computer runs on Linux, macOS, or any other operating system, you will have to use this third option, which is to set up an FTP server on your Windows VPS, which will also allow you to connect from anywhere and from any device, enabling you to transfer files with ease.
To do this, we will need to configure FTPS (FTP over SSL/TLS), which encrypts any connection to your server, ensuring your username, password and files are transferred securely.
This process consists of two main parts - setting up the server role on the VPS and then connecting using a client application.
How to install an FTP Server Role on Your Windows VPS
First, we need to add the FTP Server feature, which is part of the Web Server (IIS) role in Windows Server.
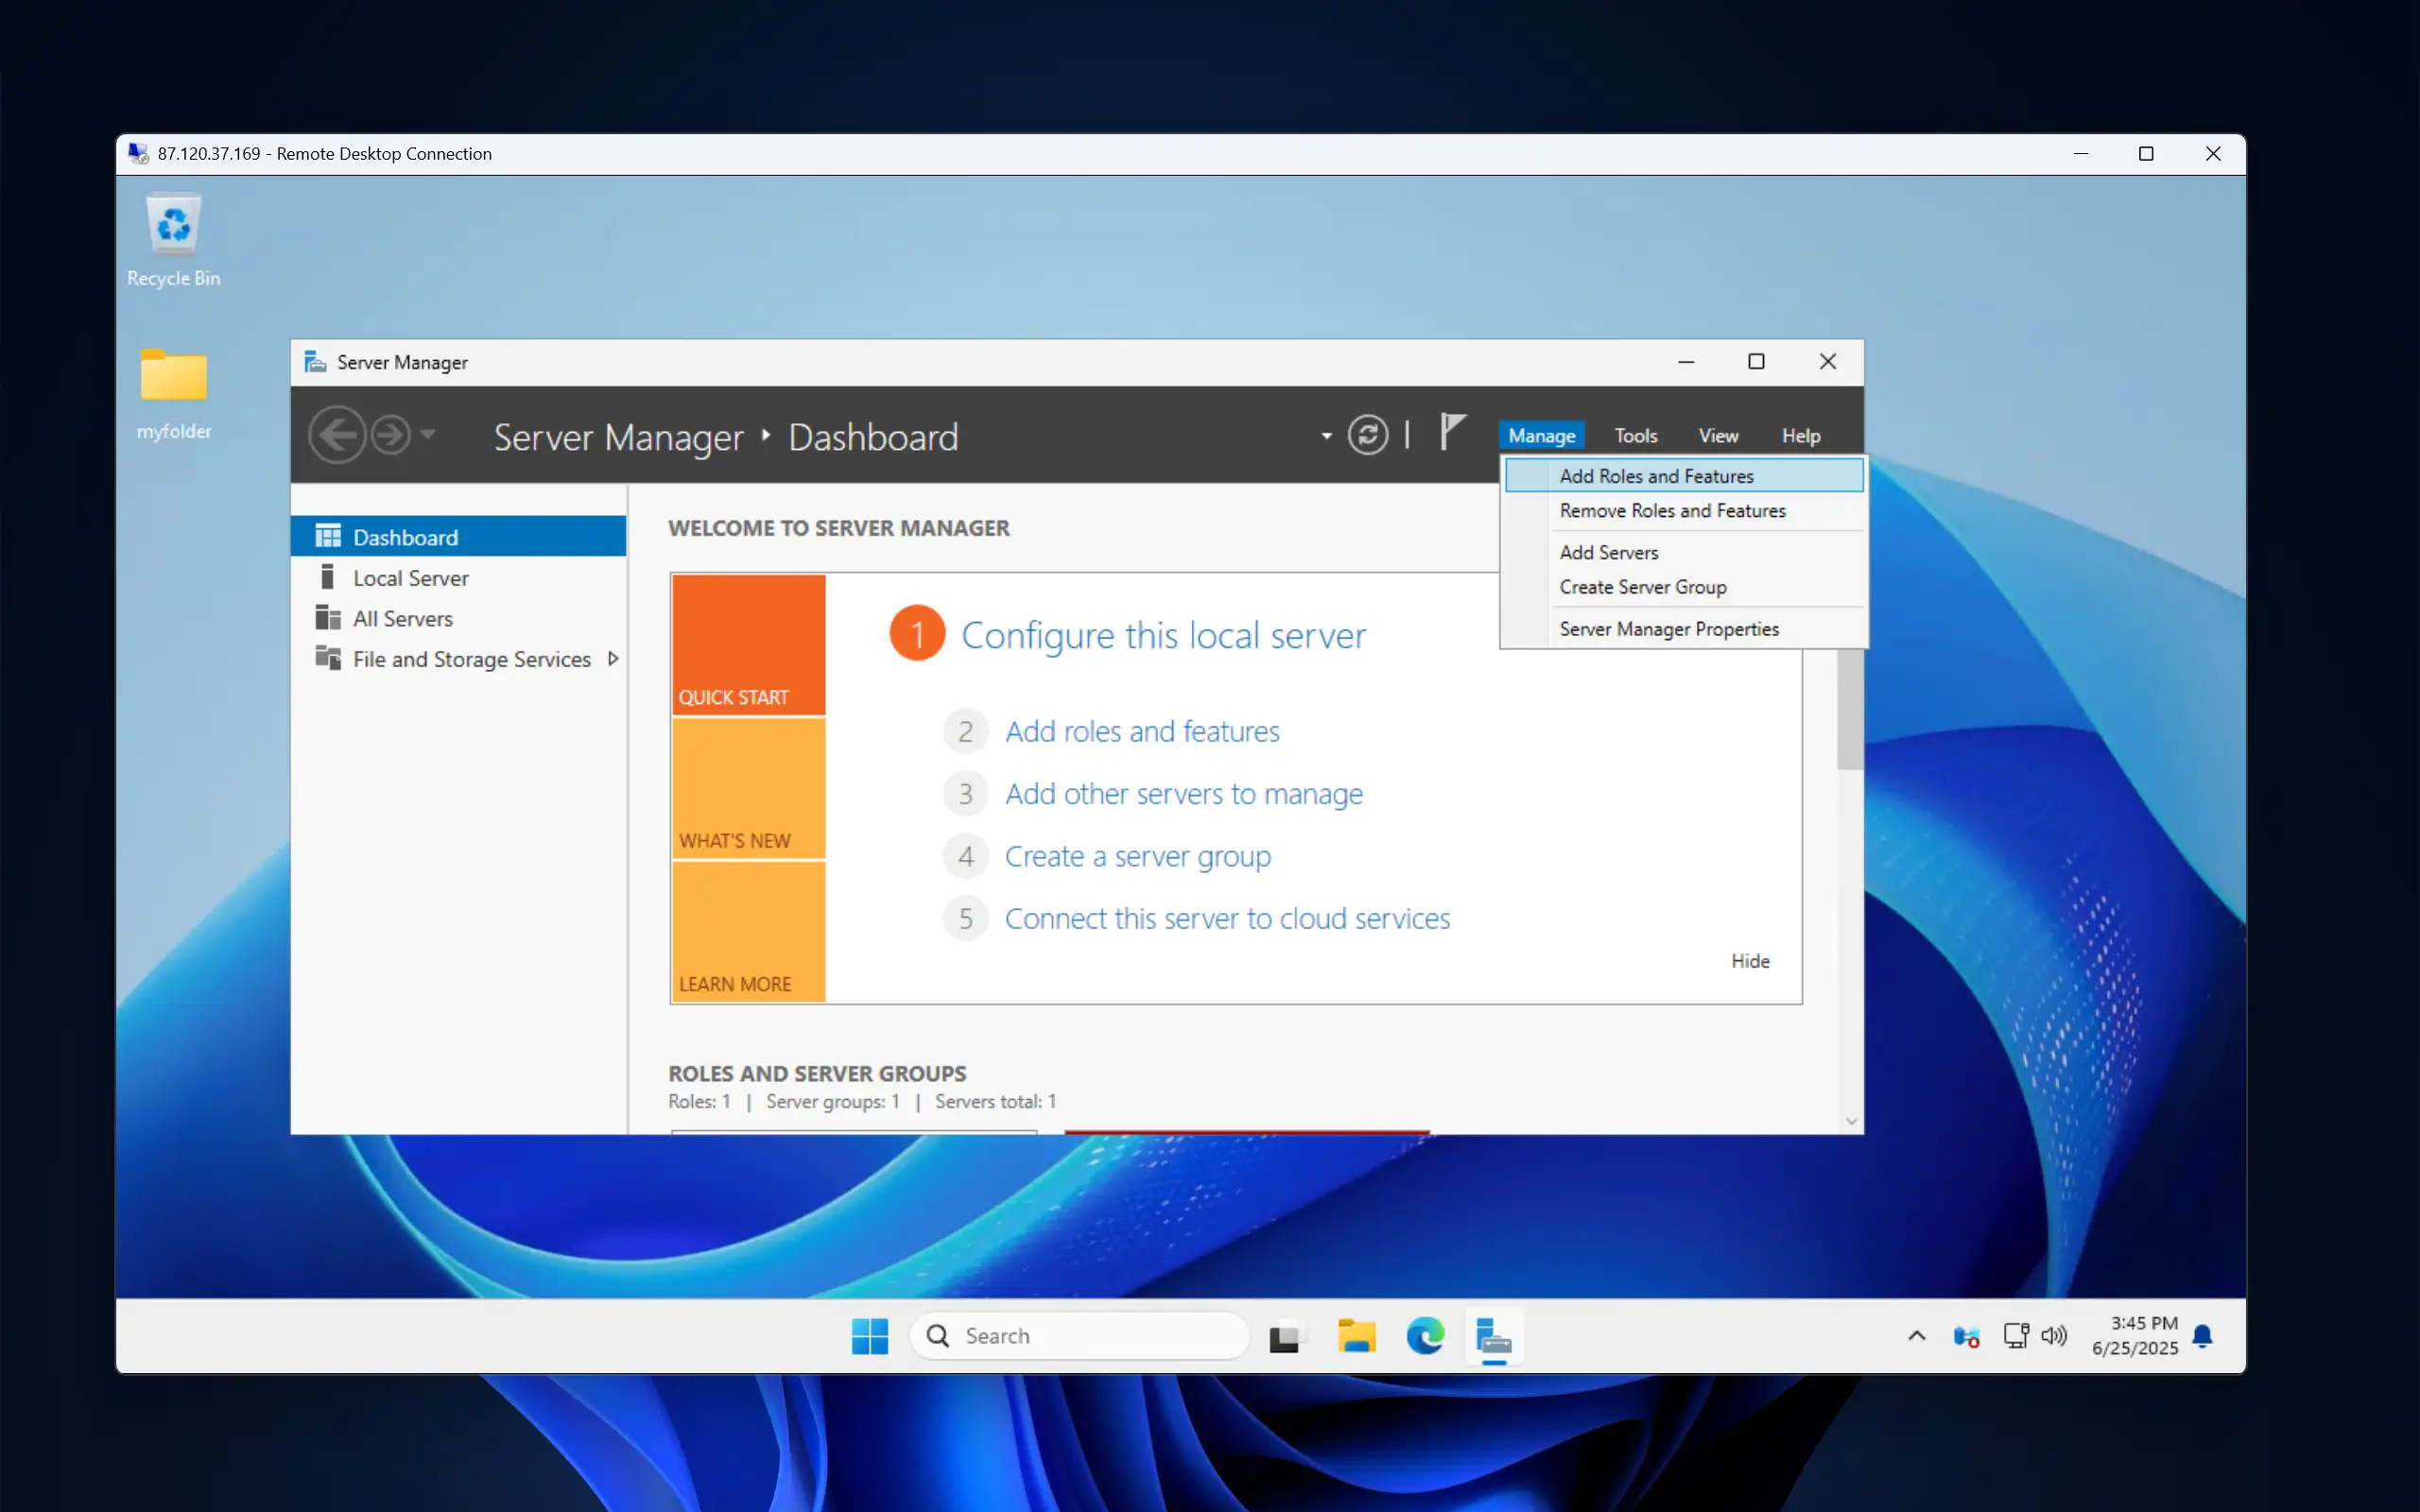
To do this, connect to your VPS via Remote Desktop and open Server Manager from the Start Menu or taskbar. Next, in the Server Manager dashboard, click Add roles and features.
Proceed through the wizard until you reach the Server Roles section. Here, you need to check the box for Web Server (IIS). A window will then pop up asking to add required features. Click the Add Features button.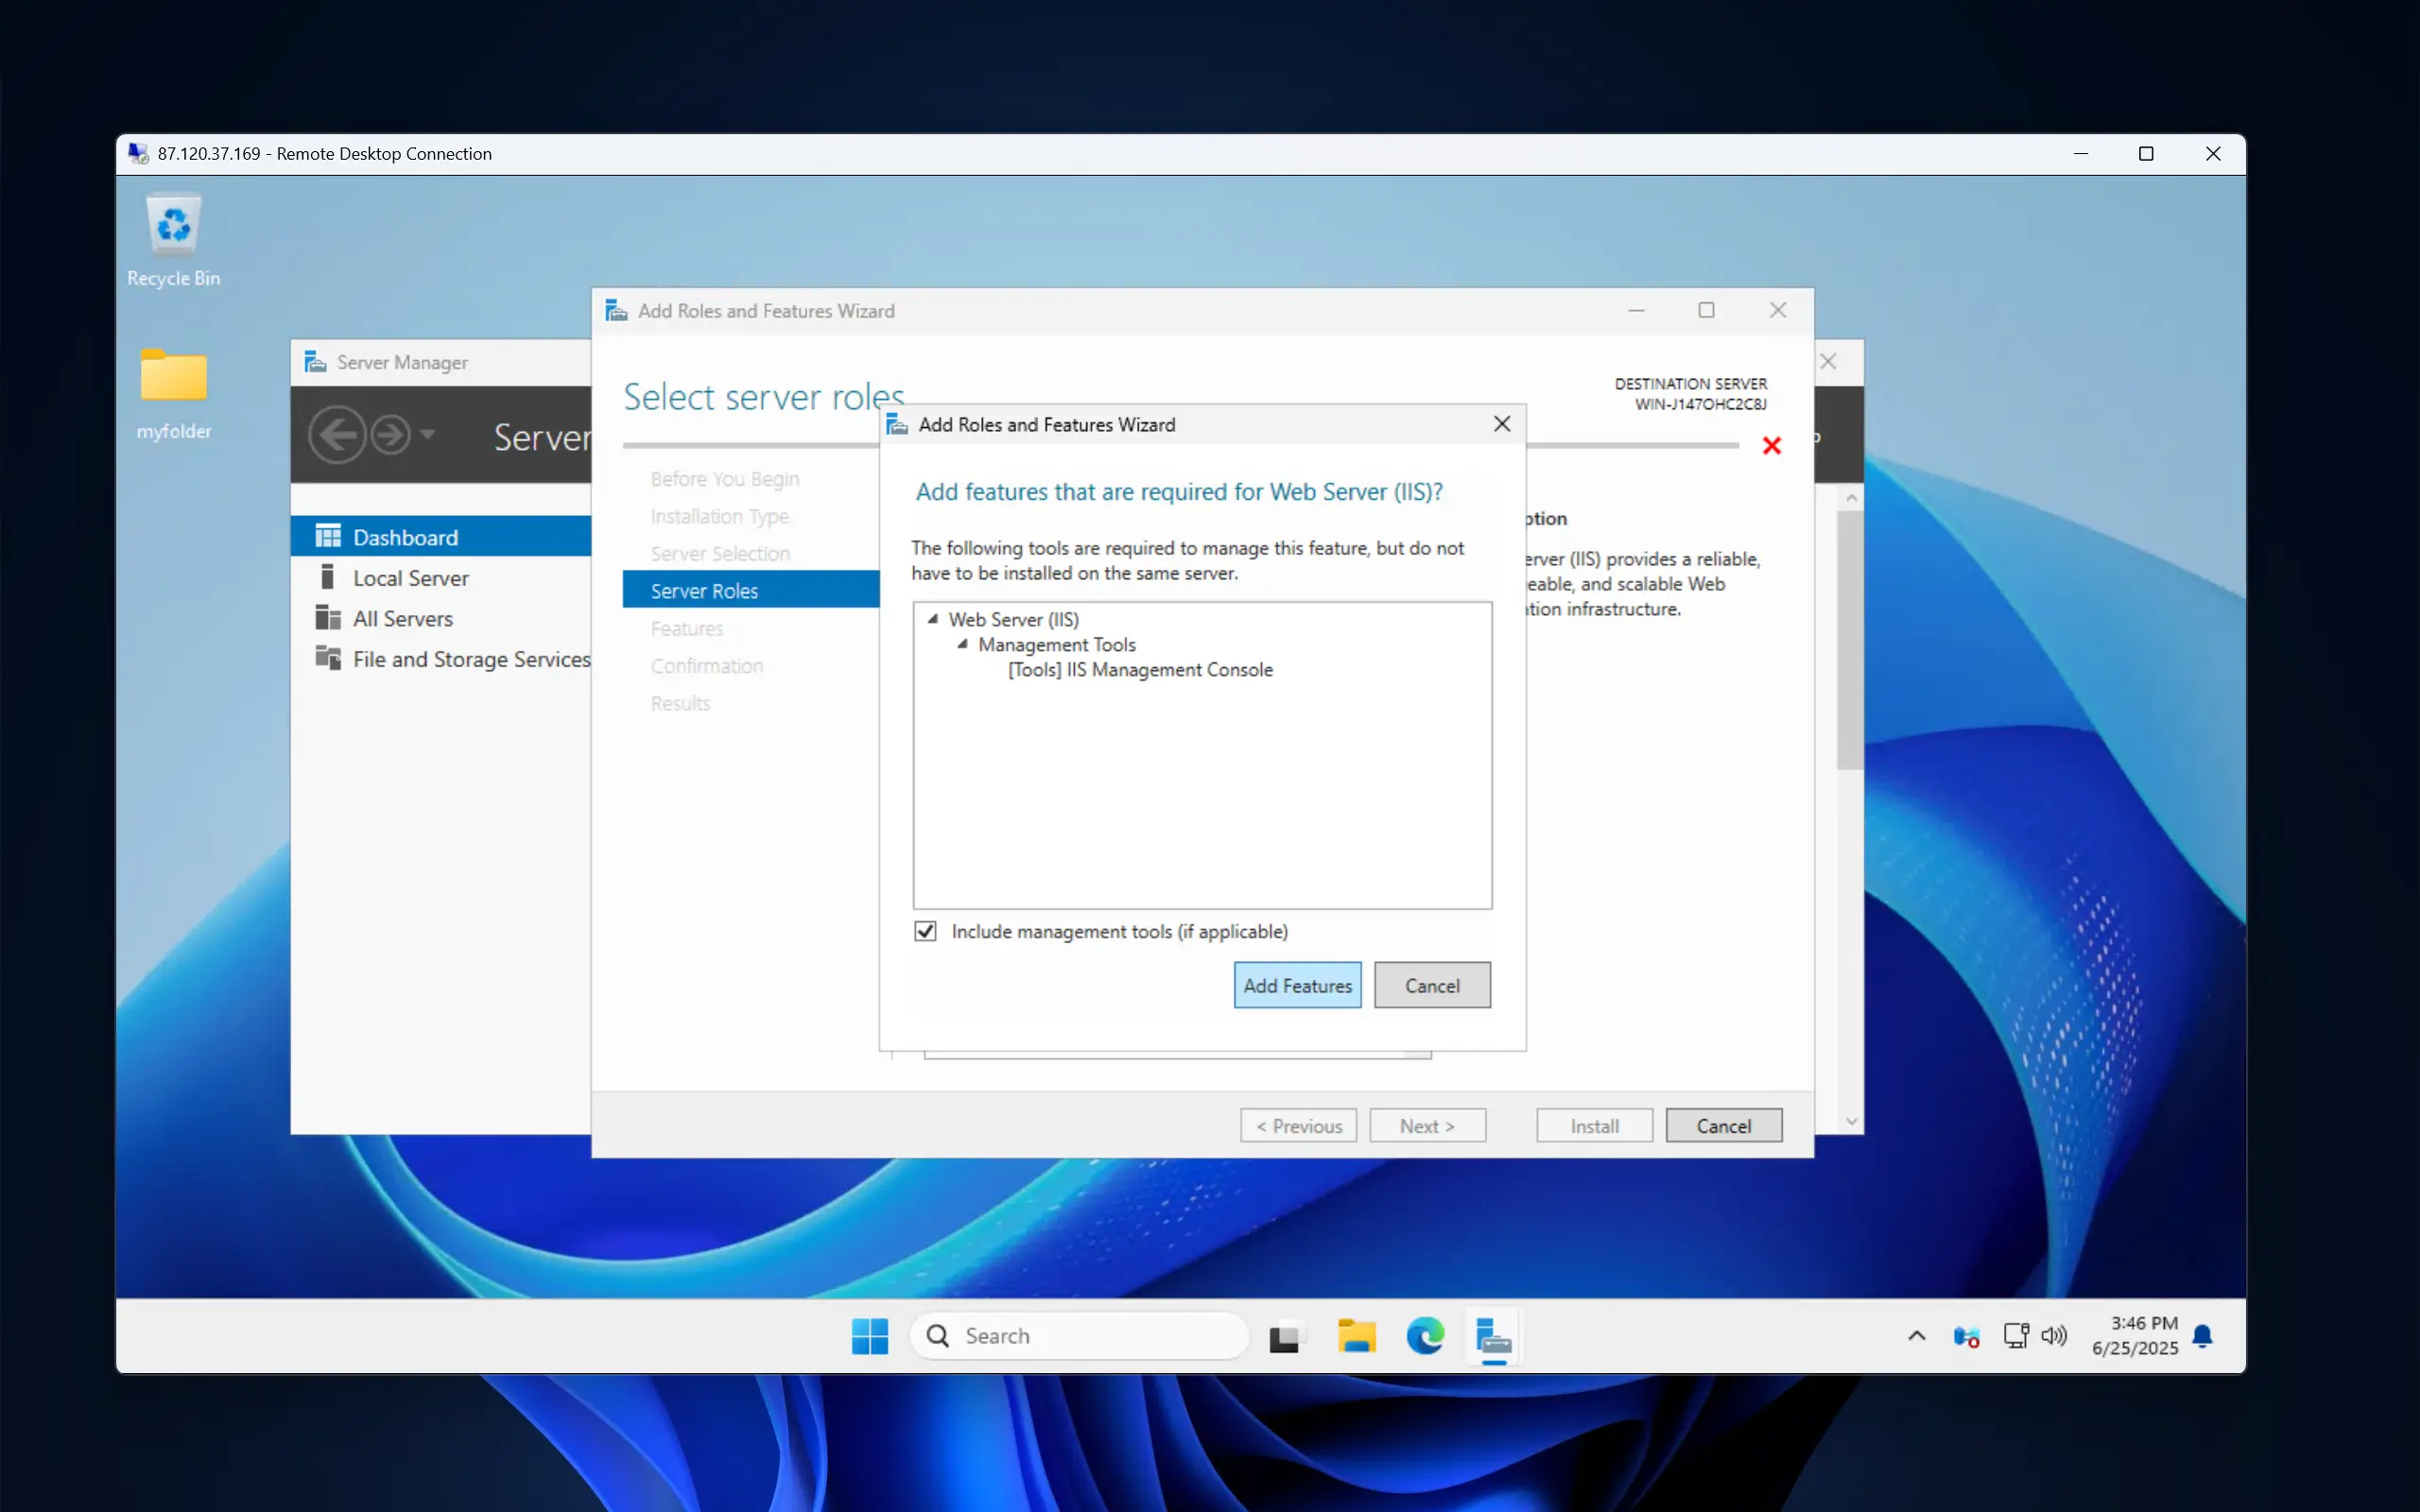
Continue to the Role Services section (under Web Server (IIS)). Scroll down and check the FTP Server box. You can uncheck Web Server as we do not need it. Make sure the IIS Management Console box is also checked, as it should be by default.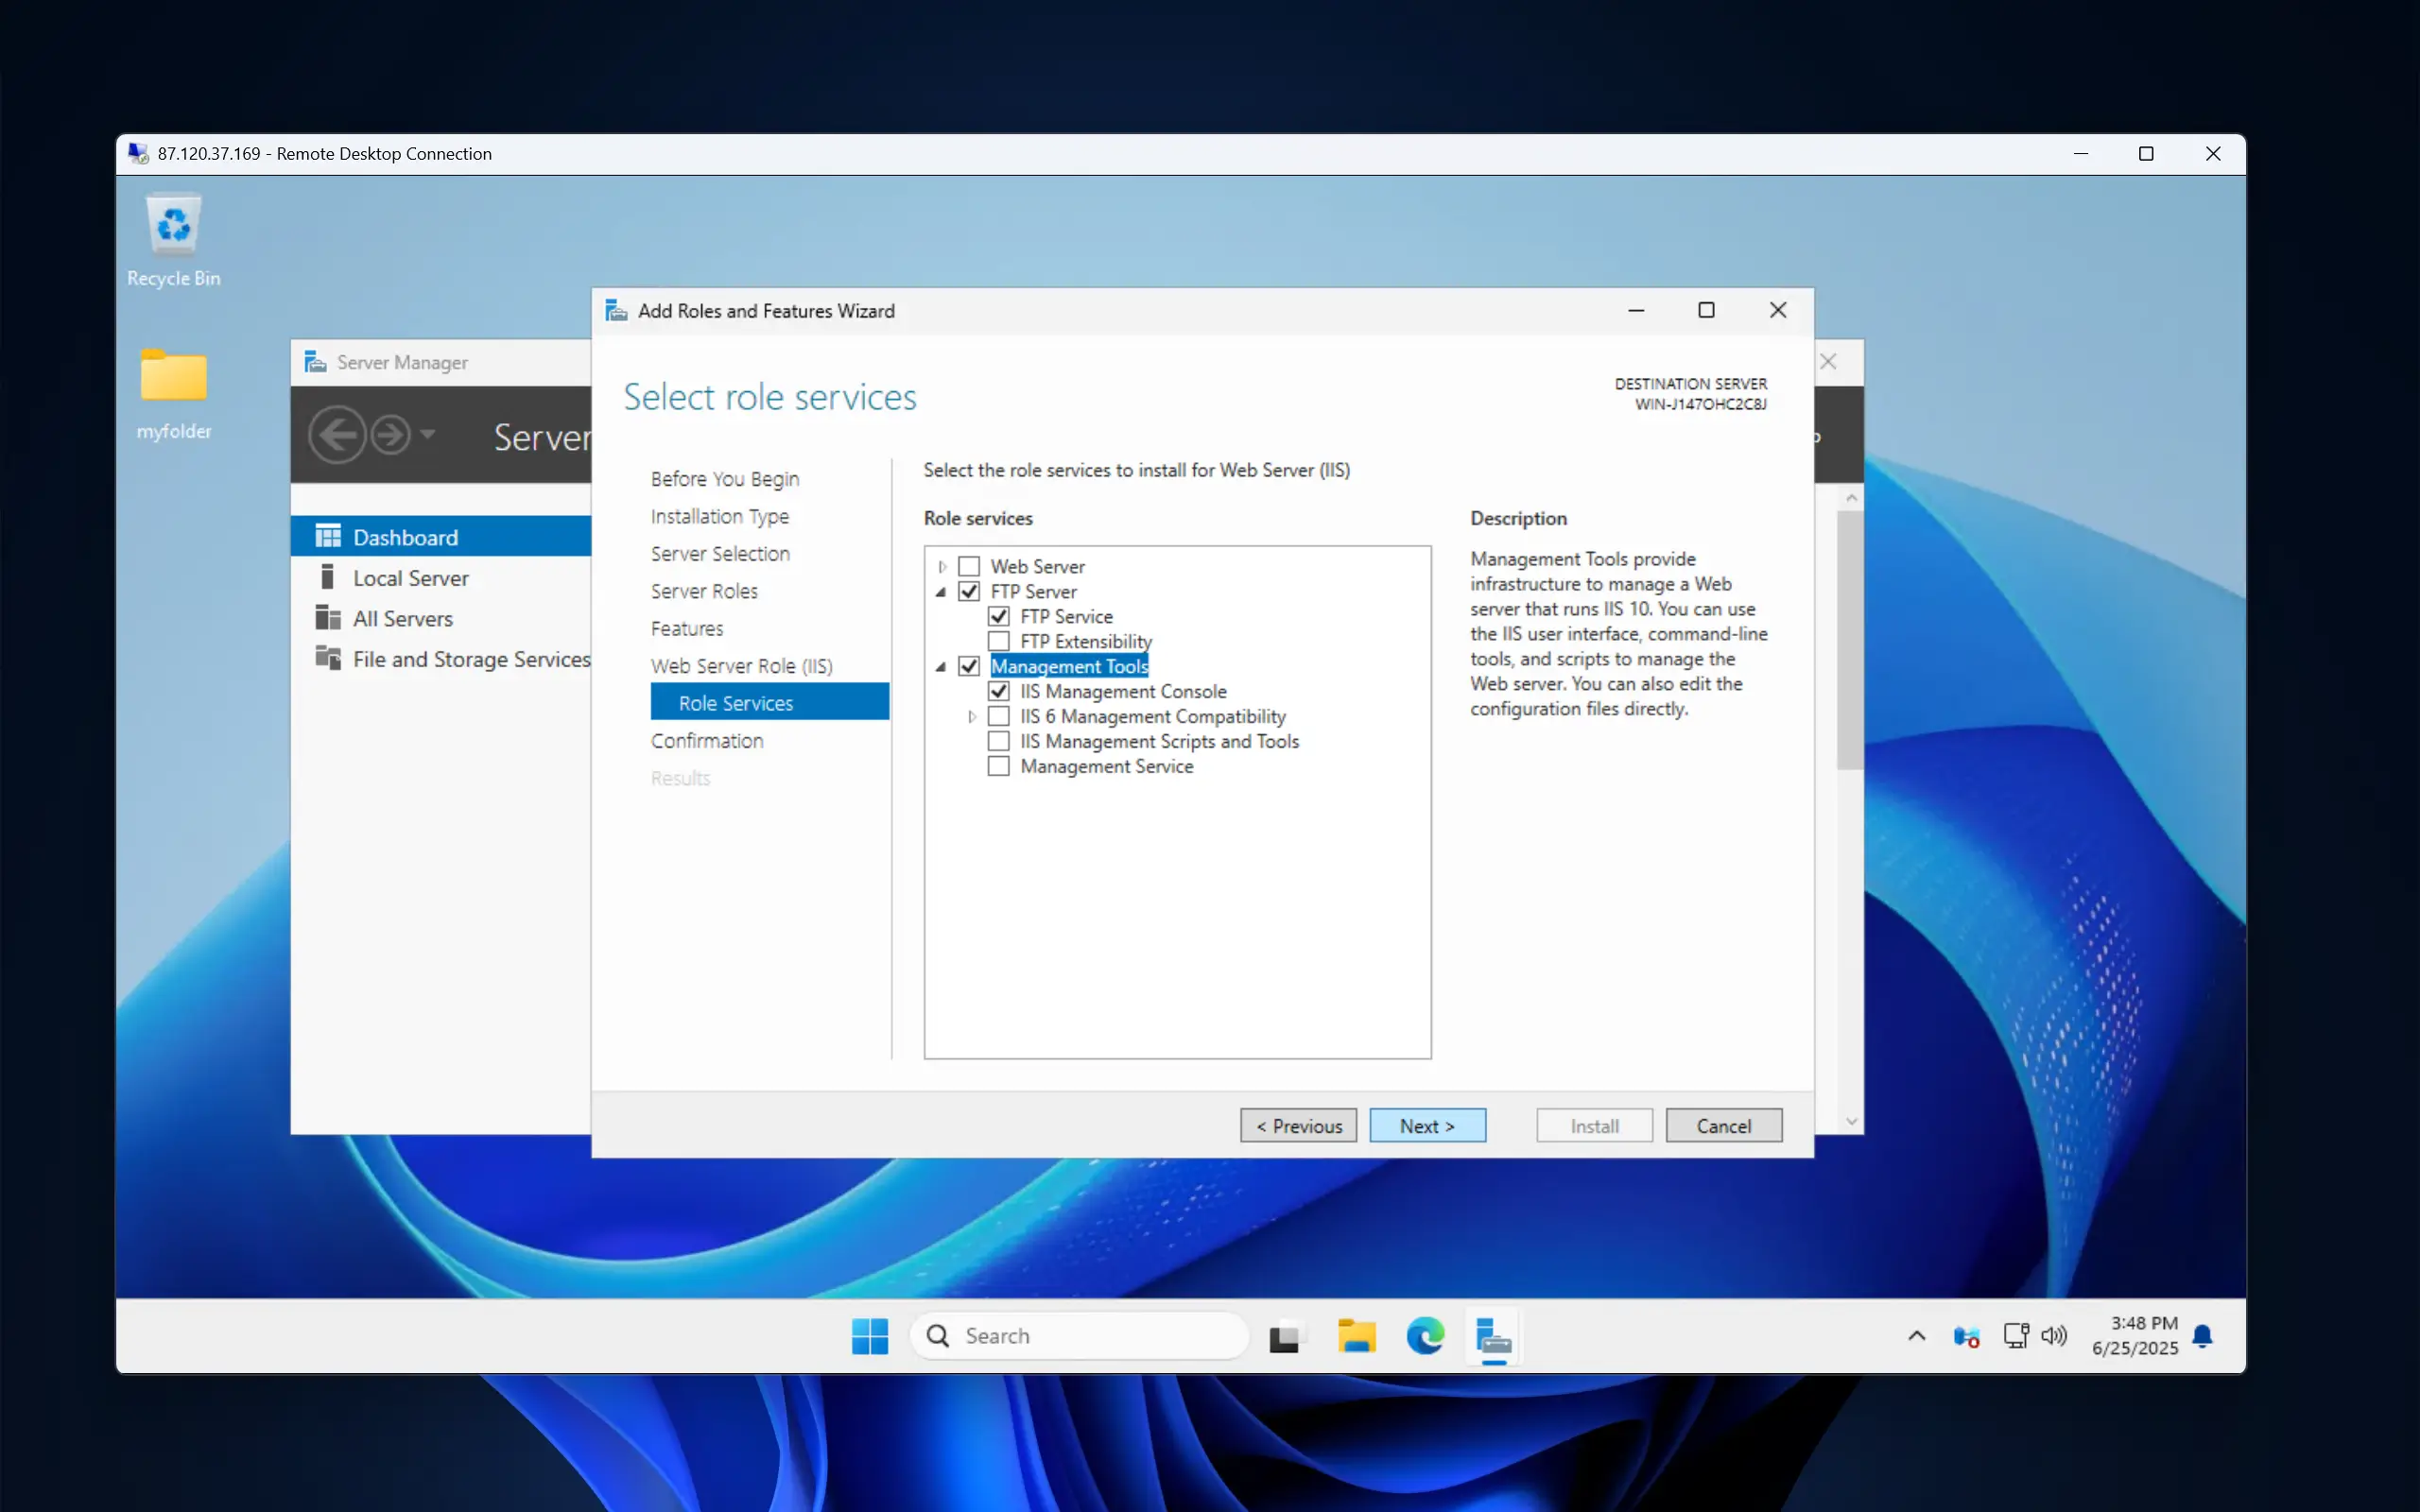
Click Next and then click on Install. After that, simply wait for the installation to complete and your FTP will be set up.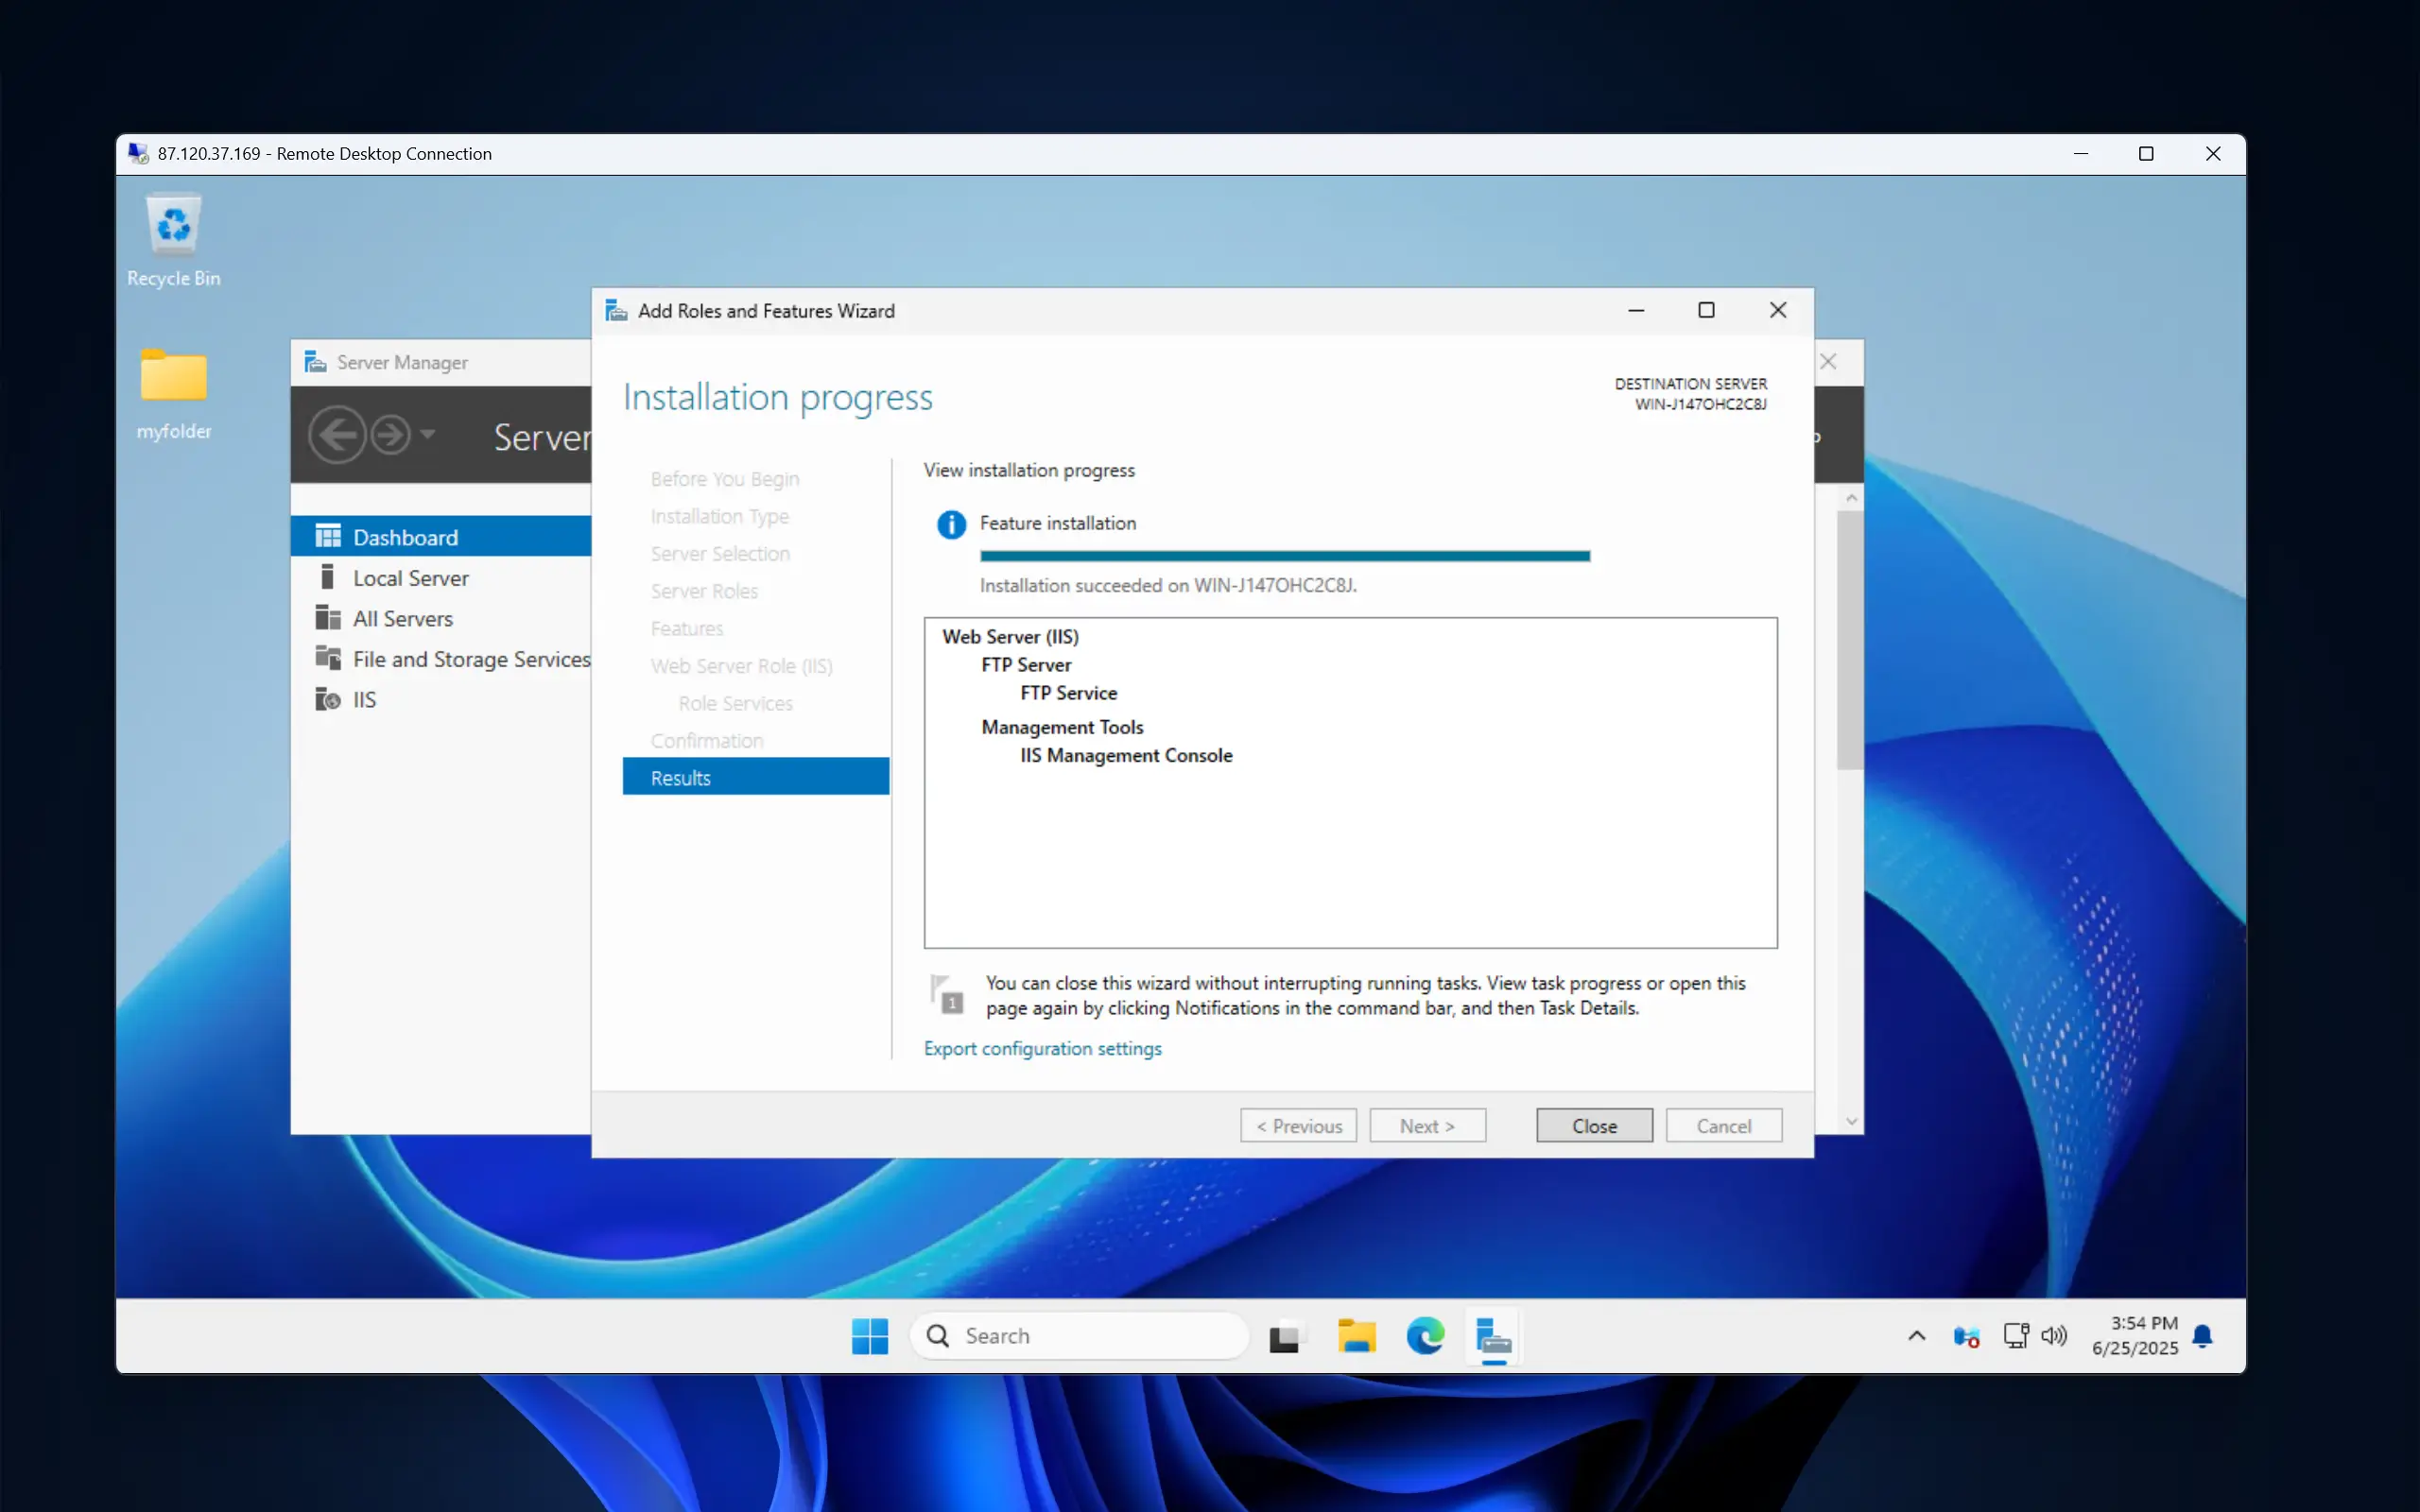
Configure a FTP Endpoint
Now that the FTP server is installed, we'll create a dedicated site for our file transfers.
From the Start Menu, search for and open Internet Information Services (IIS) Manager. First, we will need to create a self-signed SSL certificate. Navigate to IIS -> Server Certificates and open it.
Next, click on Create Self-Signed Certificate… from the menu on the right. Enter a name for the certificate and leave the certificate store field as it is. Continue by clicking on OK. This will create the certificate.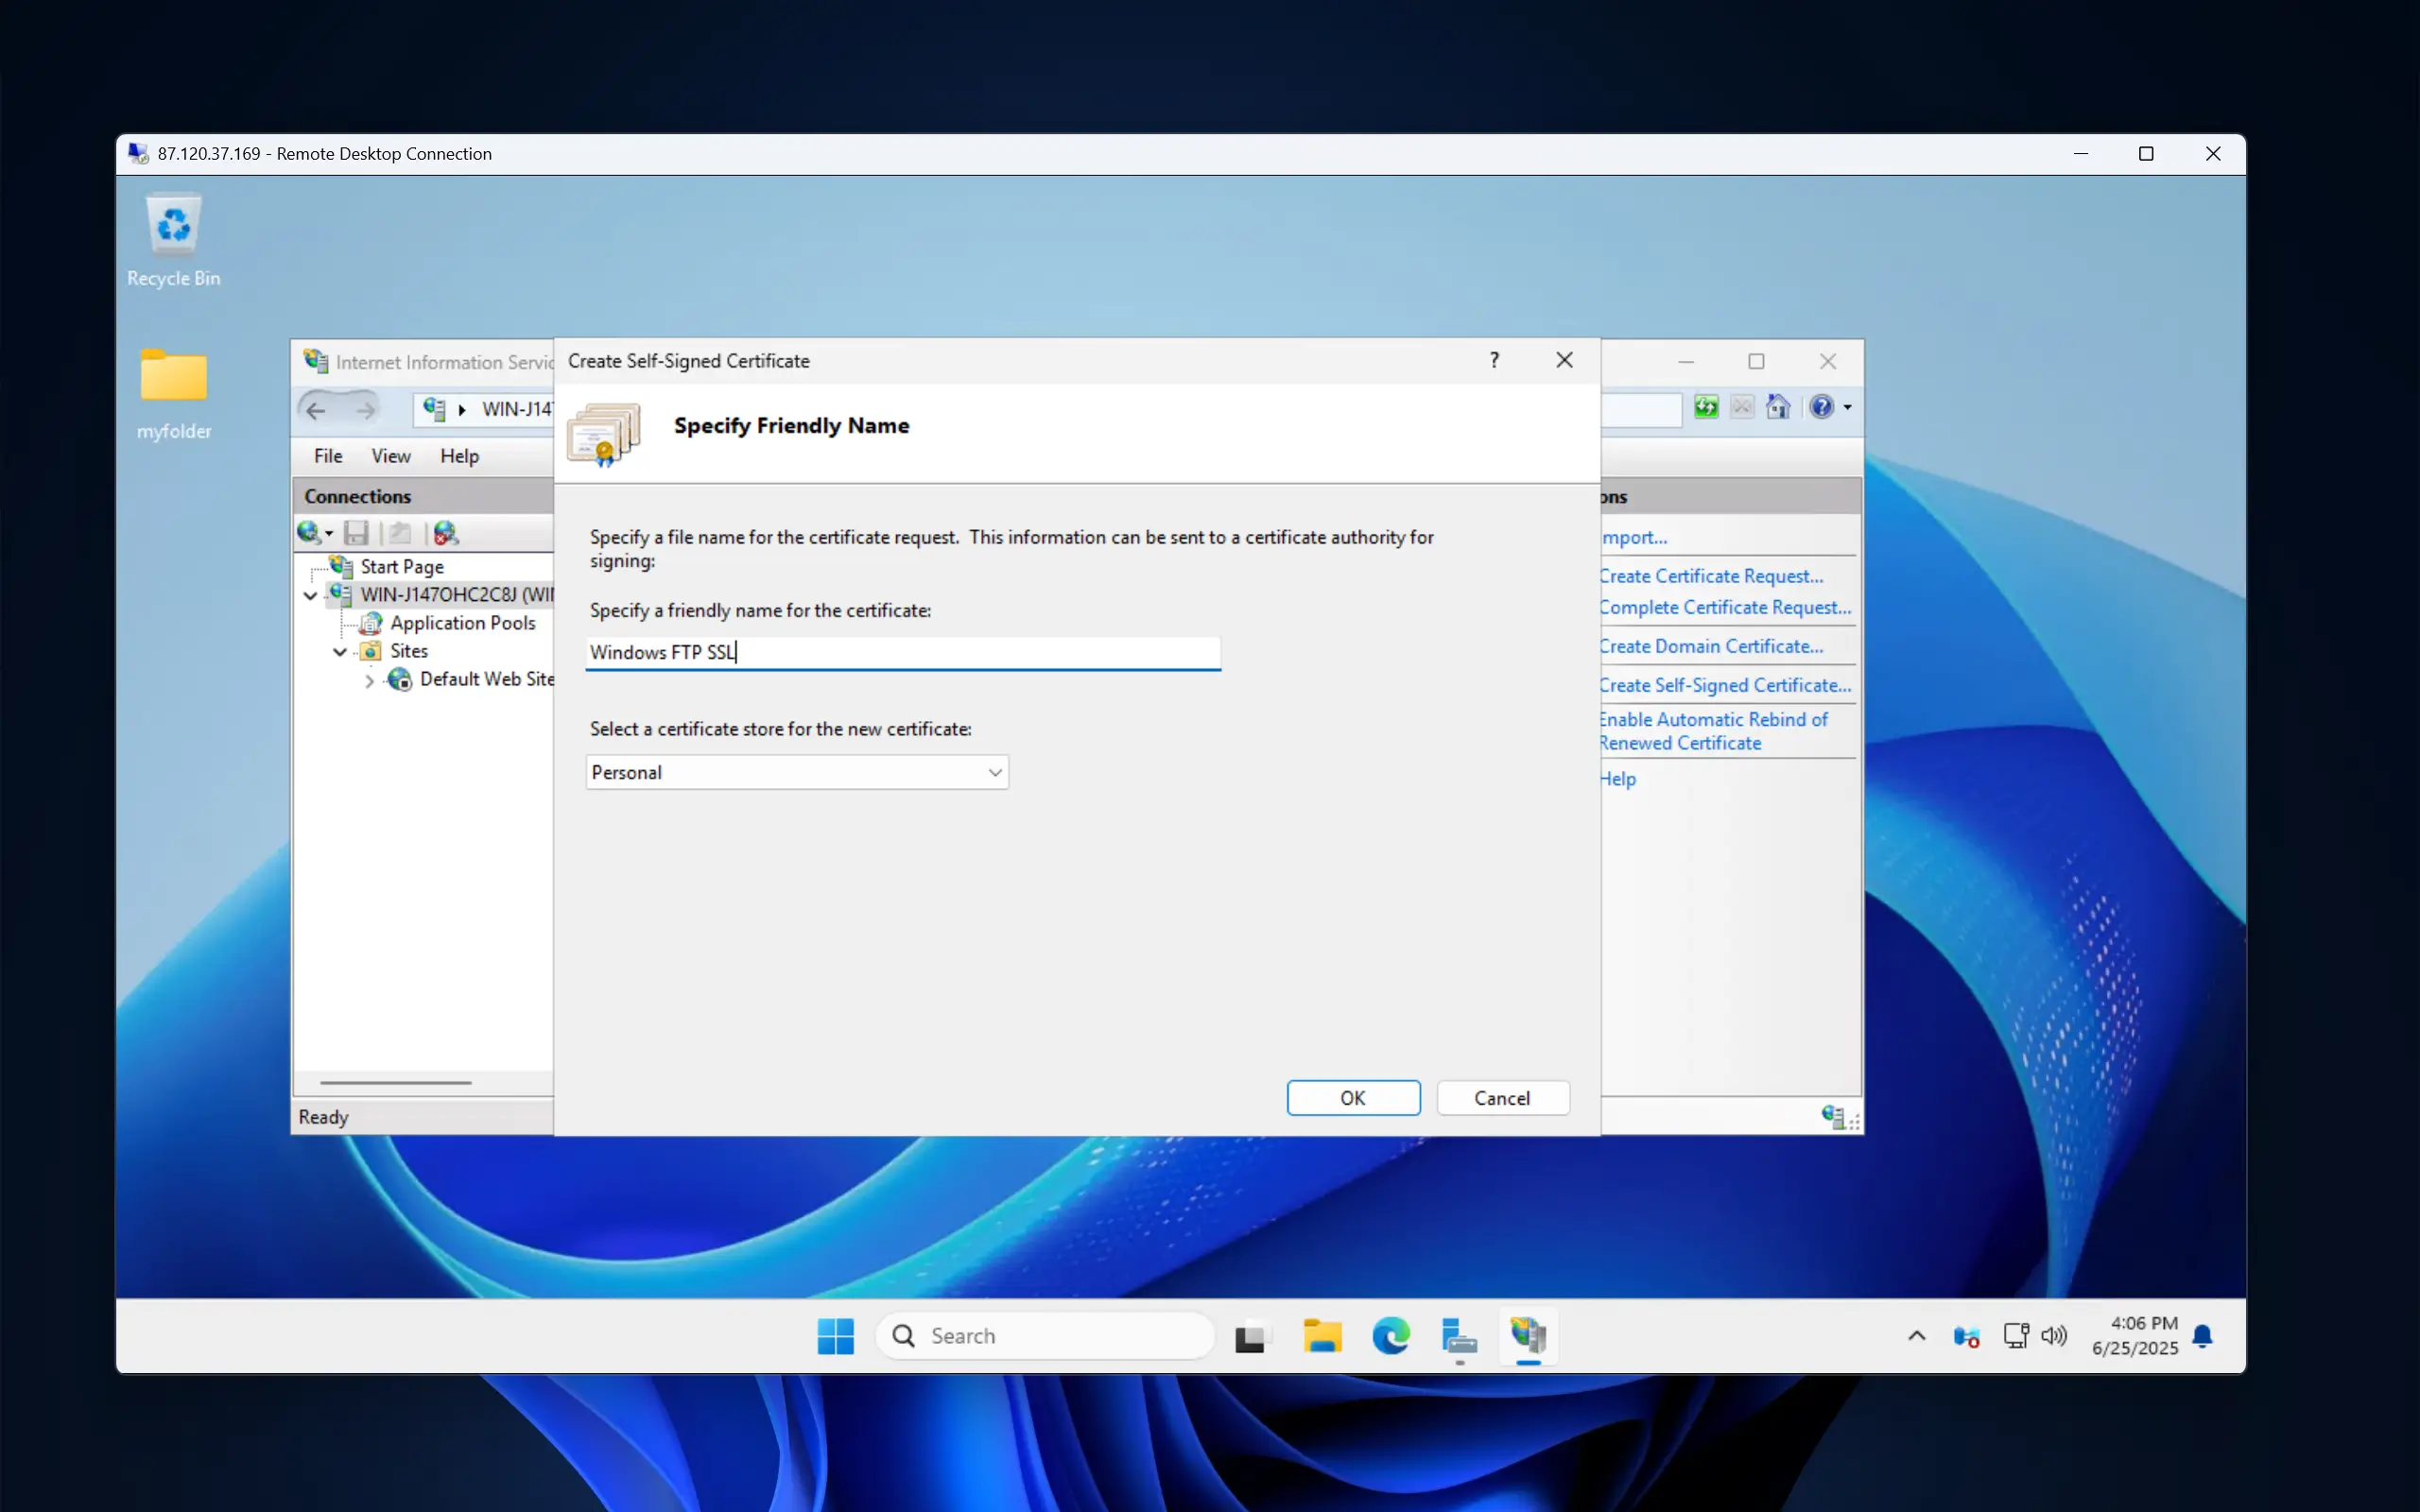
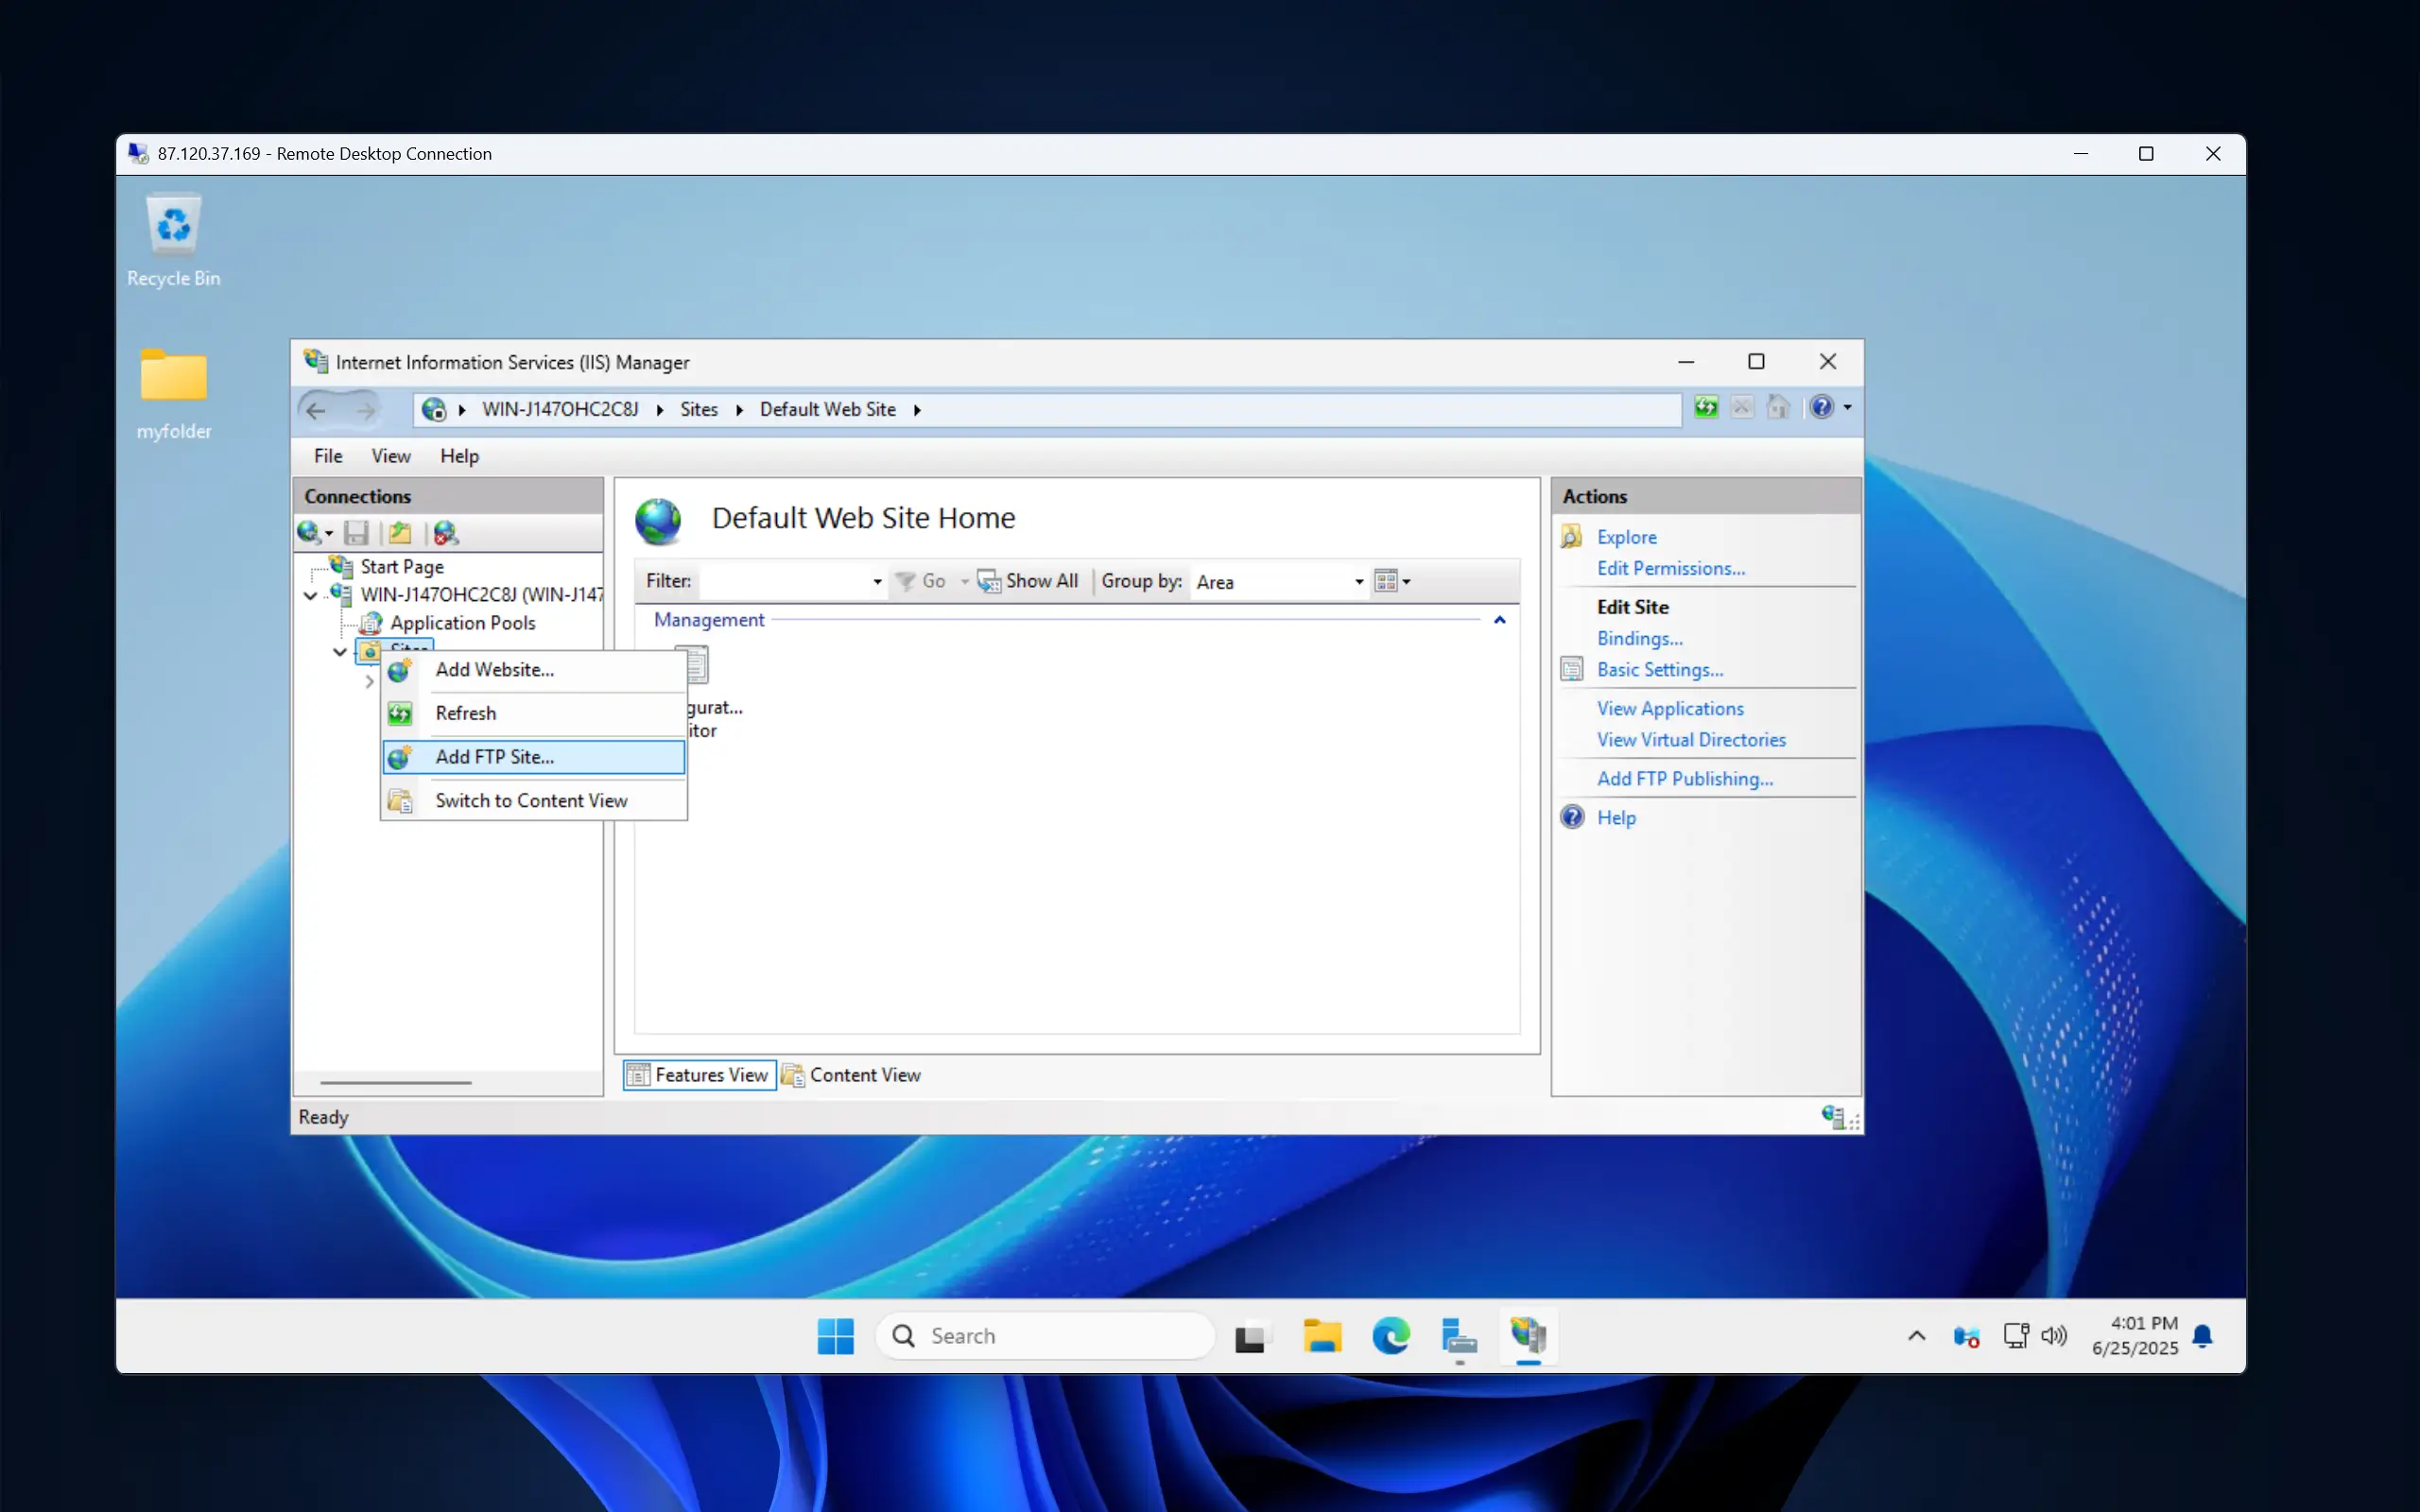
Now it is time to create the FTP Site. In the Connections panel on the left, click your server’s name to expand the options menu. Right-click the Sites folder and select Add FTP Site....
Here’s where we can configure the FTP Site Information. Give it a custom name, like "Windows FTP".
For the physical path, use a folder on your VPS where you wish your files to be stored. You can create a new folder, for example, C:\FTP and select it. Proceed by clicking on the Next button.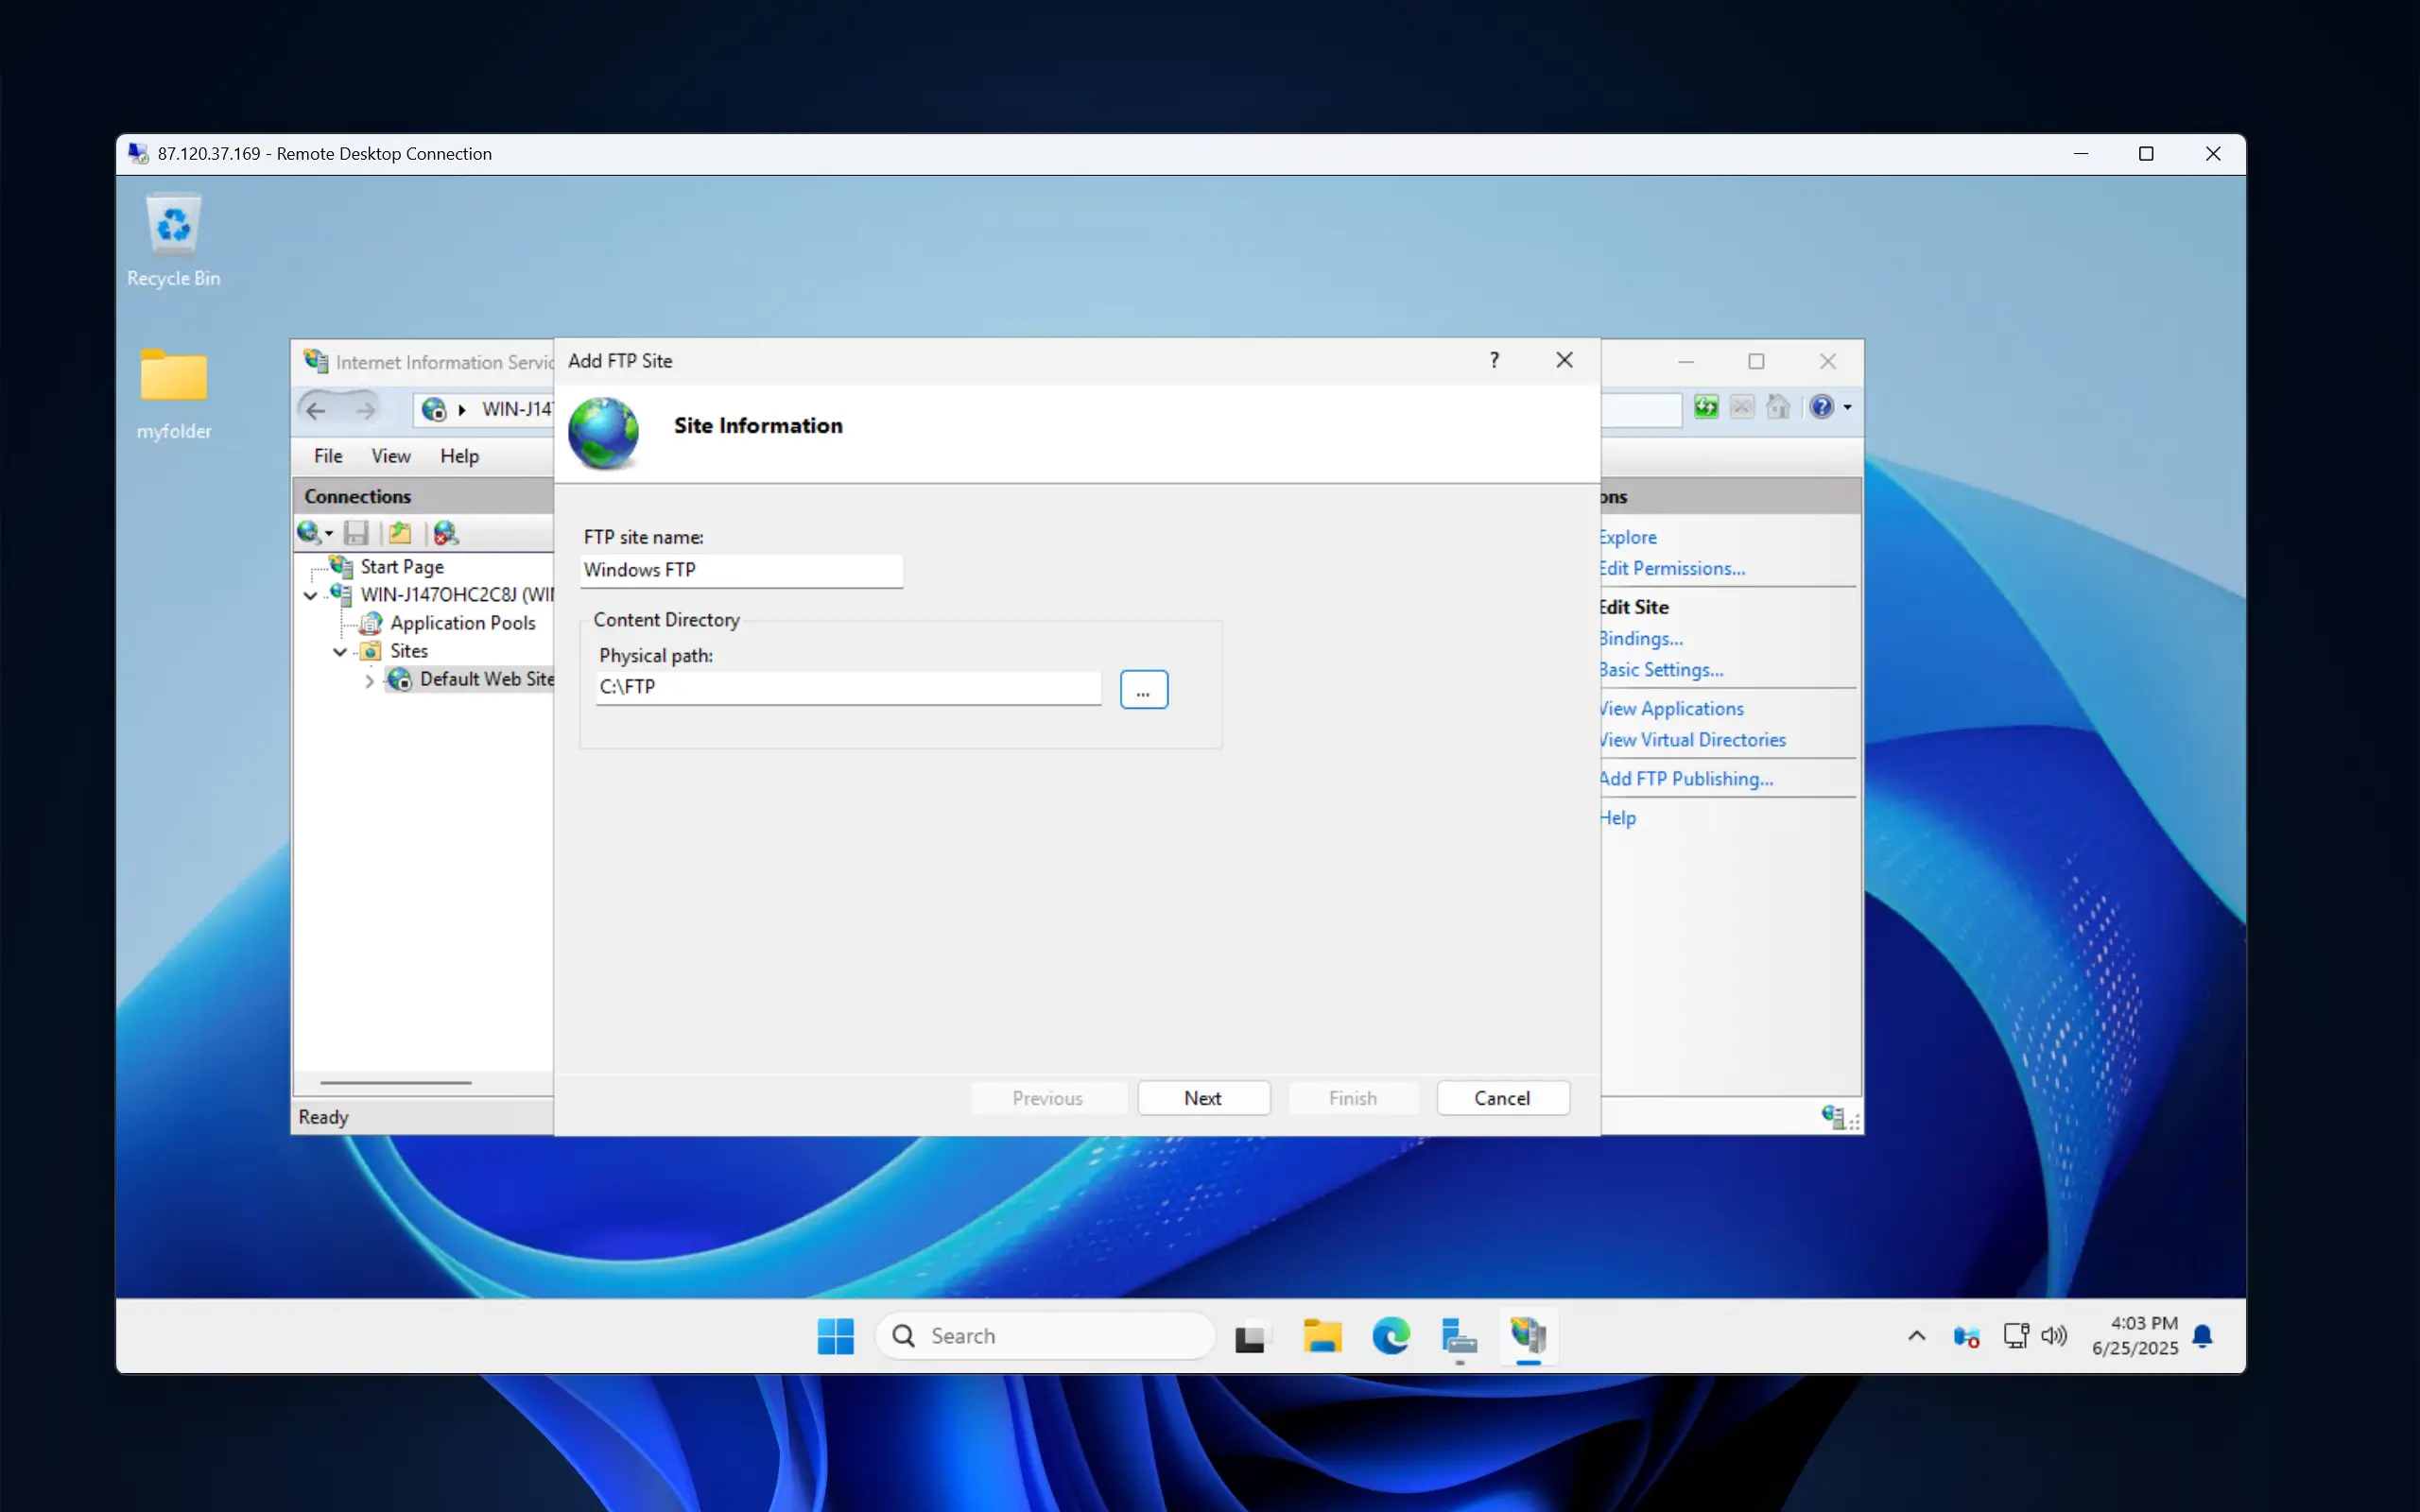
On the next screen, leave the IP Address as "All Unassigned" and the Port as 21. Crucially, for security, check the Require SSL box. For the SSL Certificate, you should select the self-signed certificate that you created earlier. This will encrypt your connection.
Finally, finish the configuration with the following options:
Authentication: Check the Basic box. This is still secure because we are forcing an SSL connection.
Authorization: Select "Specified users" from the dropdown. In the text box below, type the username you use to log into your VPS (e.g., Administrator).
Permissions: Check both the Read and Write boxes.
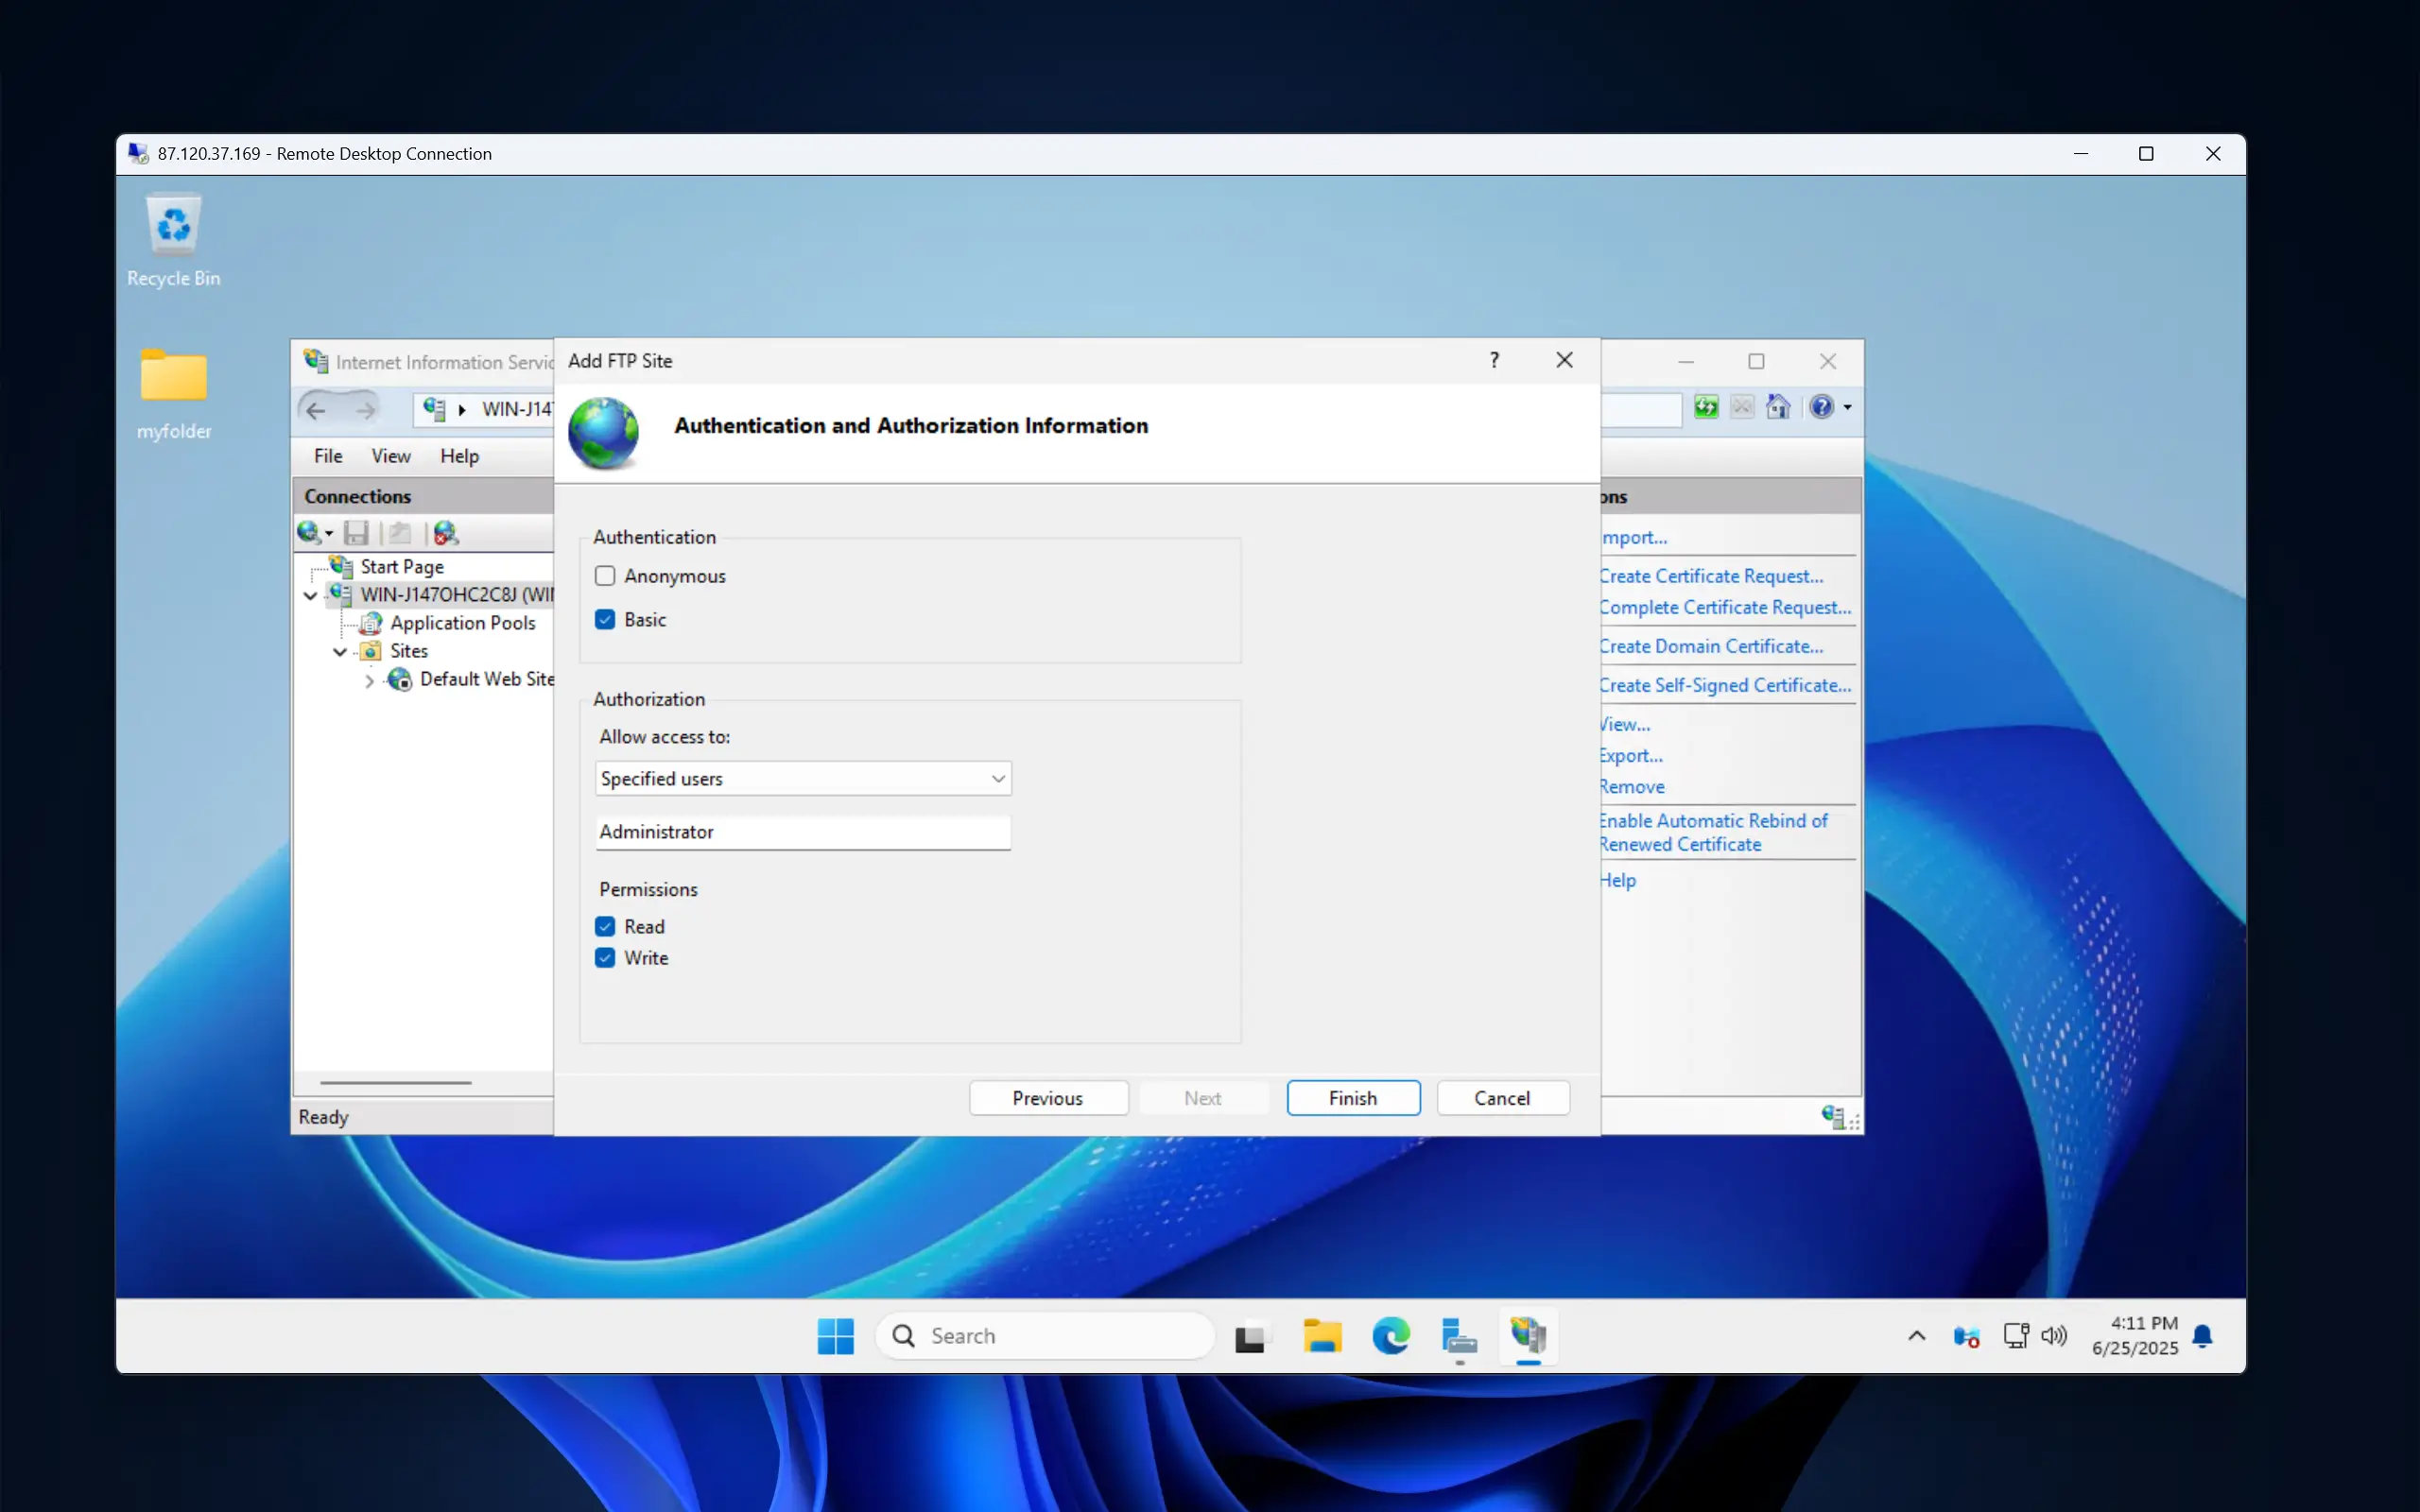
Finally, click Finish. Your FTP server is now running. Port 21 should be opened automatically in Windows Firewall by the IIS setup above, but you can also double-check if there are any problems with reaching port 21 on your Windows VPS.
Connect Using an FTP Client
Now that you’ve got everything set up, you can connect from any computer or operating system by using an FTP client. A popular option is FileZilla, a popular, free client available for Windows, macOS and Linux, which is what we are going to be using for this tutorial.
First, download and install FileZilla on your local computer. Next, open FileZilla and go to File > Site Manager.
After that, click New Site and configure the connection with the following details:
Protocol: “FTP - File Transfer Protocol”
Host: Your VPS's IP address.
Port: 21
Encryption: “Use explicit FTP over TLS if available”. This is critical for security.
Logon Type: Normal.
User: Your VPS username (Administrator)
Password: Your VPS password.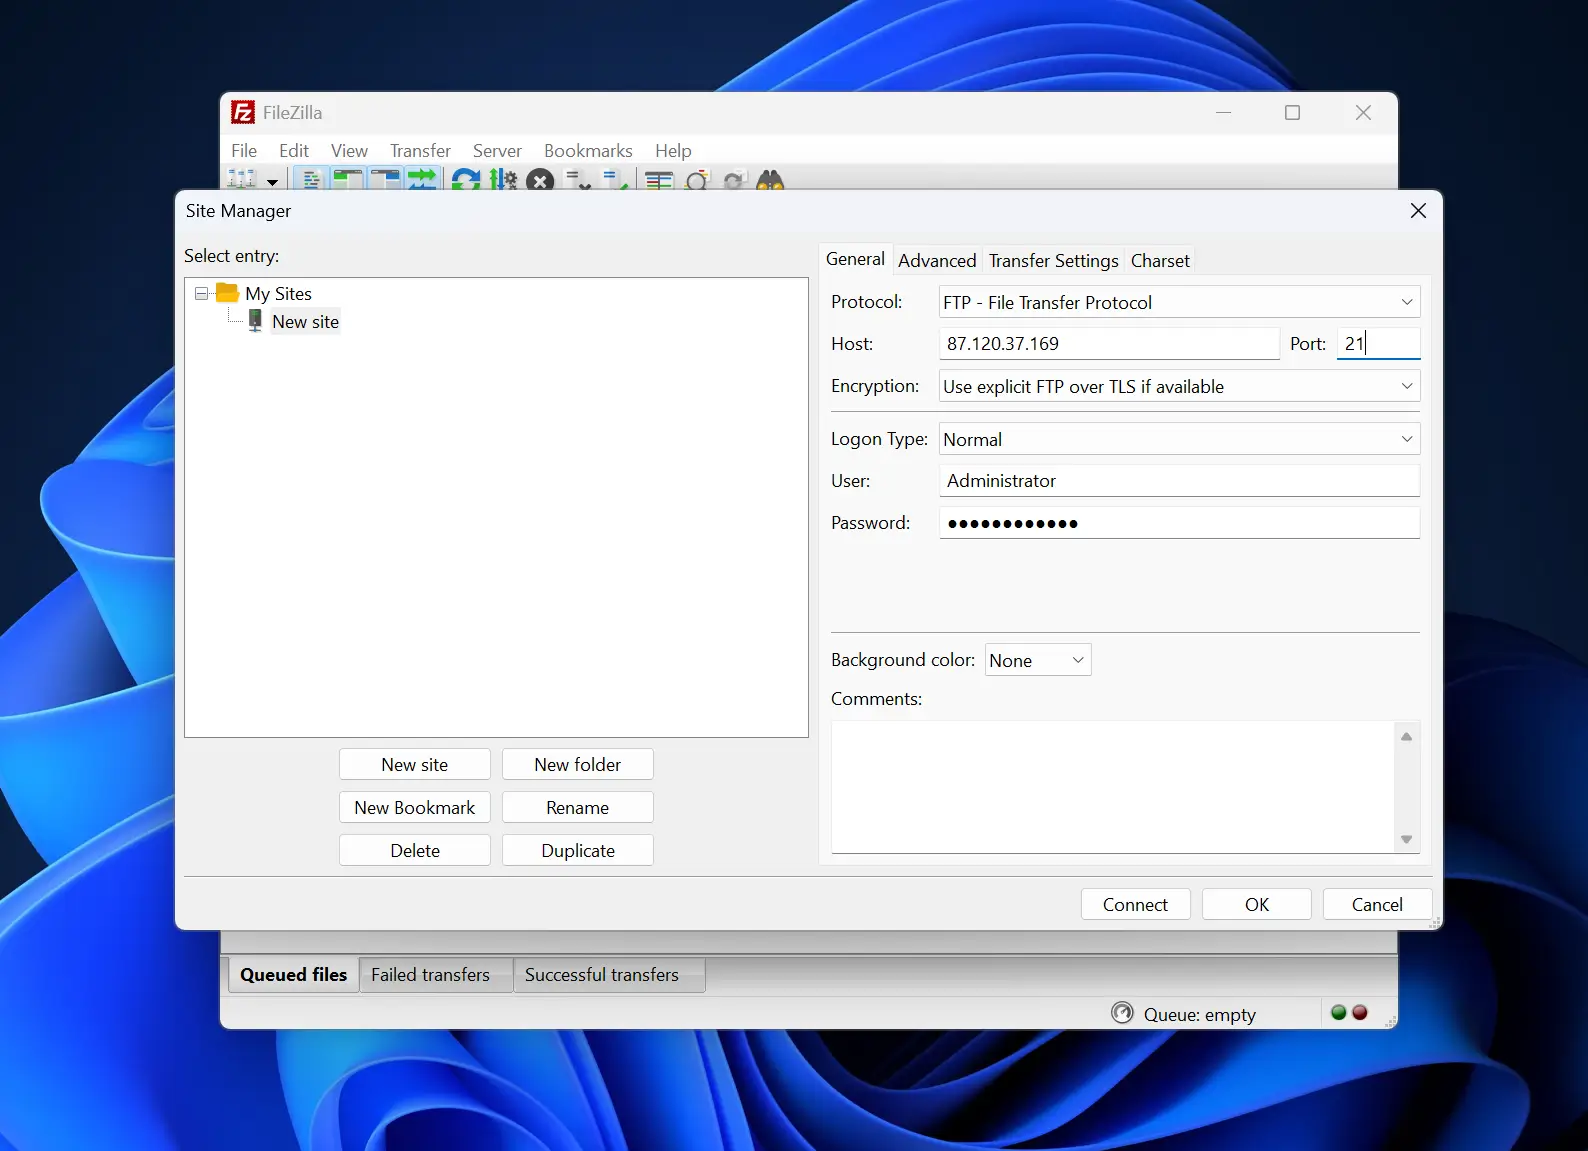
Click Connect. You will likely see a warning about an "unknown certificate" because we used a self-signed one. This is expected. Check the "Always trust this certificate in future sessions" box and click OK. FileZilla will establish a connection:
You will see your local PC files on the left and the remote FTP folder on right. Currently the FTP folder is empty. To transfer a file, right-click it and press Upload.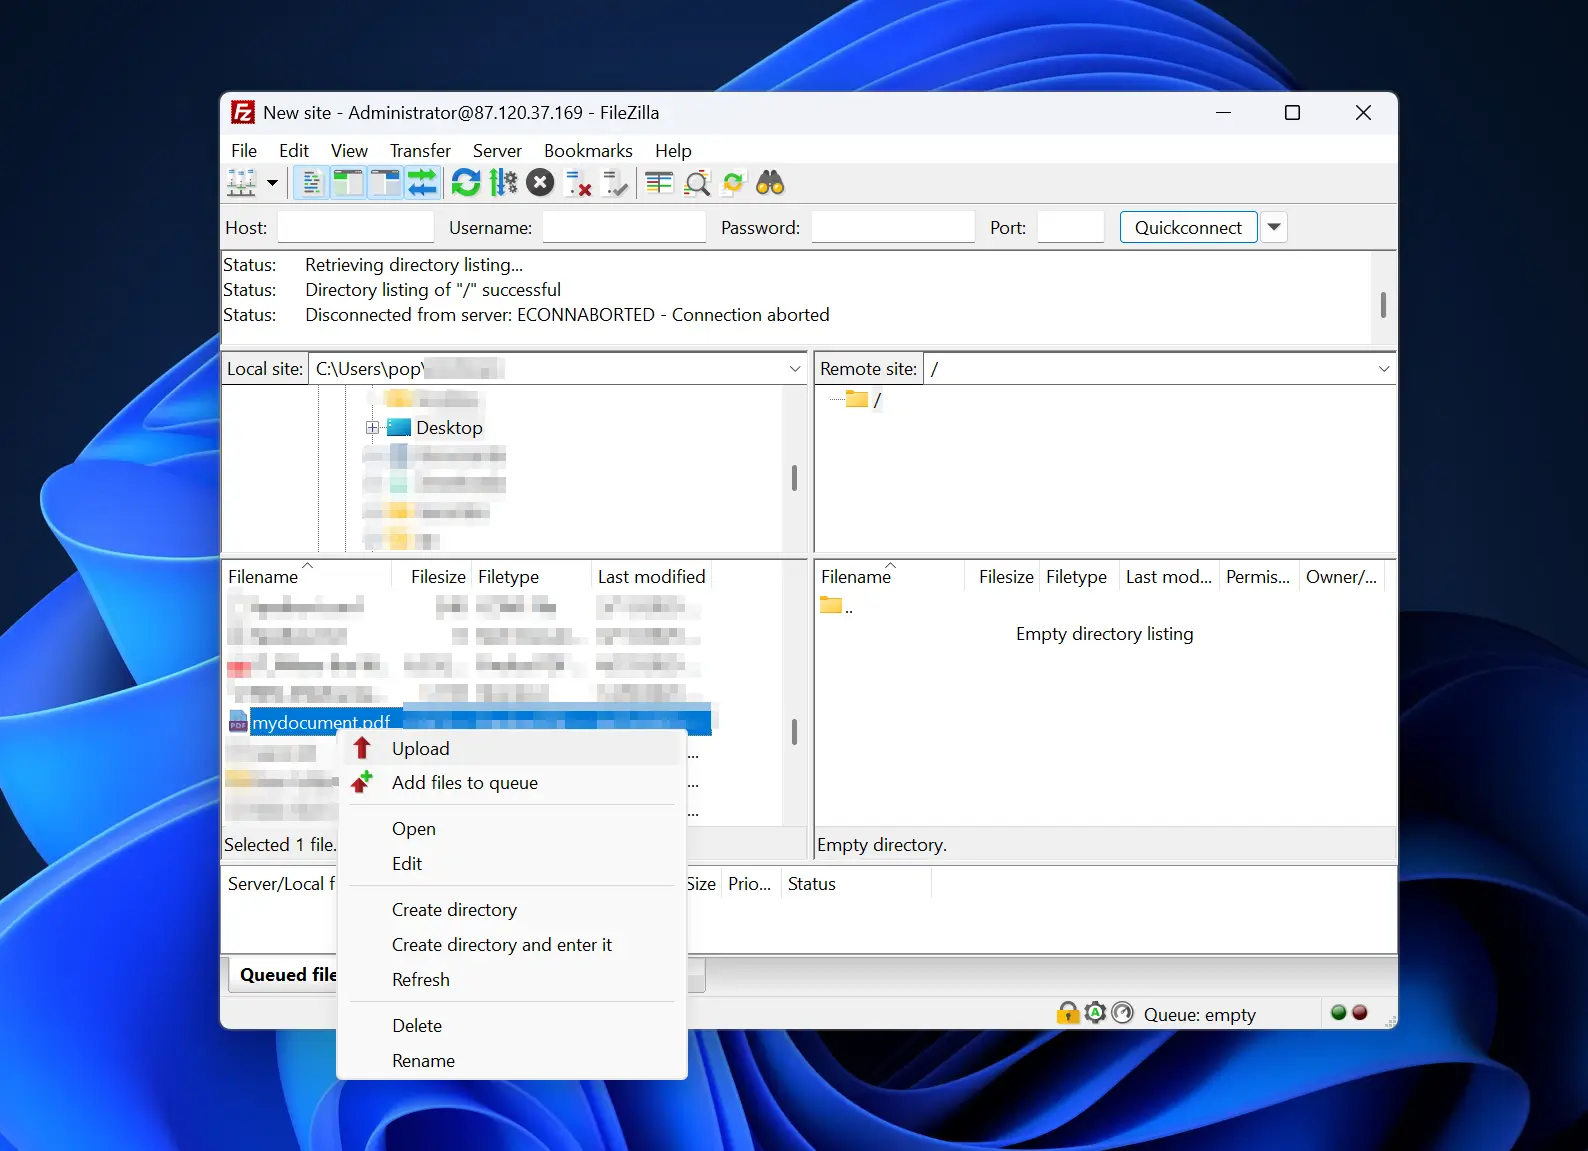
The file will get uploaded to the FTP folder on your VPS. In our case, this would be C:\FTP as this is the folder we set in the previous steps. We can verify it on the VPS itself: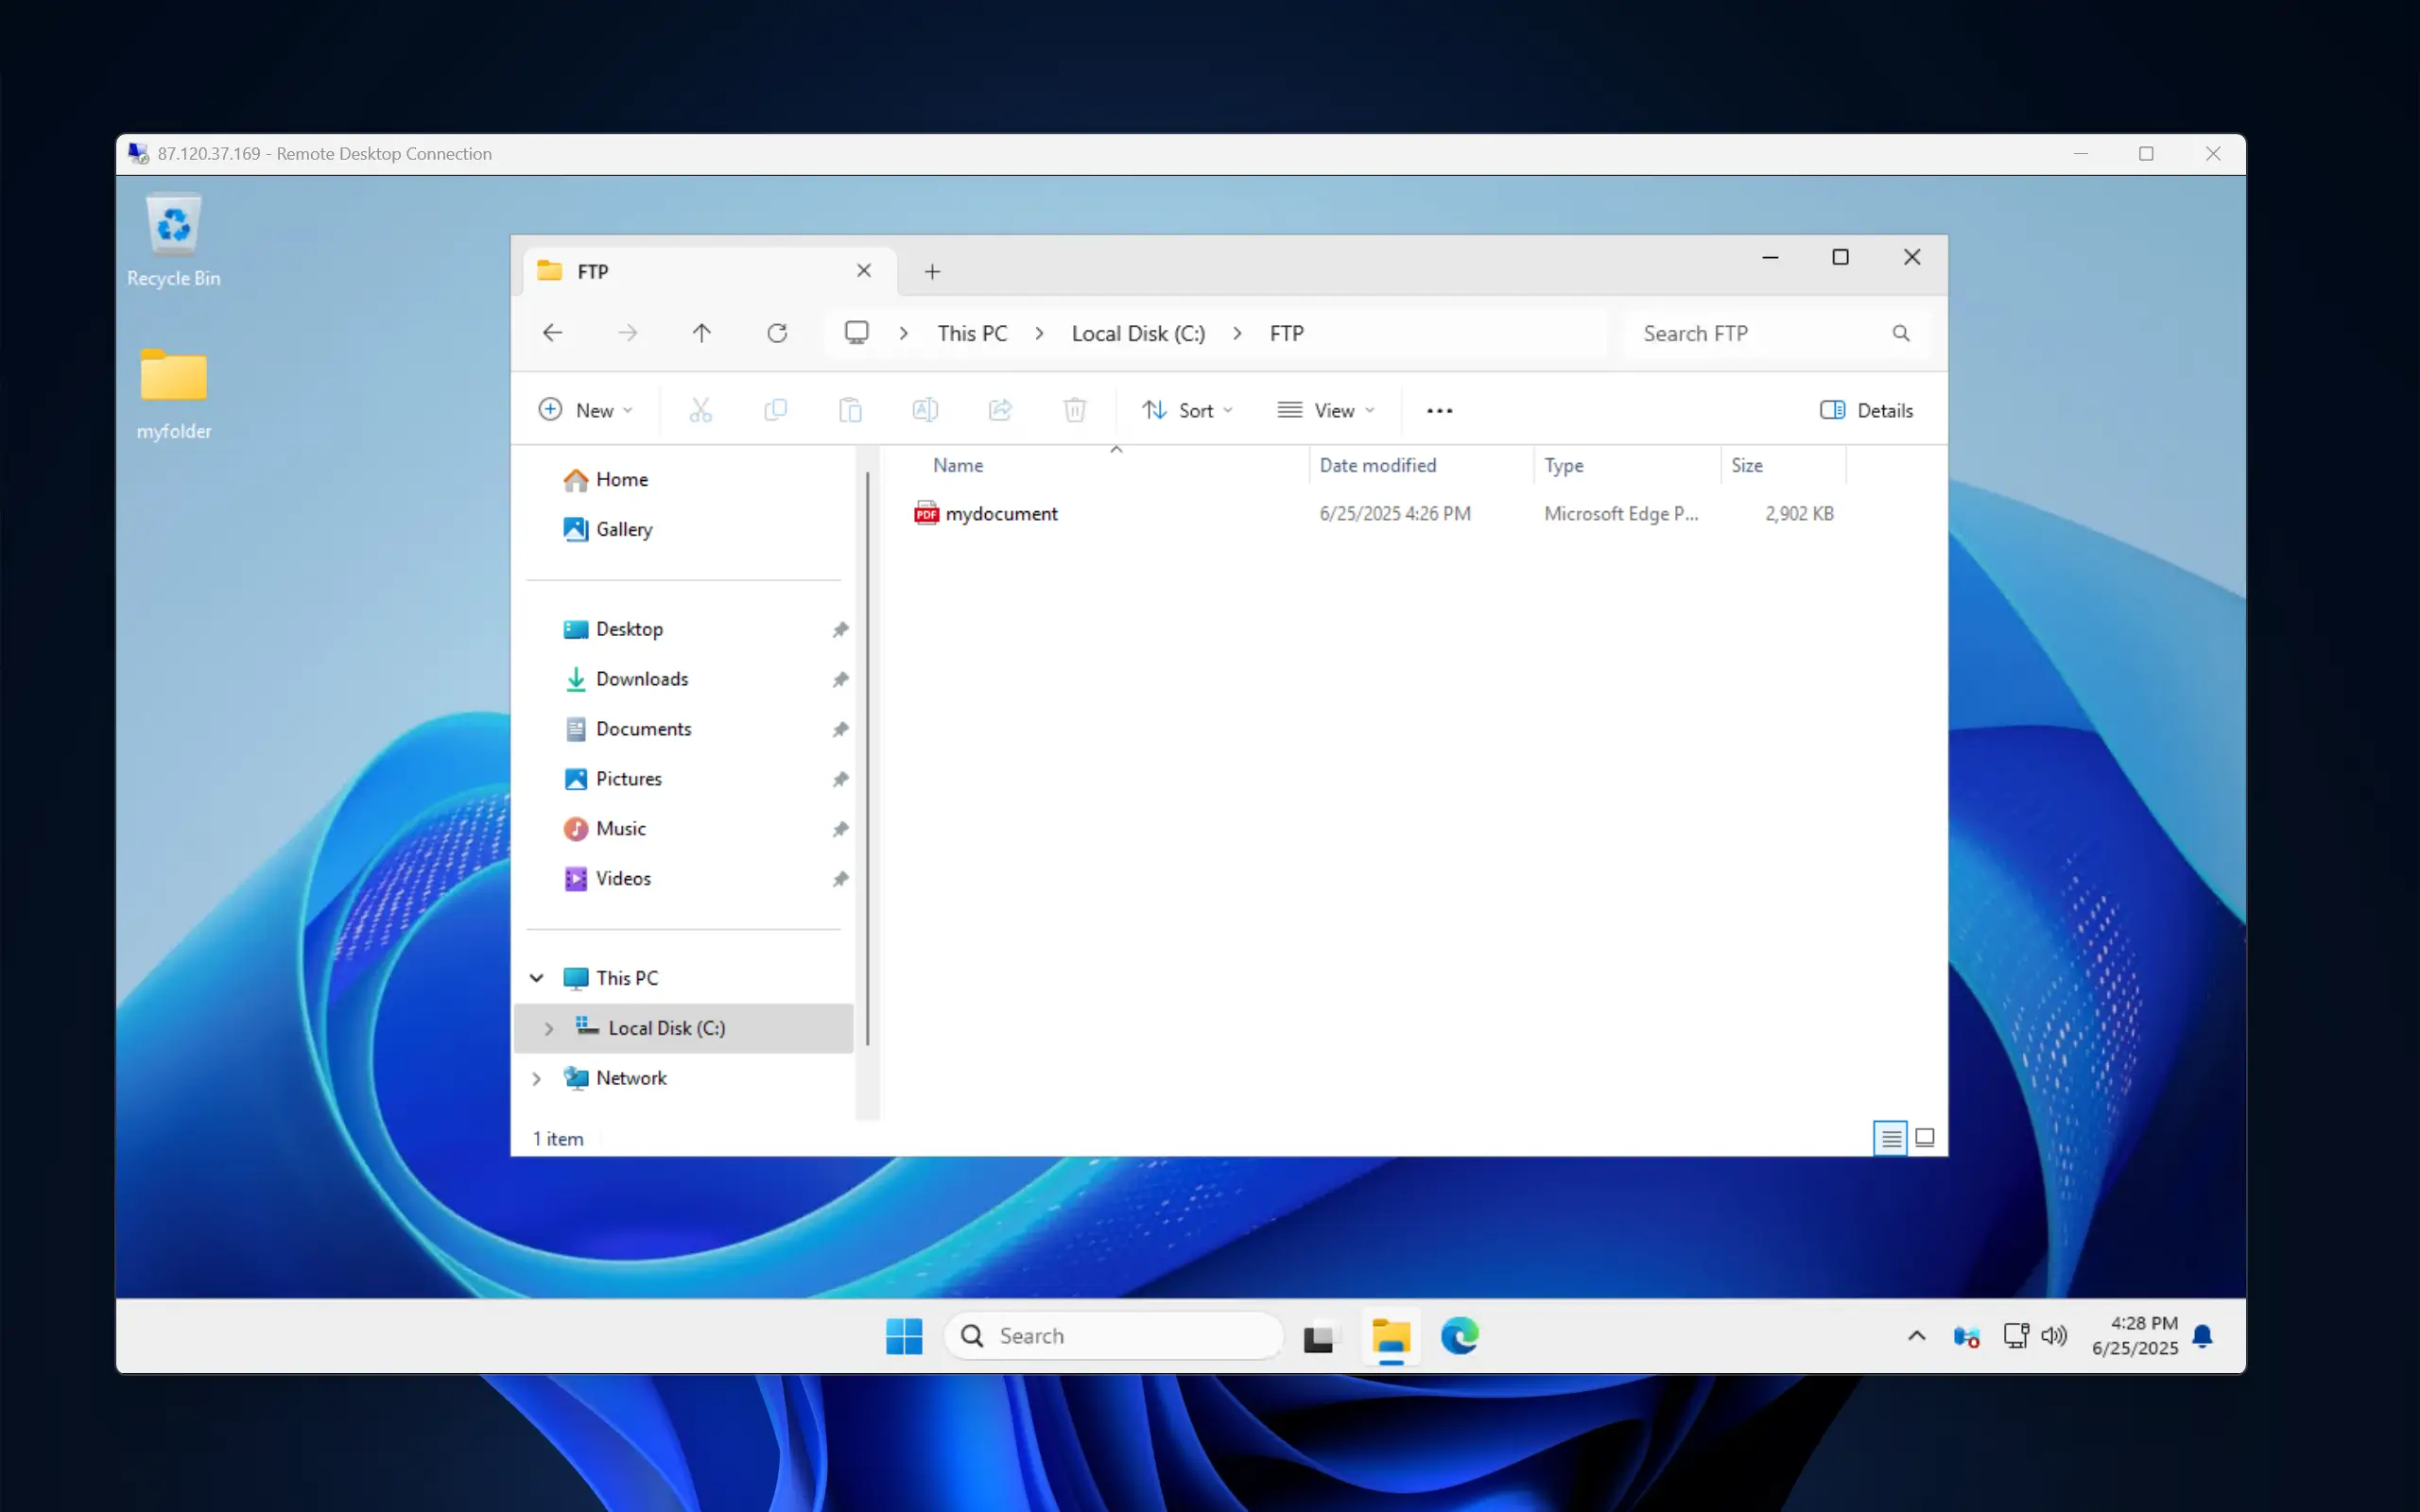
That’s it! You now have 3 ways to transfer files from your local machine to your Windows VPS!

