


In this tutorial, we are going to show you how to manually install the Standard edition of Office 2024 on your Windows Server so that you can start managing your files and system with only a few clicks!
What does the Office 2024 Standard edition include?
If you have purchased the Office 2024 Standard edition as an add-on for your server, you can expect to get all of the following Microsoft software:
- Excel
- Word
- PowerPoint
- Outlook
- Publisher
- Access
How to install Office 2024 on your Windows server
If you have already purchased Office 2024 as an add-on for your cloud instance, there are a few steps that you need to follow in order to install it on your Windows server.
Download the Office Deployment Tool
The first thing that you will need to do is to download the Office Deployment Tool (ODT):
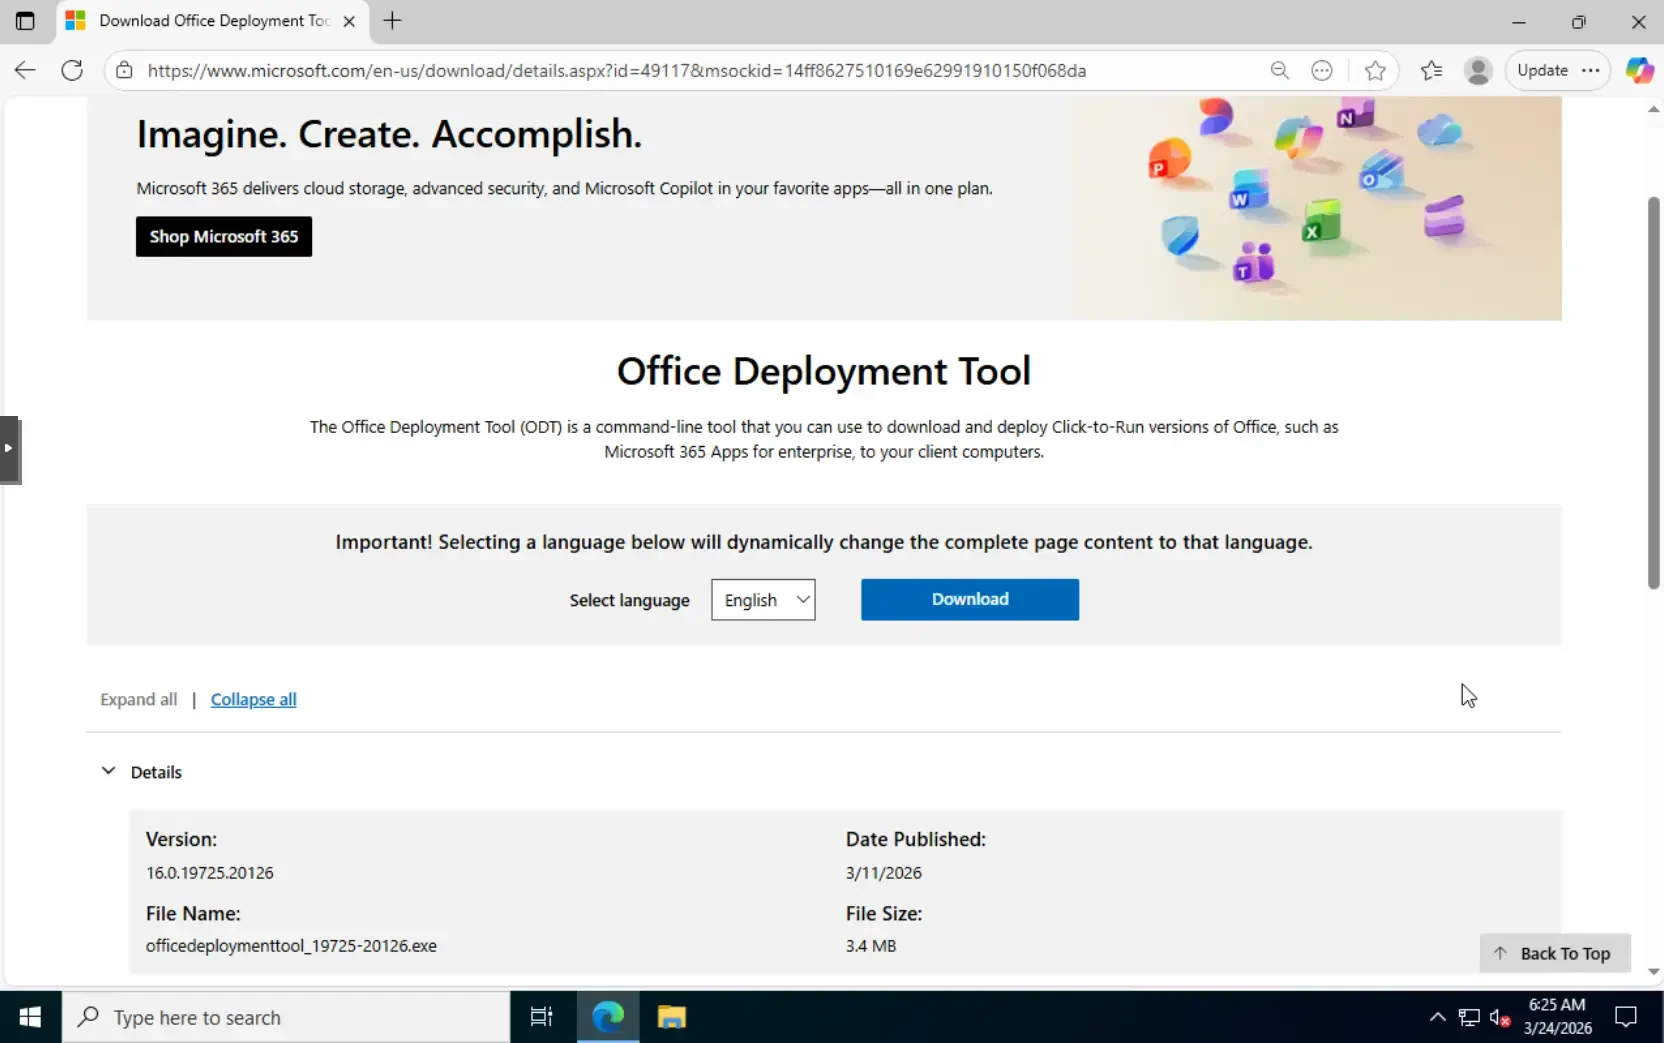
This tool utilizes a command-line interface that you are going to be using in order to install Office on your Windows cloud server.
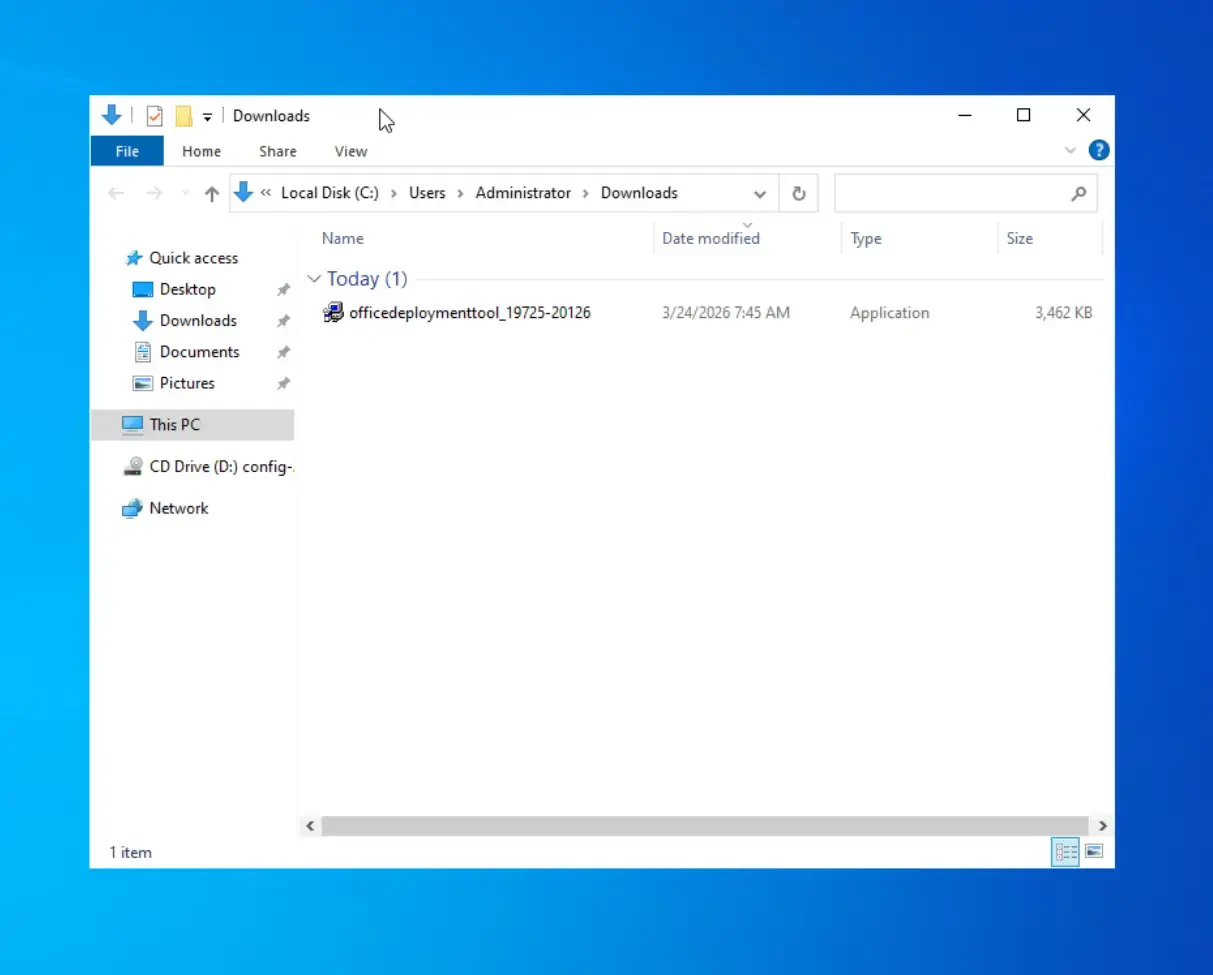
Once you have successfully downloaded the file, you are going to need to find it by using the ‘File Explorer’ on your virtual machine. When you find it, simply double-click it in order to initiate the installation process:
Install the tool
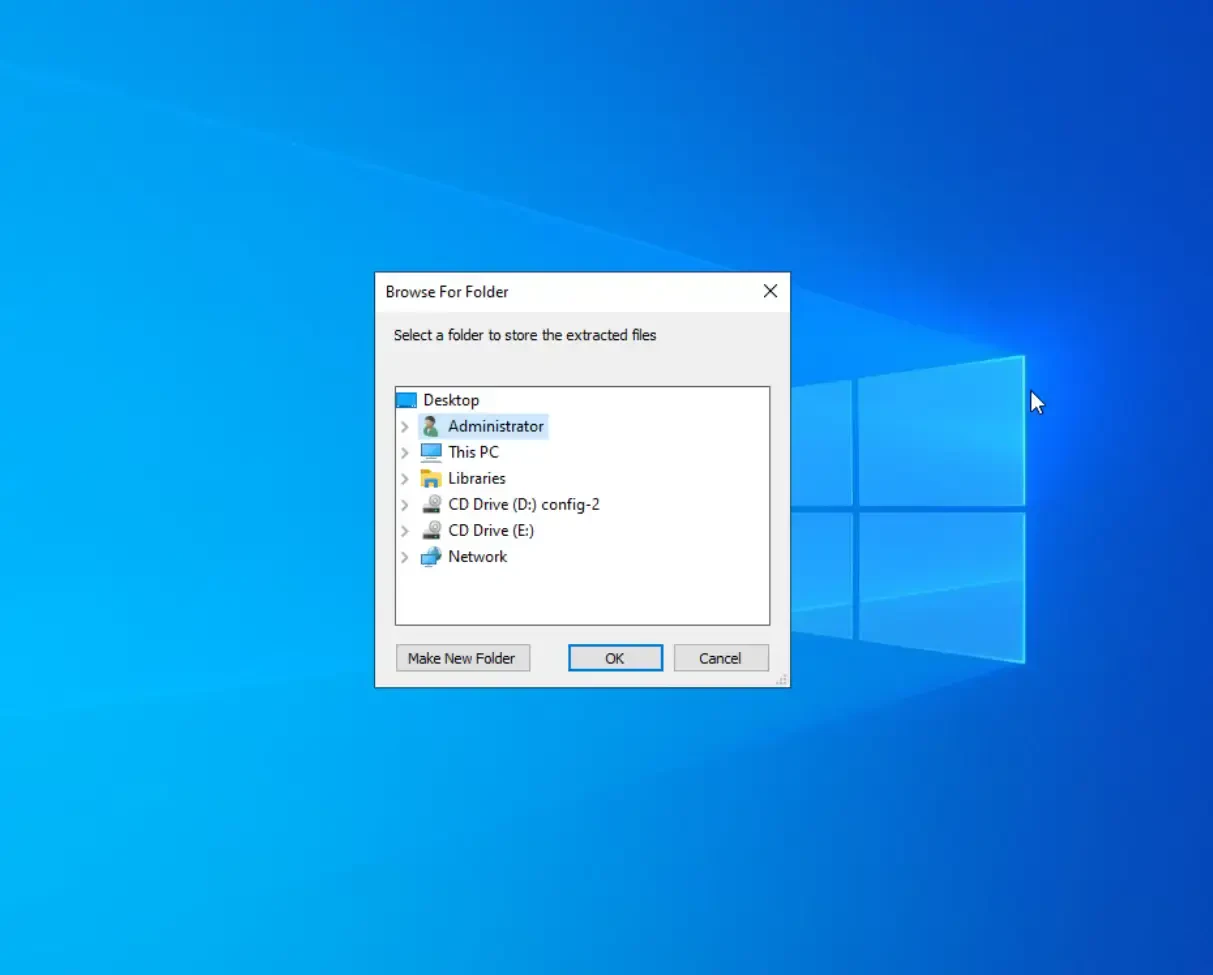
When you first launch the tool, you are going to need to accept the terms and conditions. Afterwards, you will be required to choose a folder/directory for the installation:
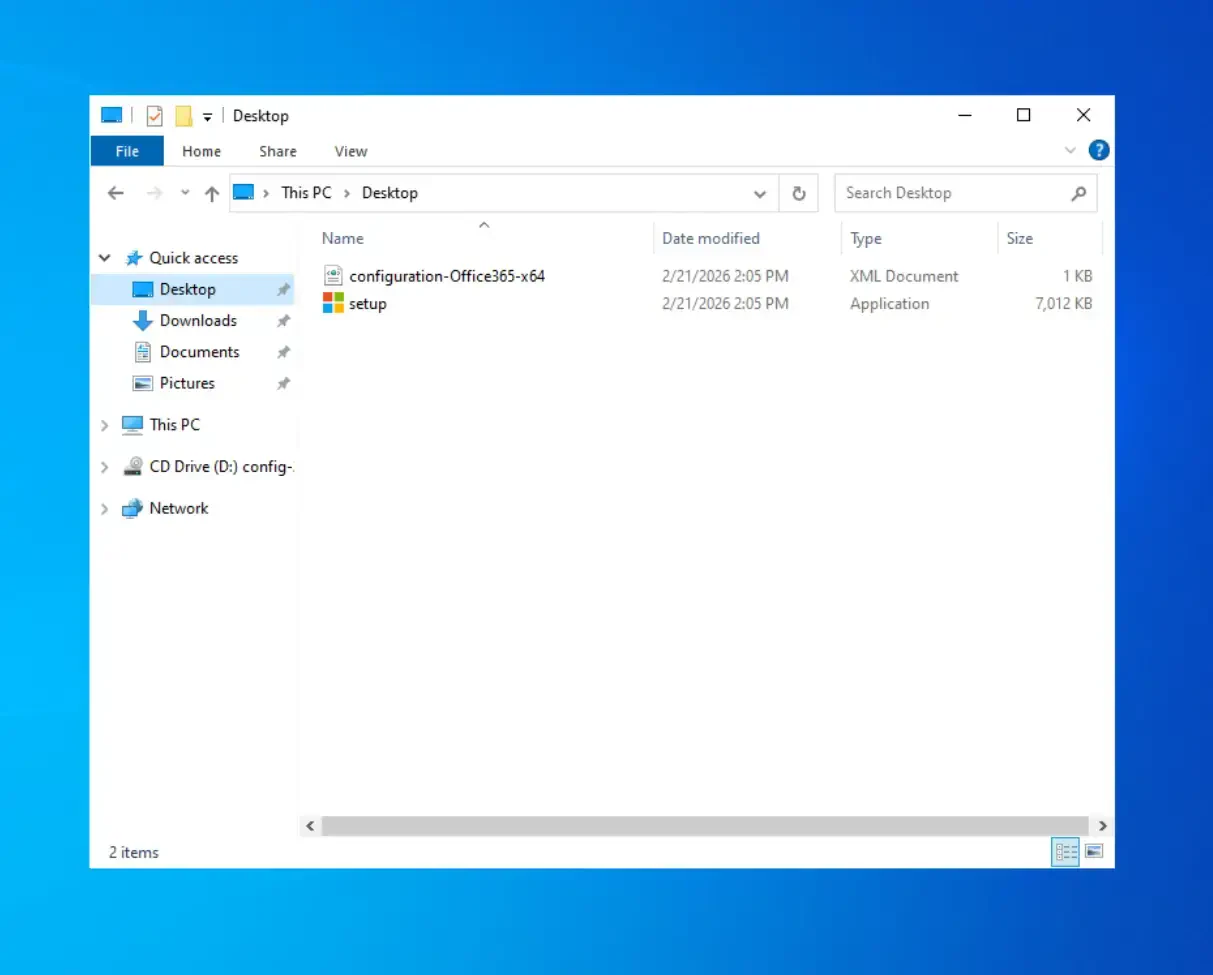
When the installation concludes, you will notice that there will be a XML file in the folder where you chose to install the tool as well as a ‘setup.exe’ file, which you are going to need to run to continue with the installation:
Before you do that, though, you are going to need to create your own XML configuration file, which you will use to give instructions to the installation depending on your software and system needs.
Create your own XML file
XML files can be easily created with any text editor. You can use the already existing ones, but we strongly suggest creating your own file.
If you want a normal, standard edition of Office 2024, you can download the following configuration XML file and paste it in your installation directory:
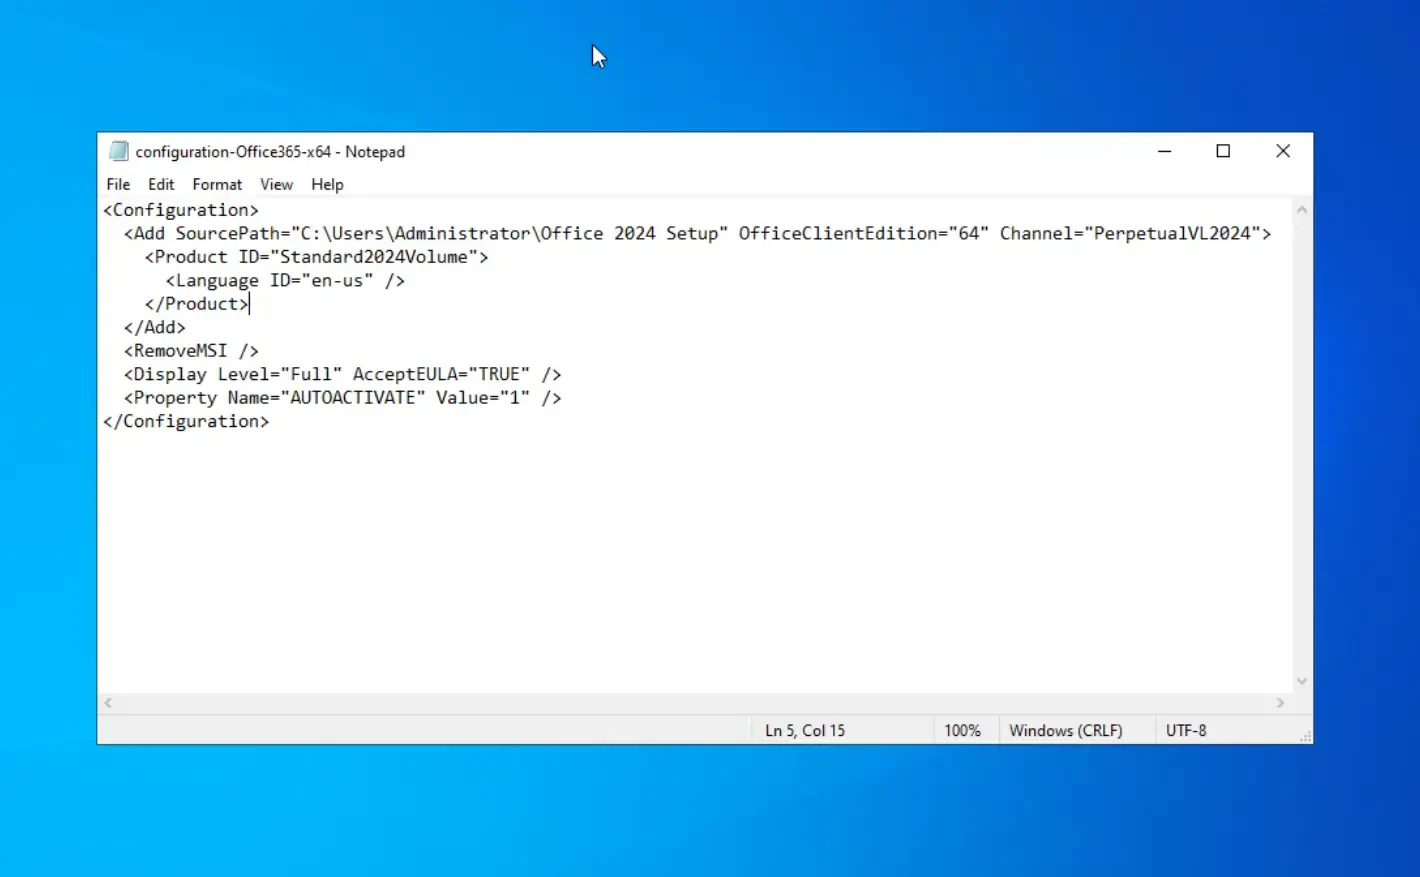
IMPORTANT: If you are going to be using the file linked above, make sure to change the path from the ‘SourcePath="C:\office\data"’ directory to your own installation folder!
If you wish to customize your Office installation, you check out the following tutorial on how to write XML configuration files.
Run the installation through CMD
Finally, once you have your XML file, you are going to need to start the installation through your system’s CMD.
To do so, you will first need to open up the command prompt onto your system. Next, you will need to copy and paste the following command:
setup.exe /download filename.xml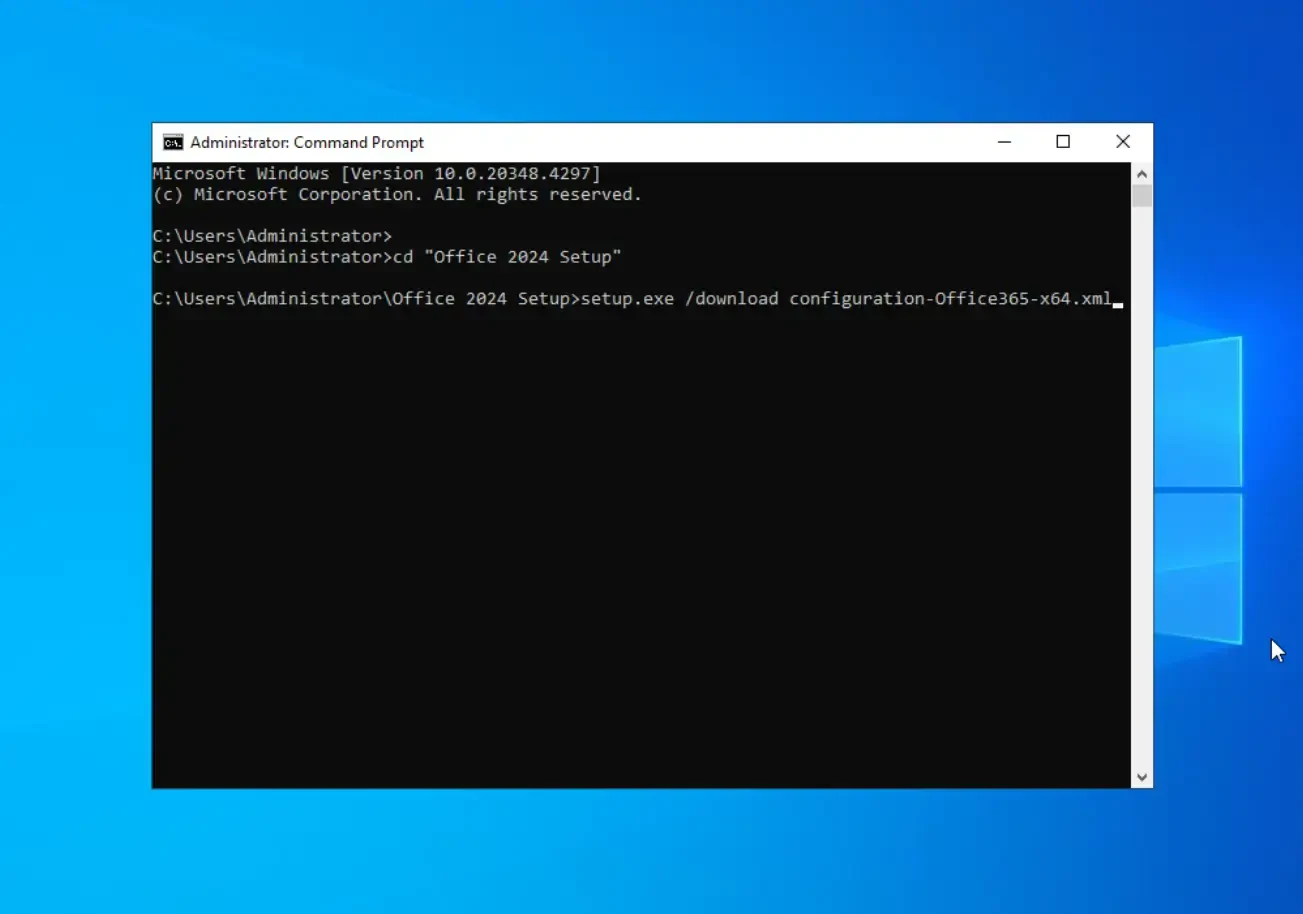
IMPORTANT: Make sure to change ‘filename.xml’ with your own XML file’s name!
This command will begin the installation process and will download the required files. Once all files have been downloaded, you will need to run this command:
setup.exe /configure filename.xml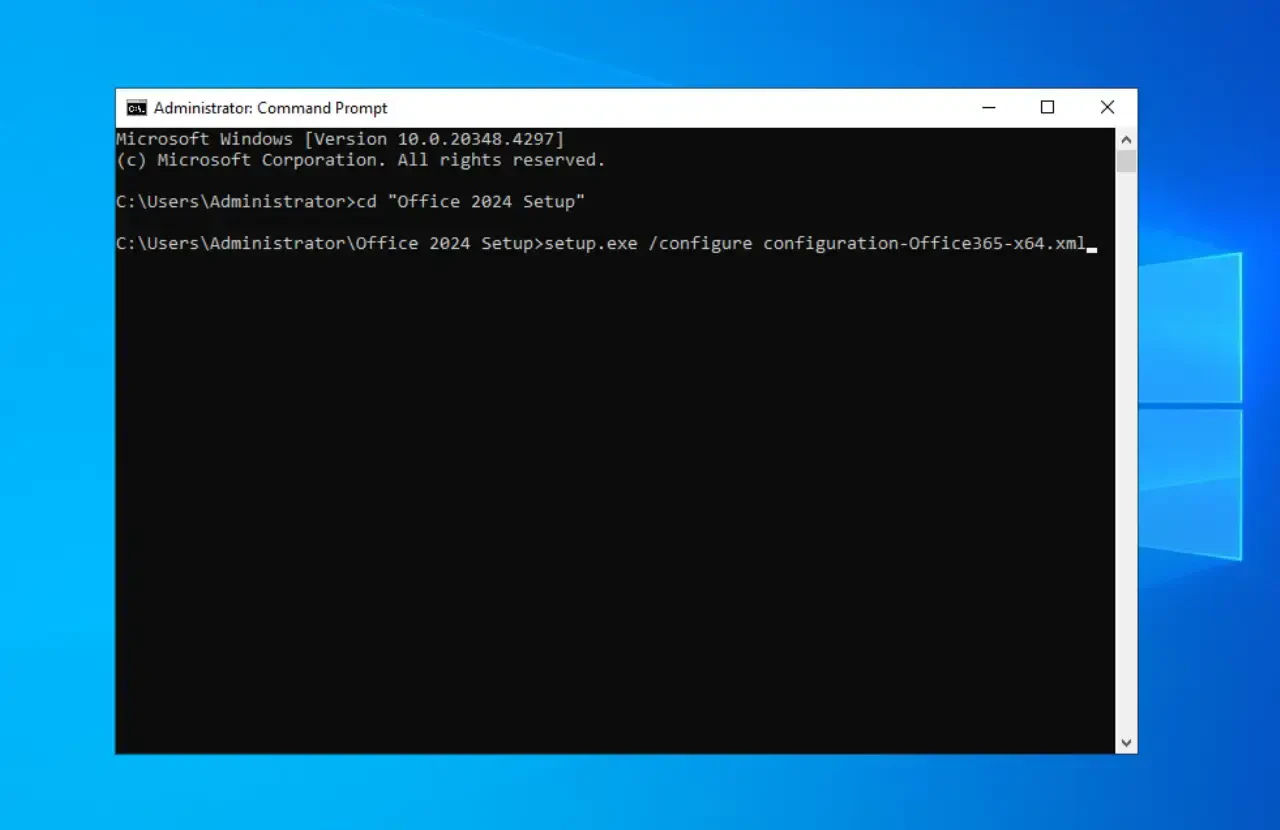
IMPORTANT: Make sure to change ‘filename.xml’ with your own XML file’s name!
This will begin the installation process. Once everything concludes, you will successfully have Office 2024 installed on your Windows server!

If you encounter any problems, you can also check out the official Microsoft Office 2024 LTSC deployment guide and you can also contact us for further assistance.
IMPORTANT: You need to have an active Office license. If you don’t have an active one, you can check out our tutorial on how to activate your Office LTSC Standard 2024 license!

