


In this detailed, step-by-step tutorial we are going to focus on Microsoft’s Active Directory (AD) and how to install the software on your Windows Server in order to help you manage your user accounts, security policies and network operations from a single place.
What is Active Directory?
Active Directory is a powerful tool and a hierarchical database which can be used to store information about users, machines and other network data such as permissions, groups and accessibility settings. It also comes equipped with a number of different features such as authentication and authorization. It consists of a number of components with the 3 most prominent ones being domain controllers, organizational units and namespaces.
Domain Controllers (DCs)
Domain Controllers (DCs) are in charge of storing and managing secure information. This includes authenticating users, keeping track of security policies as well as supervising access to the resources that are on the network.
There are 3 main types of domain controllers. The first one is the Primary Domain Controller (PDC), which is responsible for replicating and maintaining information across all domain controllers within a network. The second one is the Backup Domain Controller (BDC), which copies the information from the PDC and acts as a fail-safe mechanism should the PDC experience any issues. The third one is the Read-Only Domain Controller (RODC) and it is used to store a read-only version of all Active Directory information so that it can be accessed from remote locations.
Organizational Units (OUs)
Organizational Units (OUs) are in a sense logical containers within Active Directory. Their main role is to help organize users, machines and other objects within the network into separate groups, hence their name’s origin. OUs can be utilized to group resources, data or users based on different criteria such as departments, permissions and any other relevant information.
Namespaces
Namespaces have a more straightforward role. They define the name space for your Active Directory domain. This in turn, guarantees that all users and any group names are going to be special within the domain. Additionally, namespaces also play a vital role in name resolution as well as for facilitating access to network resources. Not only that, but they are also used to access shared resources, which is quite important when working together on a different project or file.
Domain Functional Levels
Domain functional levels, on the other hand, are used to determine the compatibility and functionality when it comes to the Active Directory domain and the version of Windows Server that you are using. They take care of managing password policies, data caching and administrative control. They are very versatile in nature, making them suitable for a plethora of different network environments with each functional level being dependent on the OS version.
Replication
Finally, we have replication. This feature ensures the consistent flow of data across different domain controllers, helping everything stay in sync. This means that user data from one network machine to another is transmitted in real time, which helps ensure everyone has the latest information, preventing issues and duplicate or missing information. This is particularly important when it comes to the process of authentication.
Now that we’ve learned more about the principles behind Active Directory it’s time to begin with the installation. The installation process in itself consists of a few different stages, which we are going to be splitting into 2 separate sections.
How to install the Active Directory Domain Services role
The first step when it comes to setting up Active Directory on your Windows Server is to install the Active Directory Domain Services (AD DS) role.
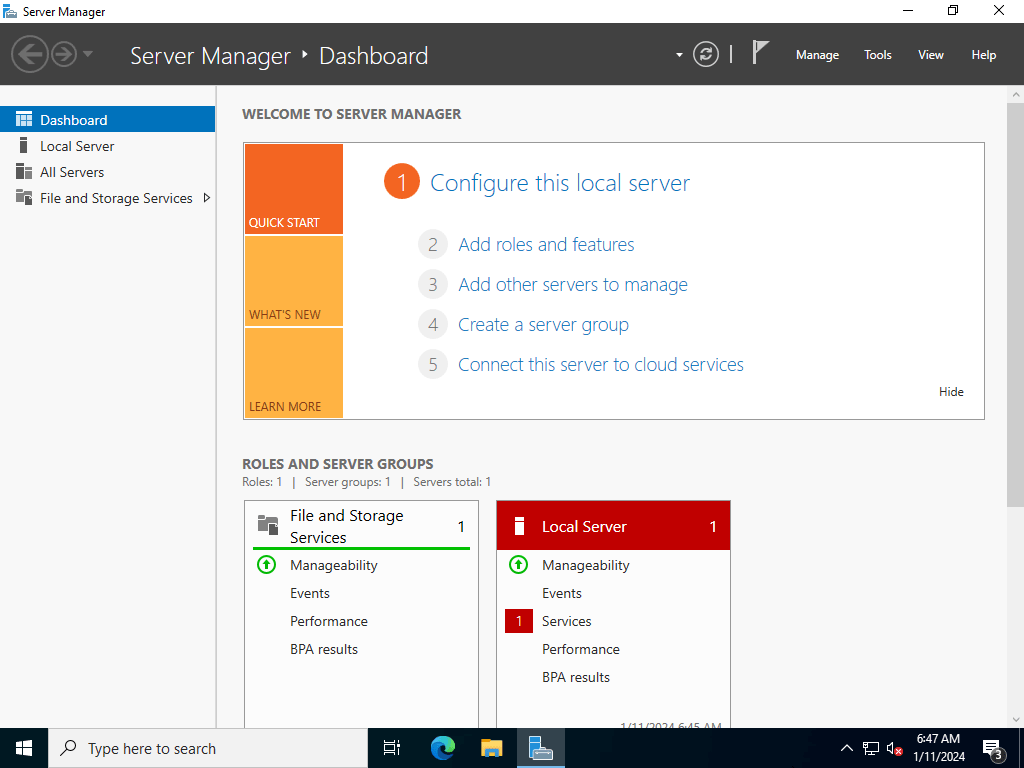
Start by opening Server Manager.
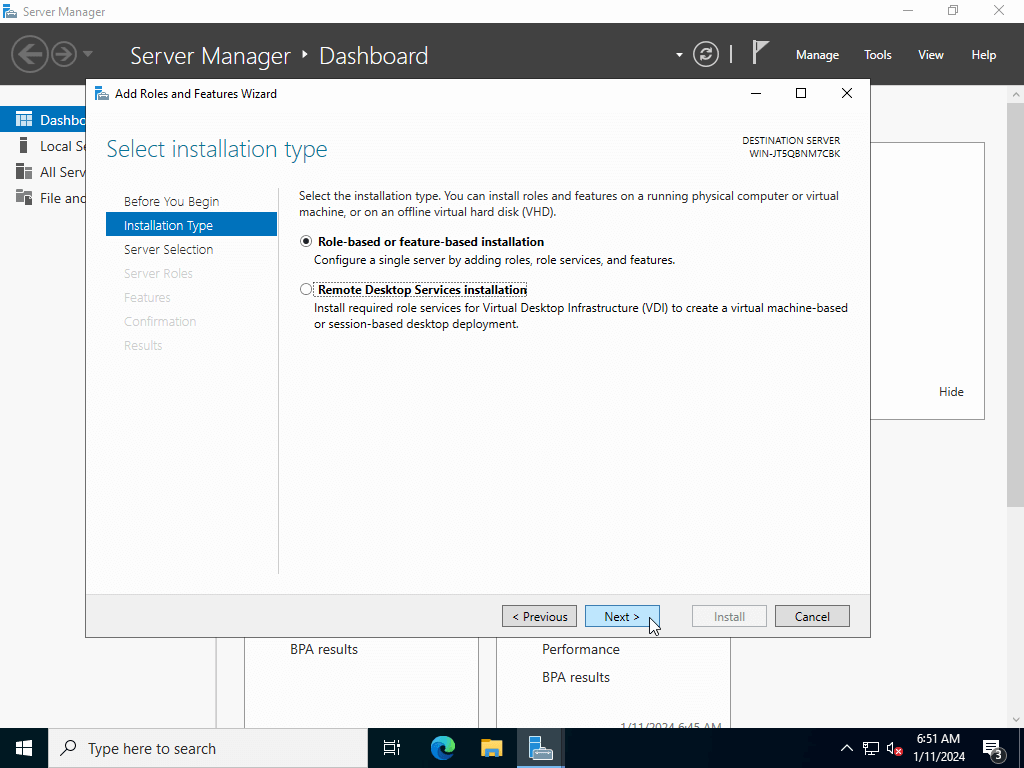
Next, click on the Manage menu and select Add Roles and Features. This will open up the installation window. From here, select the Role-based or feature-based installation option and click Next.
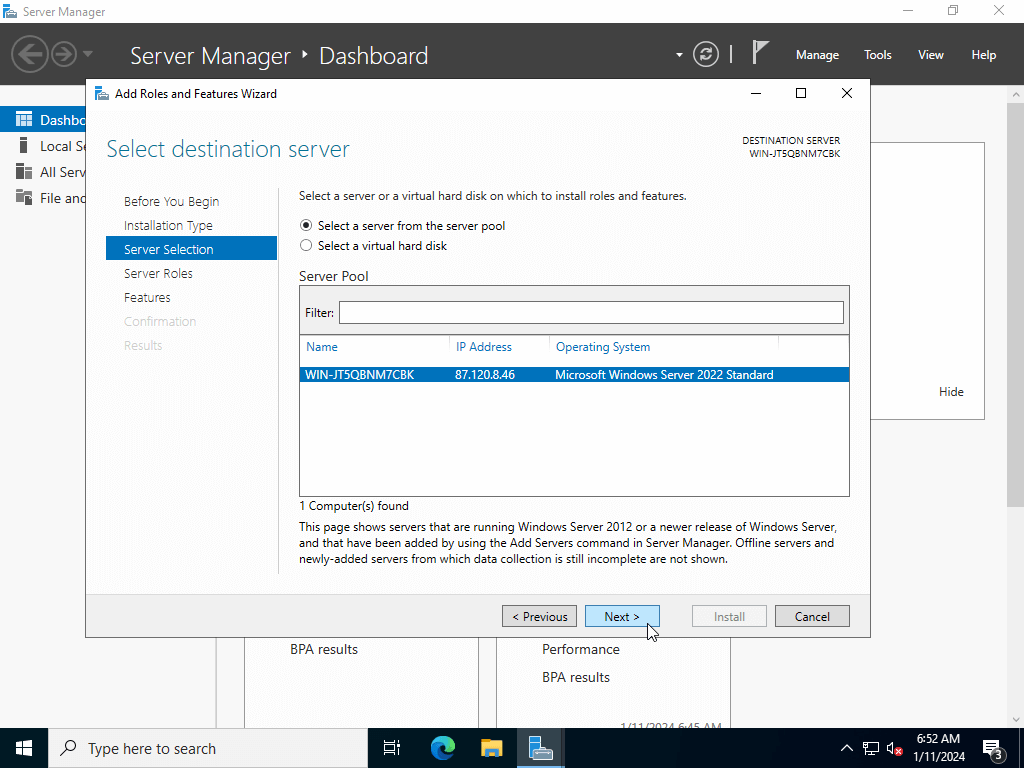
You will then be presented with a list of available servers. You need to select the server on which you’d like to host the AD DS role and click Next.
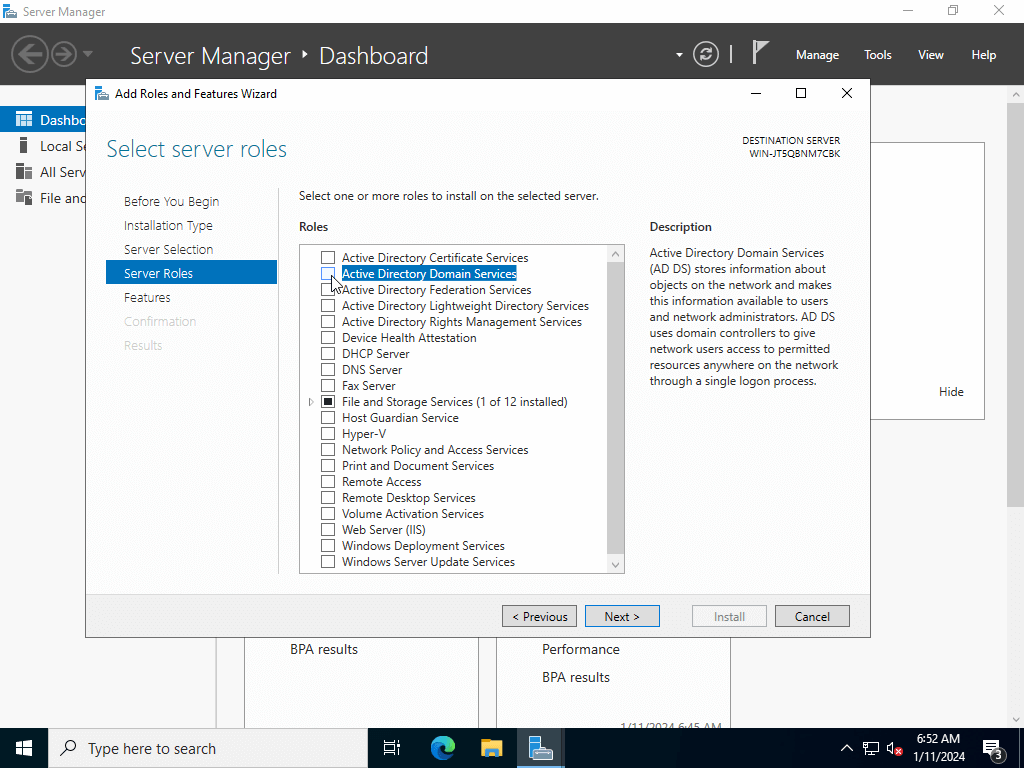
Next up, you will be taken to the Server Roles page. From here, select Active Directory Domain Services.
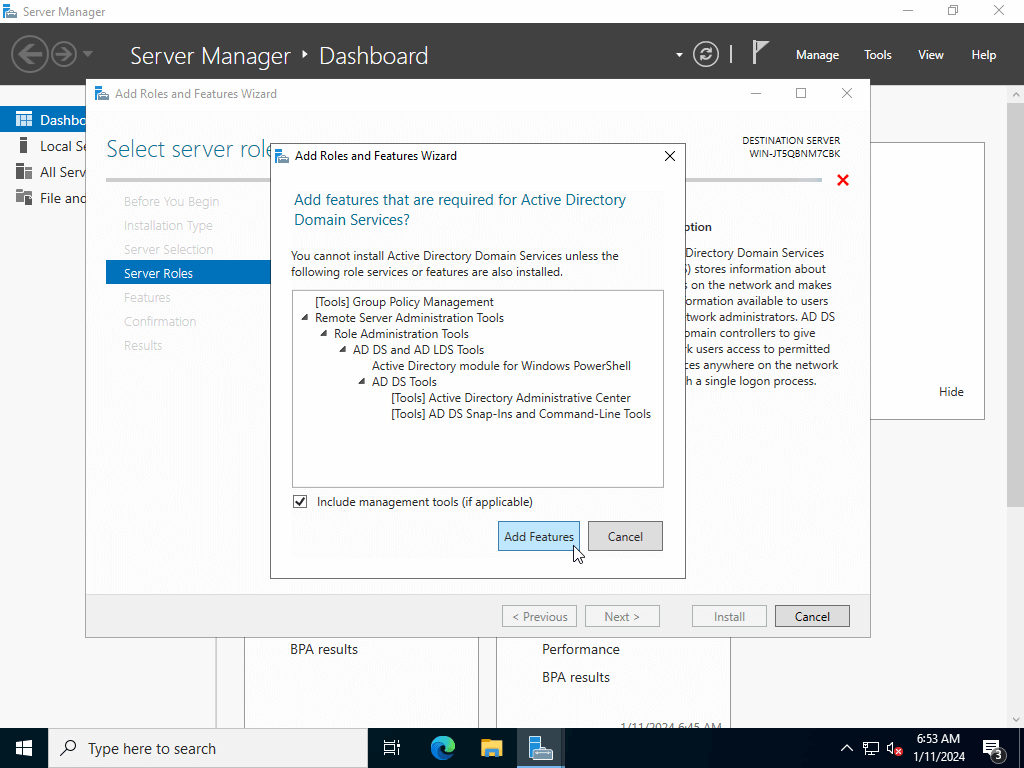
This will show you the prerequisites that are required before you install AD DS. Click on Add Features and then on Next.
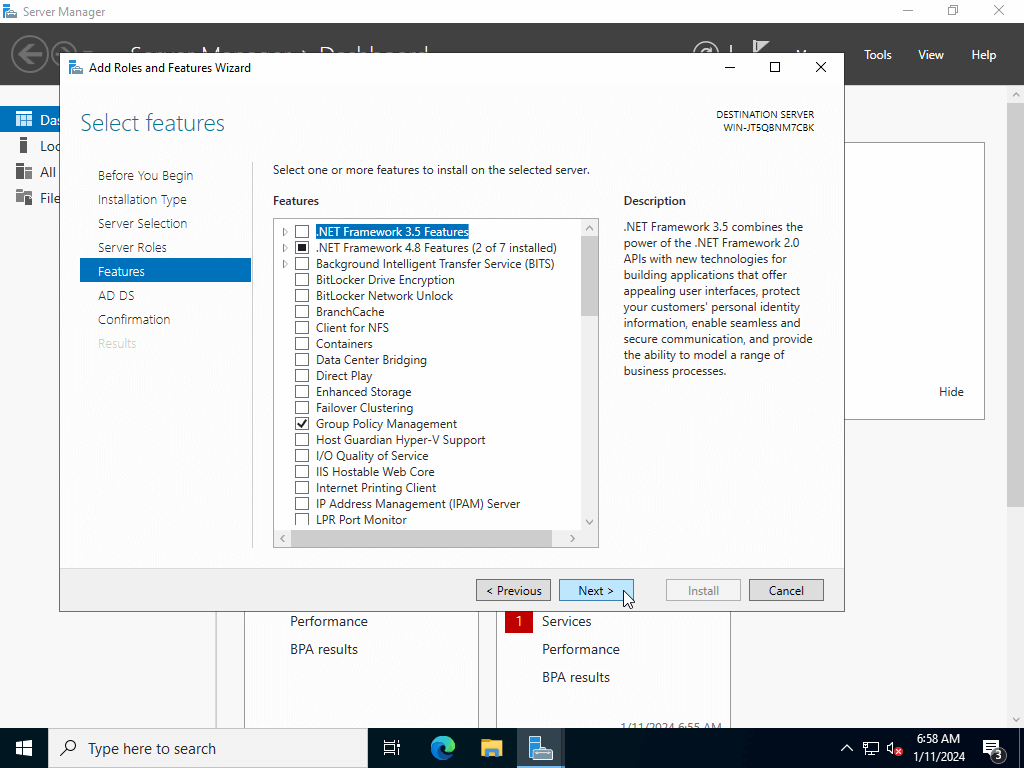
You will then be prompted to select any extra features that are required for AD DS to work as intended. Once you’ve added them, click Next.
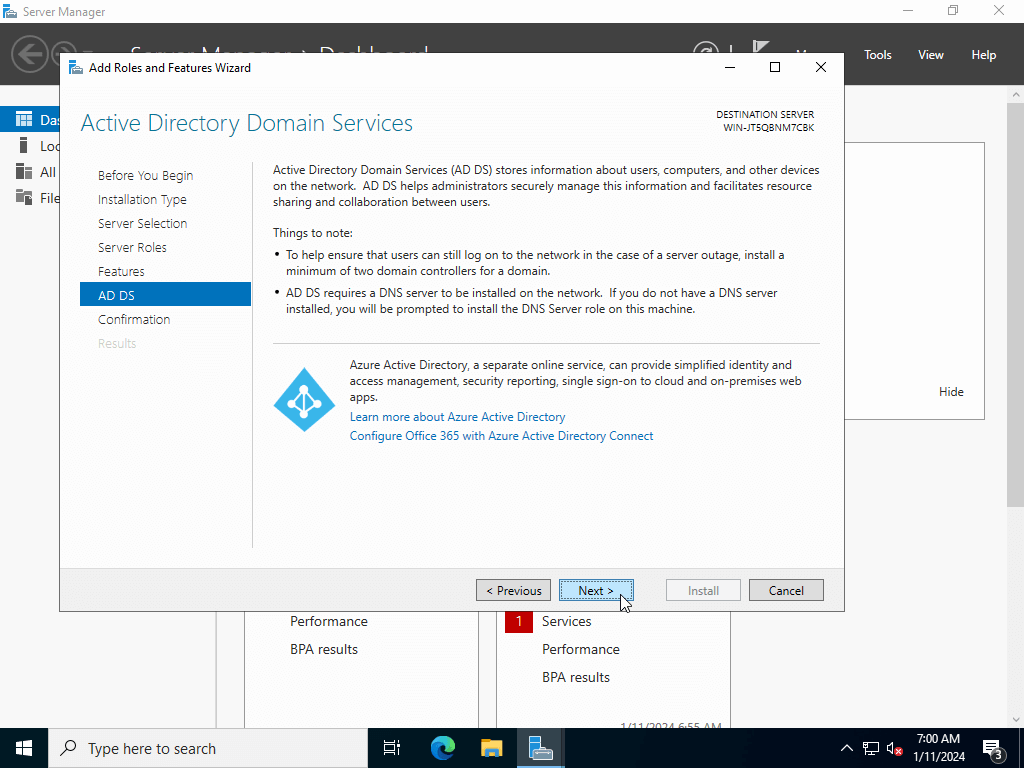
The next window will show some helpful information regarding your Active Directory installation. Click on Next to proceed.
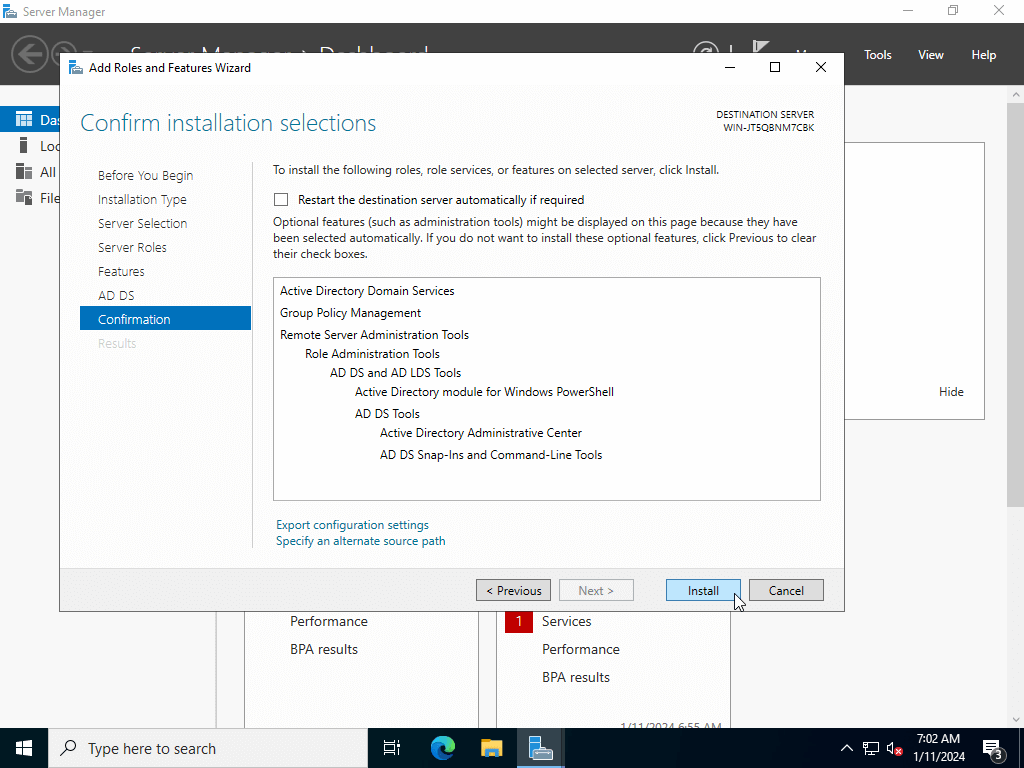
A review window will appear which will contain a summary of your installation. To proceed, click on Install, which will initiate the installation process.
When the installation concludes, you can click the Close button and you will have successfully set up the AD DS role.

How to promote the Server to a Domain Controller
The next thing you need to do is to promote the server to a domain controller. This will ensure that the server acts as the primary authority within the Active Directory domain, which will enable it to establish policies, perform authentication and exchange data so that it is kept up to date across all controllers.
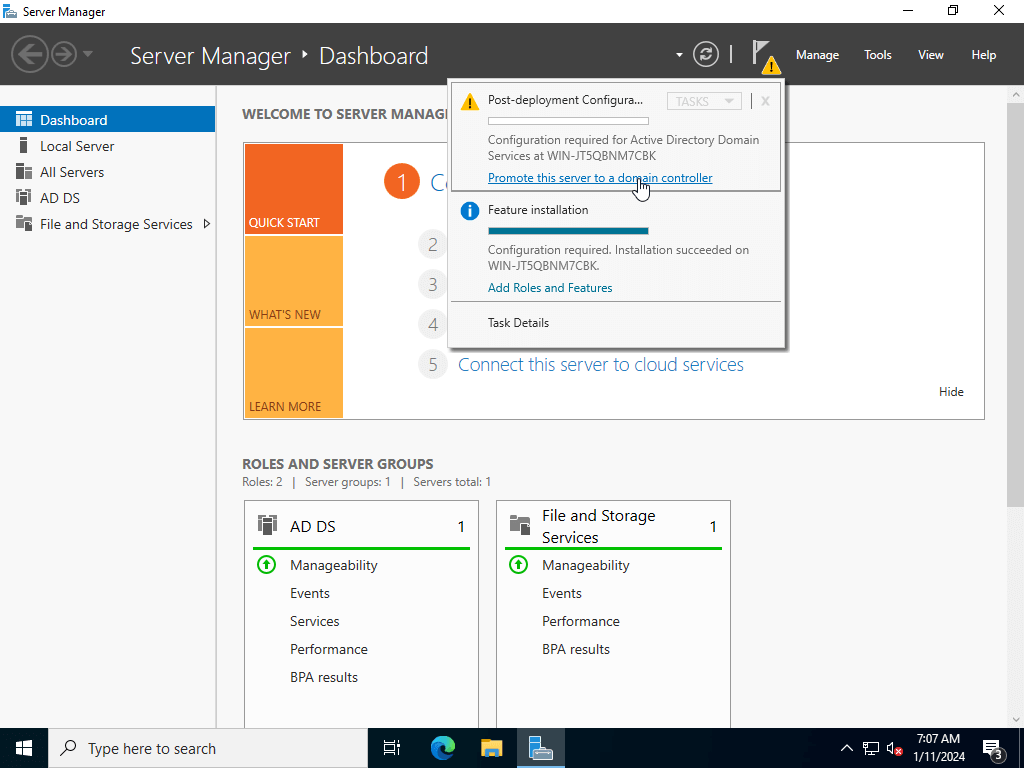
Start by launching the Server Manager and click on the Notifications icon. Then select Promote this server to a domain controller.
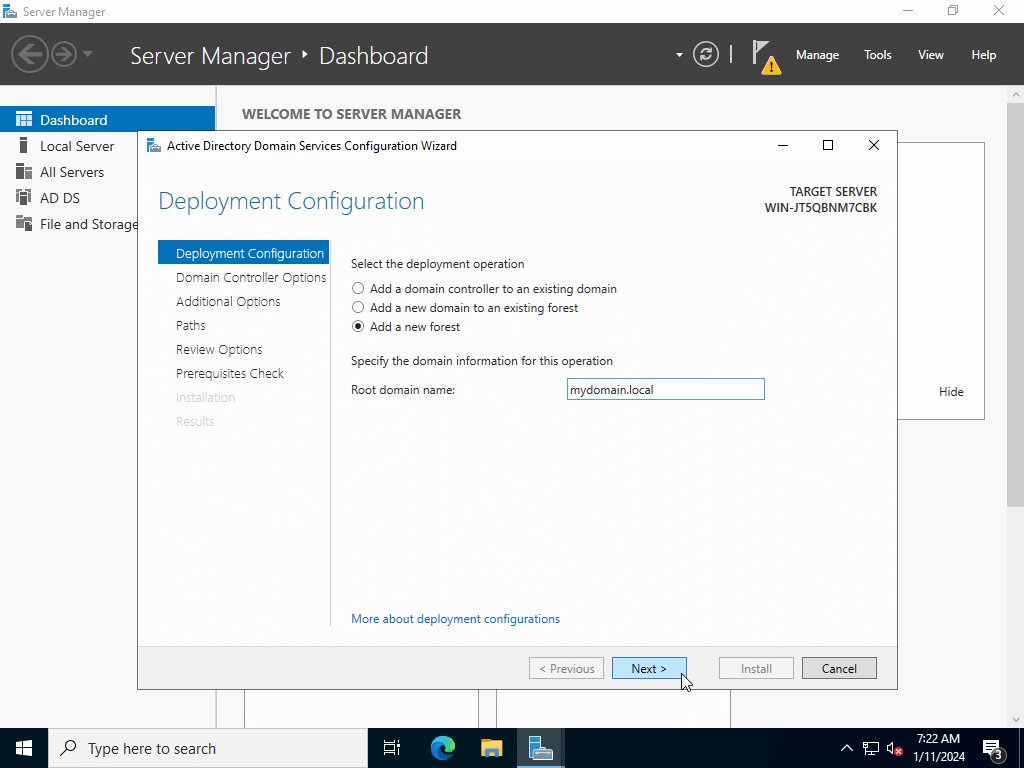
You will then need to select the Add a new forest option. For that you will need to provide a root domain, but it is not required to be resolvable on the Internet. Enter a root domain and hit Next.
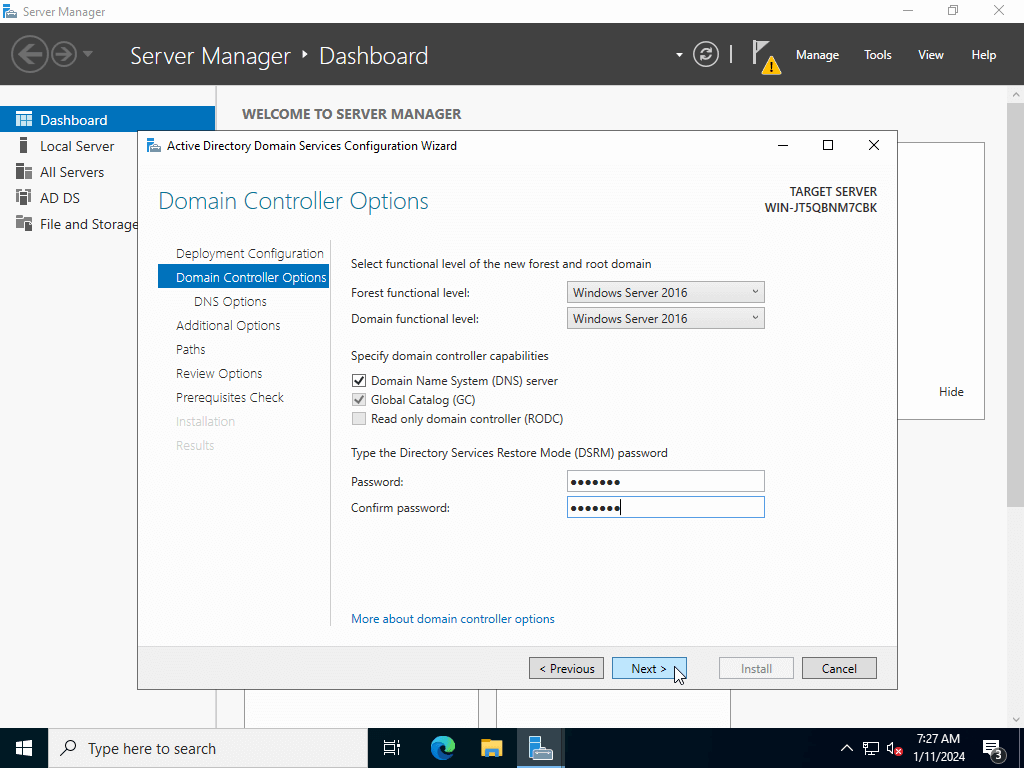
After that you will be prompted to select the Forest Functional Level and the Domain Functional Level, and also the domain controller capabilities. You can leave them as they are by default.
Following that, you are going to need to create a DSRM password in order to ensure that you can protect your Active Directory if you need to recover it. Click on Next.
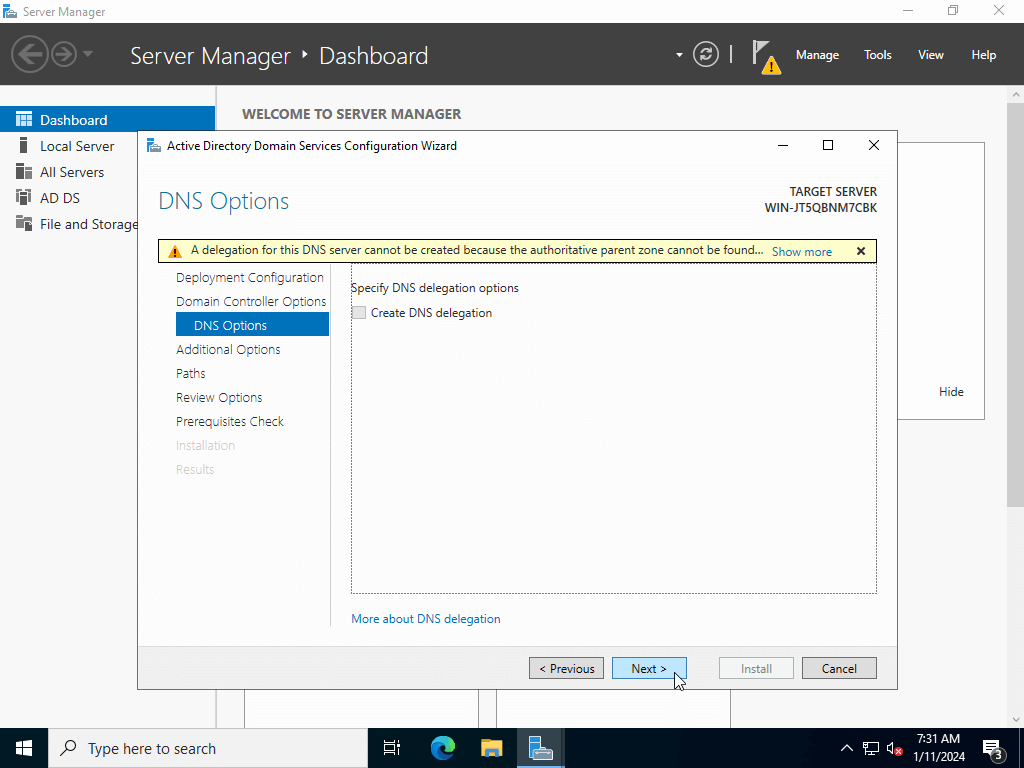
If you’re presented with a warning that a DNS delegation could not be created, just skip it by clicking on Next.
On the next step there will be generated a NetBIOS name for your domain. Feel free to change it if needed and proceed with Next.

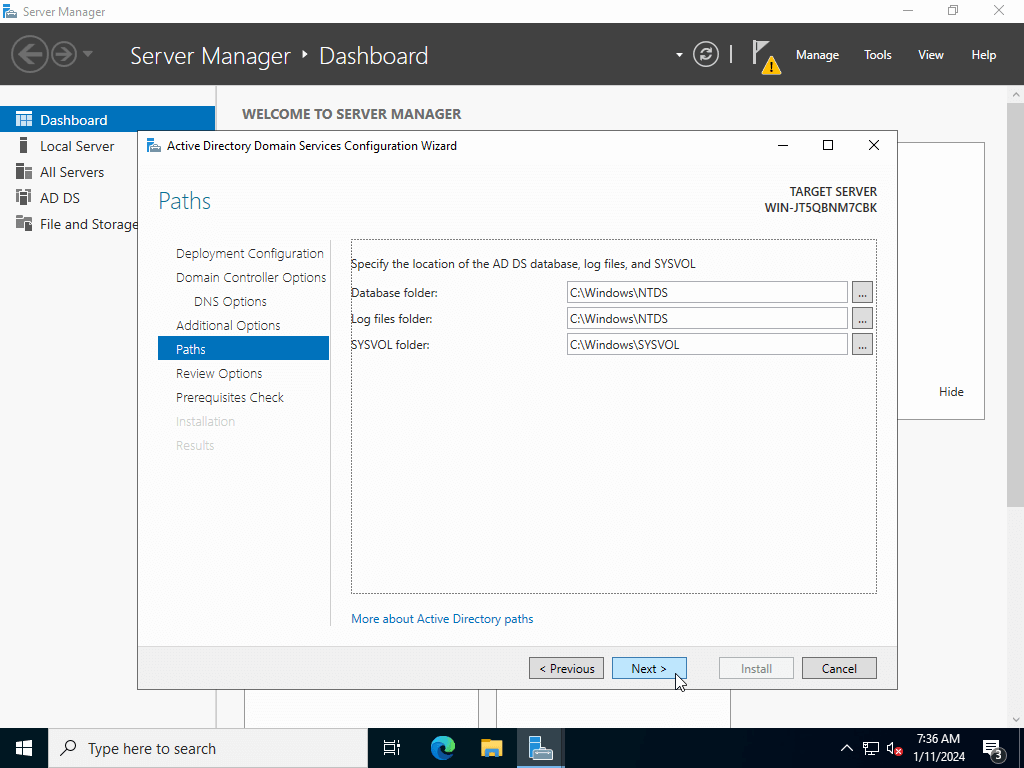
After that you will need to specify the location for the Domain DNS directory service. Just make sure that the paths have sufficient disk space and continue by clicking Next.
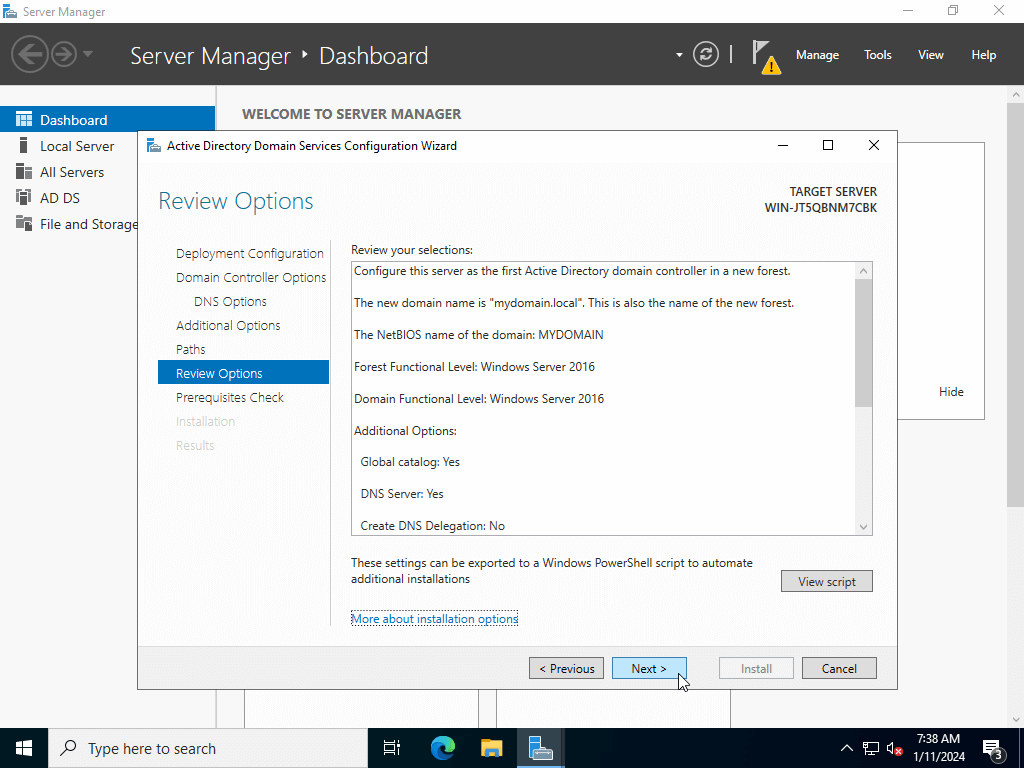
You will now be presented with a summary of your settings. Make sure to review everything and continue.
The wizard then will check if all the prerequisites for the promotion are checked.
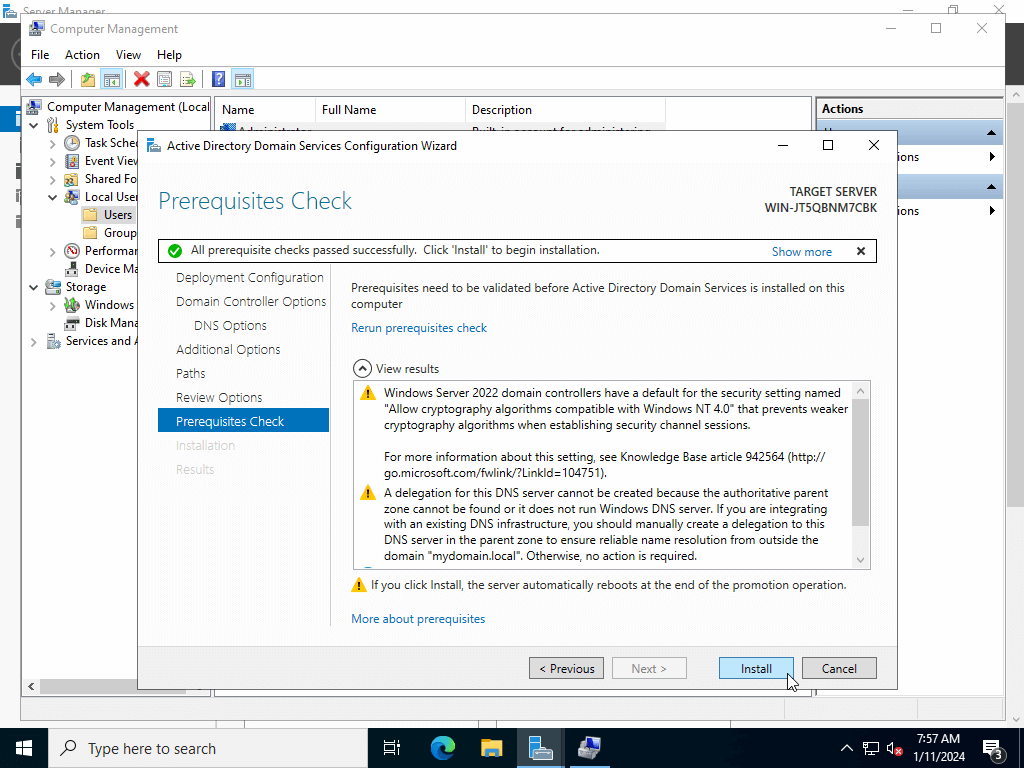
After clicking Install the installation will commence.
IMPORTANT: If the prerequisite for the Administrator password security has failed you would need to first run the command net user Administrator /passwordreq:yes in CMD and then change the Administrator password to include lowercase letters, uppercase letters, symbols and numbers via Computer Management -> Local Users and Groups -> Users -> Administrator -> Set Password, as this is Windows requirement for promoting to a domain controller.
IMPORTANT: Clicking Install will reboot your server.
That’s it, you should now have an active domain controller.
Additional configurations
Once you have completed all of the aforementioned steps, you will need to fine tune some additional details in order to make sure that AD works as it should.
You will need to manually create organizational units to help you organize users and objects within the domain. Additionally, you will also need to deploy a group policy in order to ensure that all settings across users and the domain are kept secure. Next, make sure to establish security policies to limit access to resources and data. Finally, set up monitoring to discover any potential issues as they arise and make sure to test user authentication to check if everything works as it should.

