


Have you ever wondered how you can further protect your privacy while browsing at home? In addition to the traditional methods like using a VPN, there is also another strategy that you can employ in order to further ensure your privacy stays secure - using a VPS server as a proxy.
In this tutorial, we are going to go over how you can configure your Windows VPS server to act as a personal proxy, allowing you to route your home traffic through your VPS. This will give you a number of different benefits including enhanced privacy, the ability to access geo-restricted content as well as masking your online activity from your ISP.
For this tutorial, we are going to be setting up a SOCKS5 proxy, tunneled over SSH. SOCKS5 is a versatile proxy protocol capable of handling various types of network traffic, and when combined with SSH, all data transmitted to the proxy becomes encrypted and protected.
We will also be utilizing a VPS with the latest Windows Server 2025 OS, which includes the OpenSSH Server feature by default.
In terms of your own PC, your Windows 10/11 computer already comes equipped with the SSH command-line client as well as SOCKS5 protocol support. This means that you can set up everything without having to download any additional third-party proxy server applications or specialized SSH clients.
Configure OpenSSH Server on your Windows VPS
Let’s start by first connecting to your Windows VPS via via Remote Desktop or VNC. If you are using a VPSBG Windows VPS server, you should use “Administrator” as the username and the password that you used to configure your server.
Once connected, let’s check that the OpenSSH server is present and ready to be used. Open PowerShell via the Start Menu: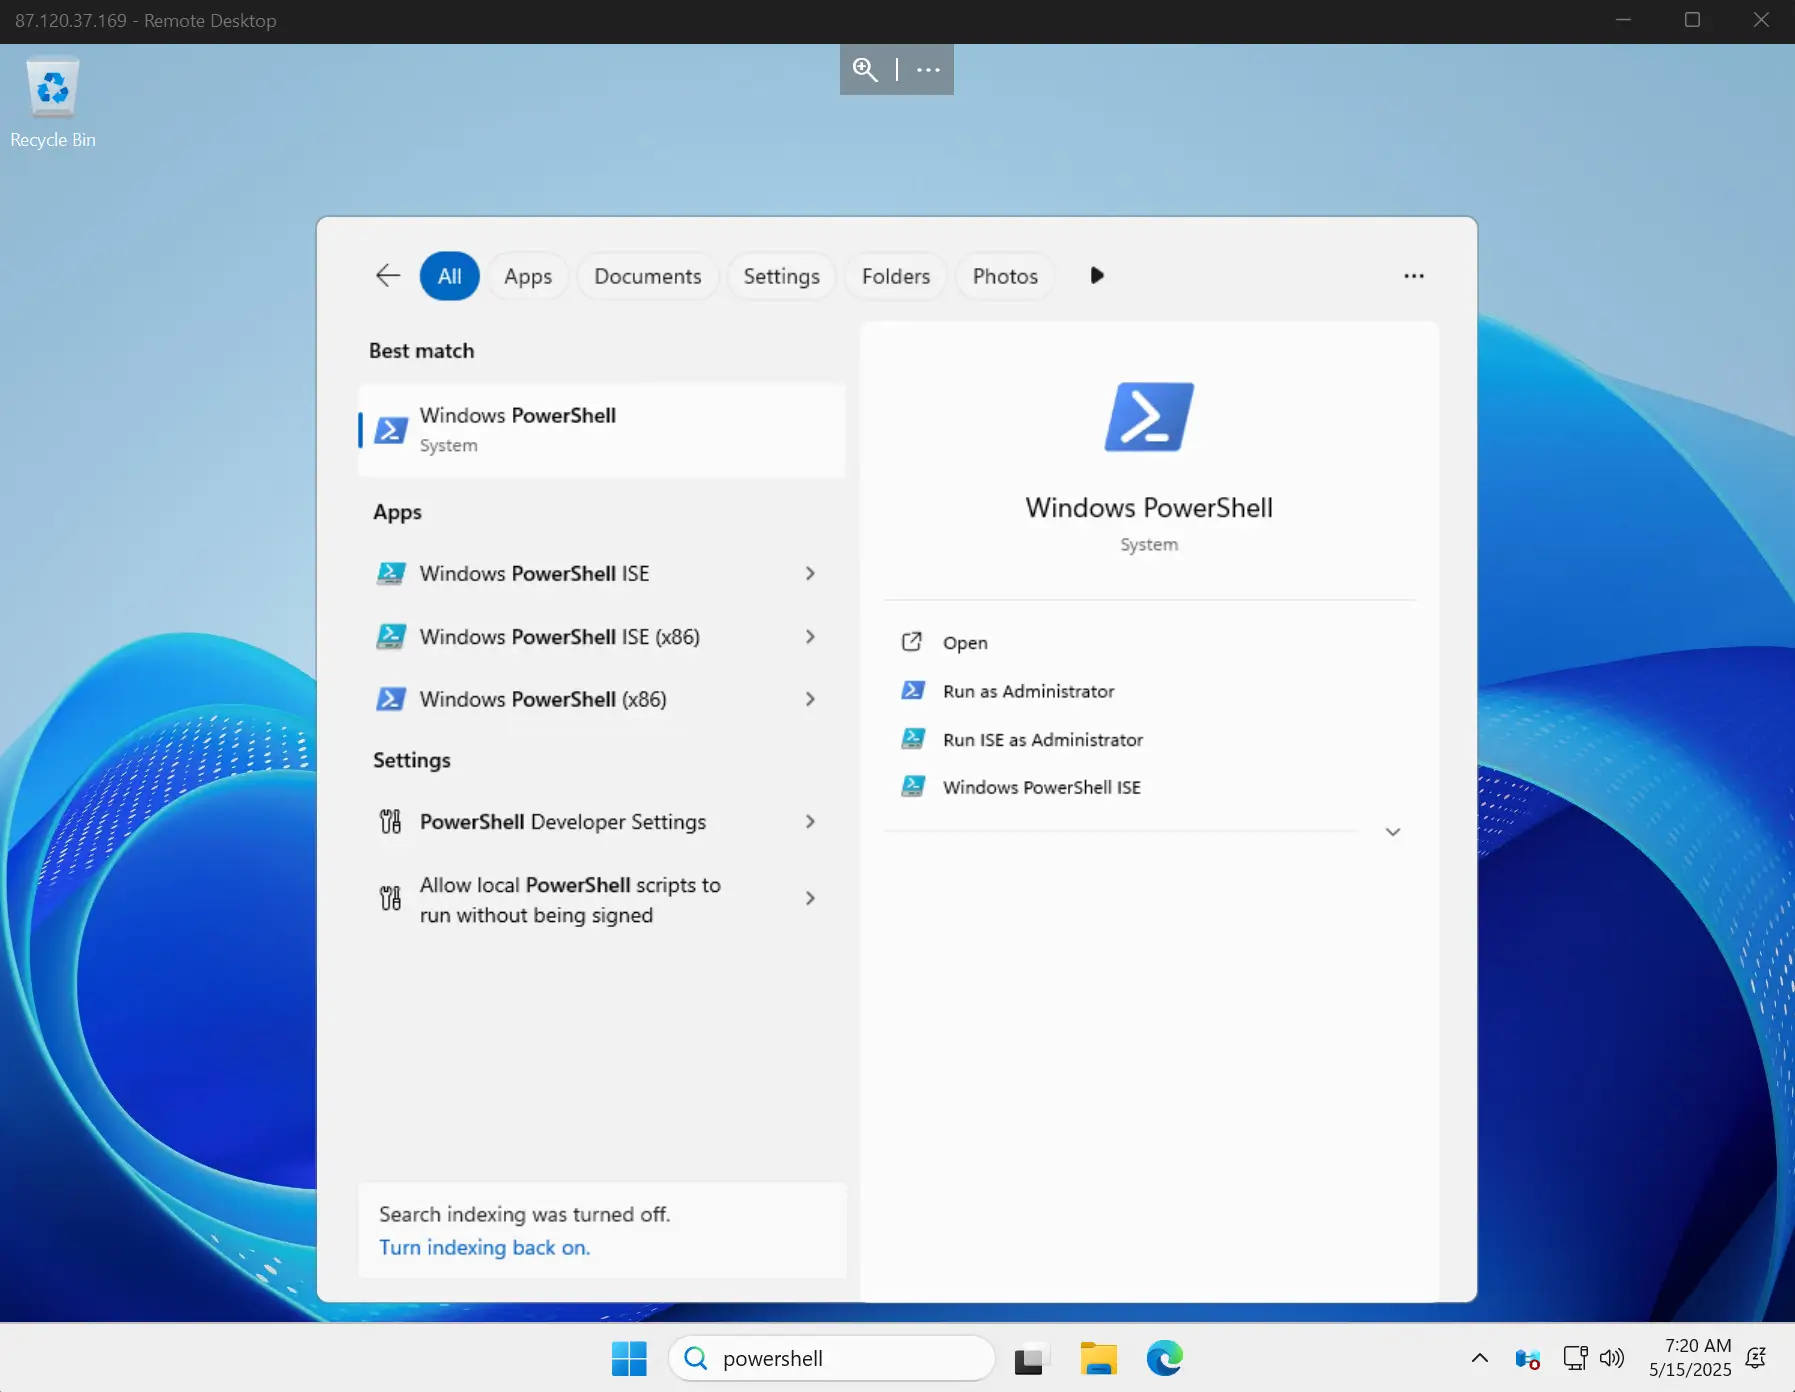
Next, type in the following command:
Get-WindowsCapability -Online | Where-Object Name -like 'OpenSSH.Server*'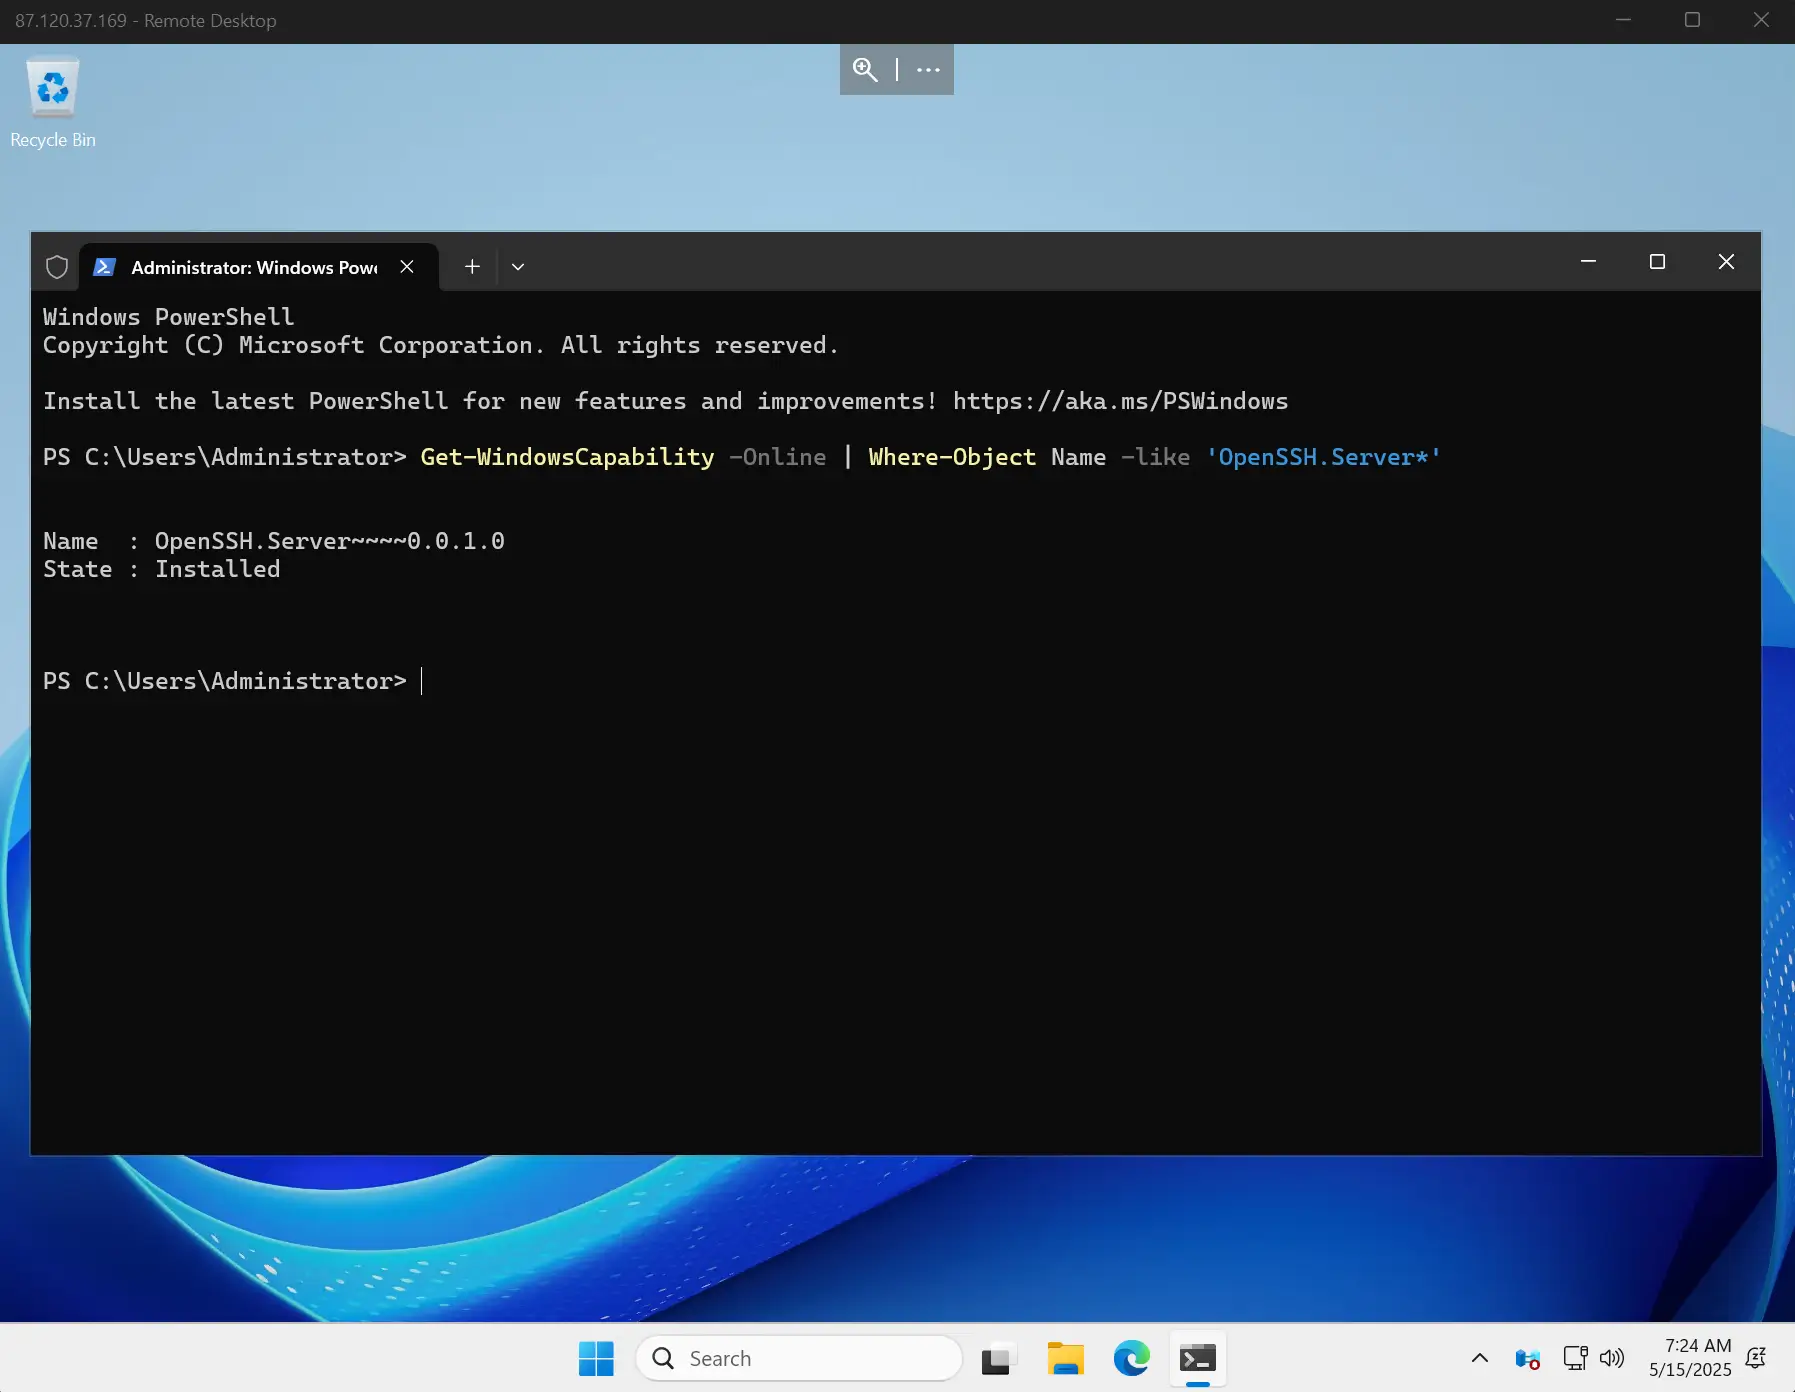
State: Installed confirms that OpenSSH Server is installed and ready to be used.
Note: If the output is State: NotPresent, you can easily install it with:
Add-WindowsCapability -Online -Name OpenSSH.Server~~~~0.0.1.0In the same Administrator PowerShell window, start the sshd service:
Start-Service sshdThen set the service to start automatically when your VPS boots:
Set-Service sshd -StartupType 'Automatic'Lastly, confirm the service is running and that it is set to start automatically:
Get-Service sshd | select -property status,starttype,name,displaynameThe output should include Running for Status and Automatic for StartType like so: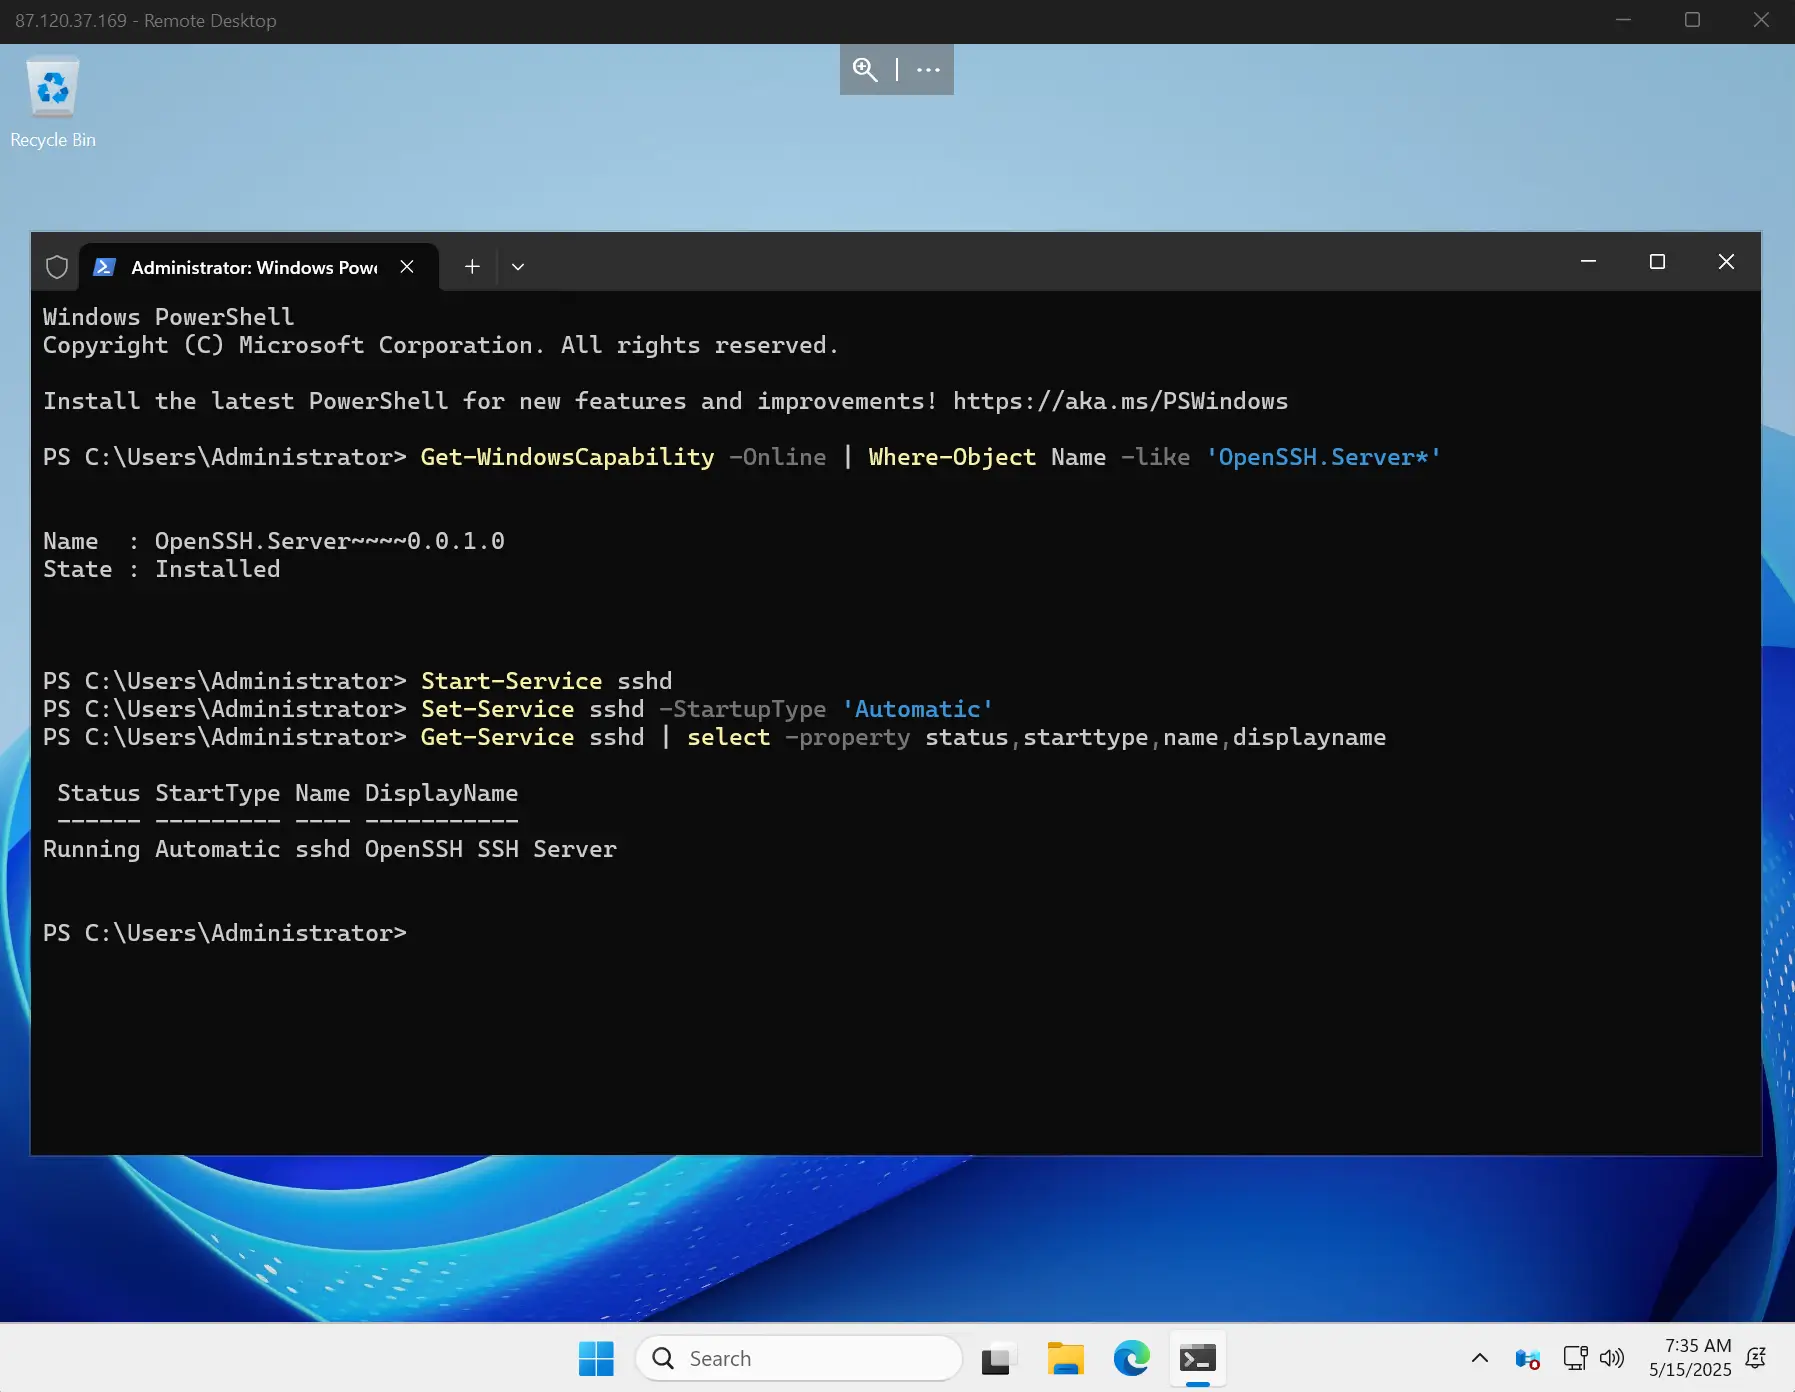
The sshd server is now running on port 22 on your Windows VPS, but Windows Firewall allows accessing it only from Private networks. As the default Windows OS setting for your VPS network is set to Public, we will need to also allow public networks to access port 22, enabling you to reach it from your home computer.
Let’s navigate to Start menu -> Windows Defender Firewall With Advanced Security and open the firewall settings: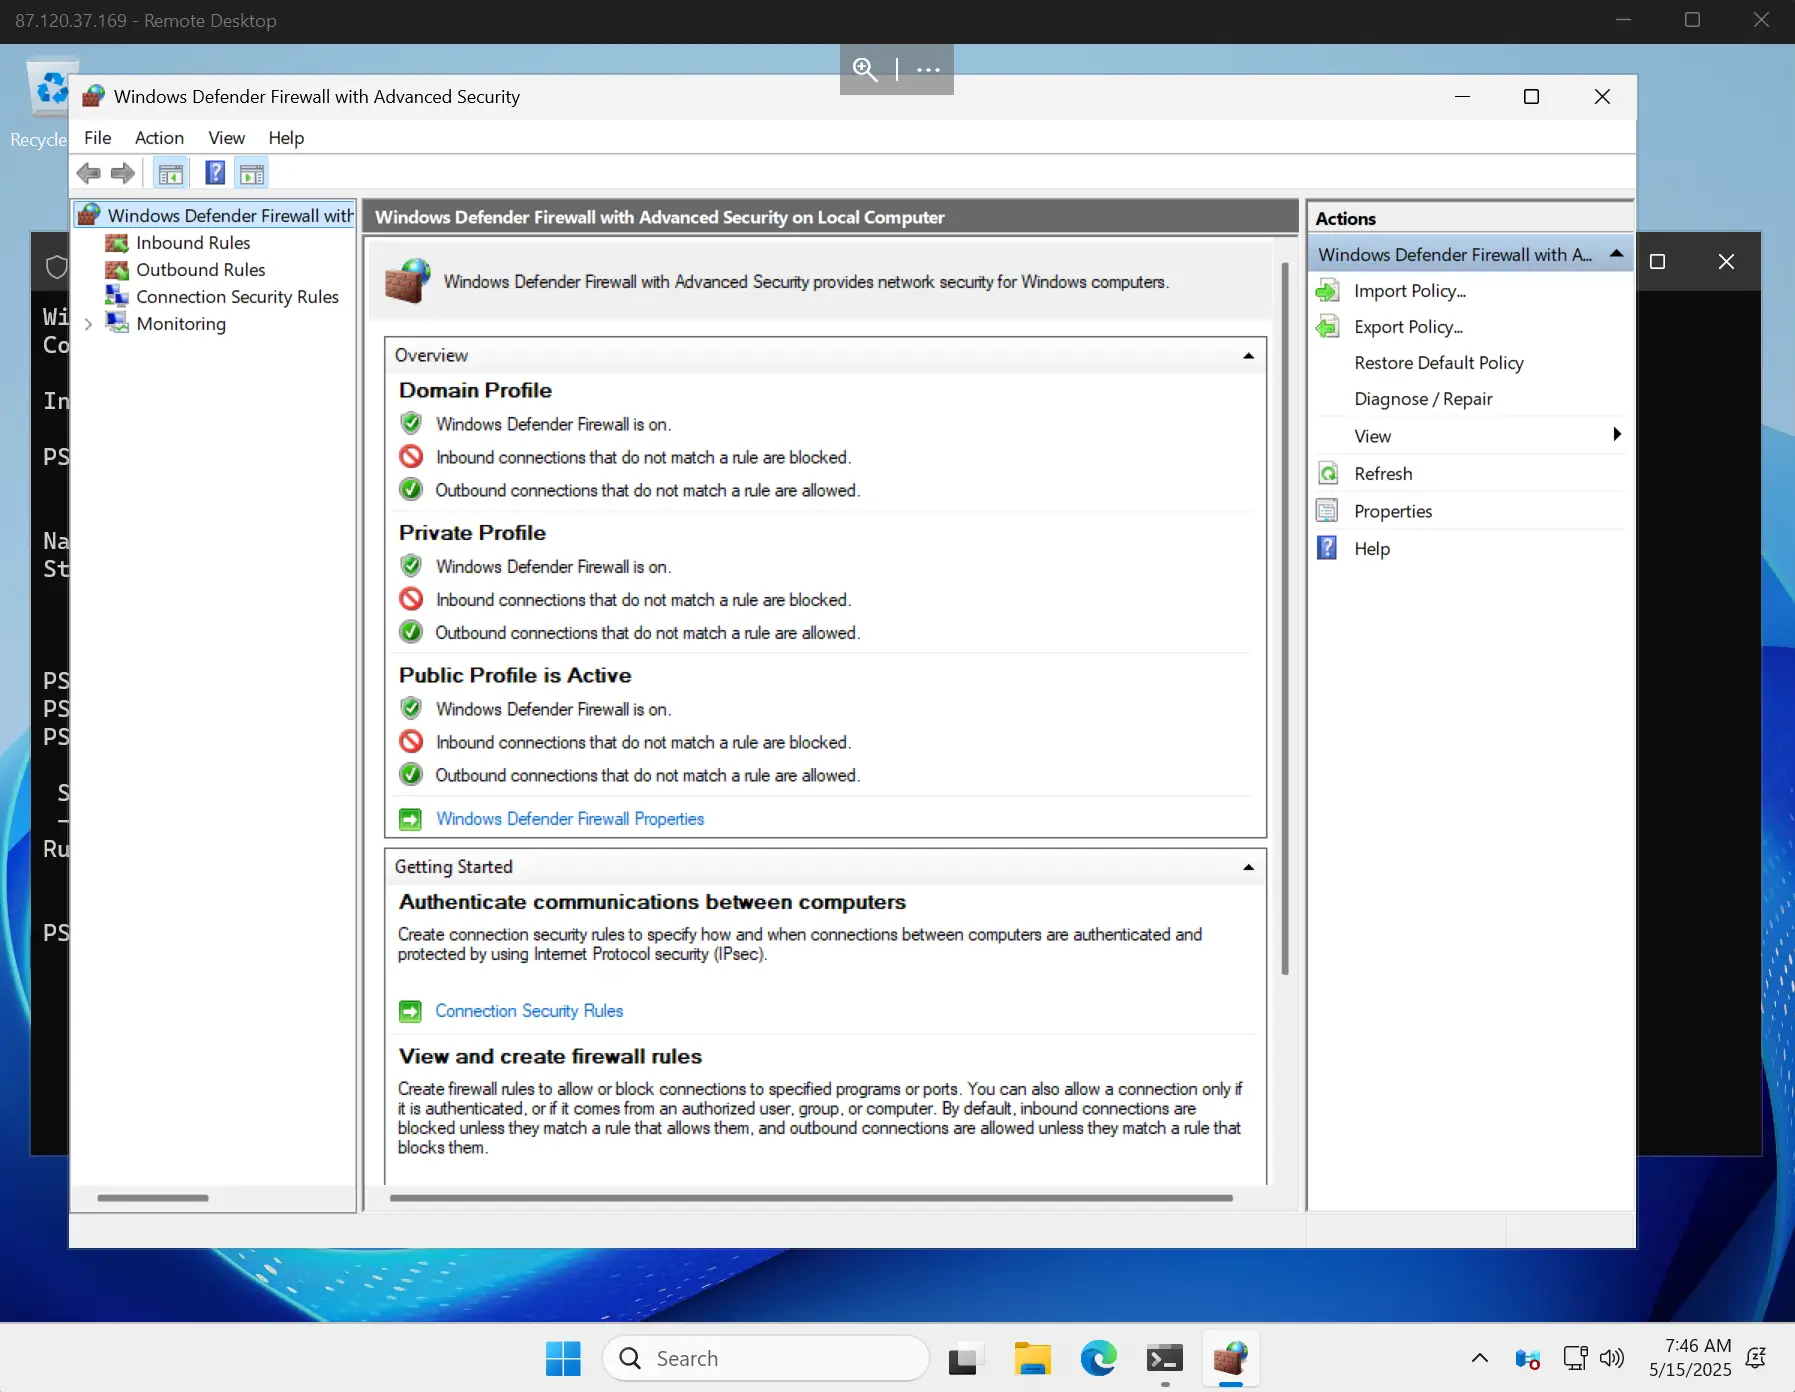
Click on Inbound Rules in the top left menu and search for the OpenSSH SSH server (sshd) rule: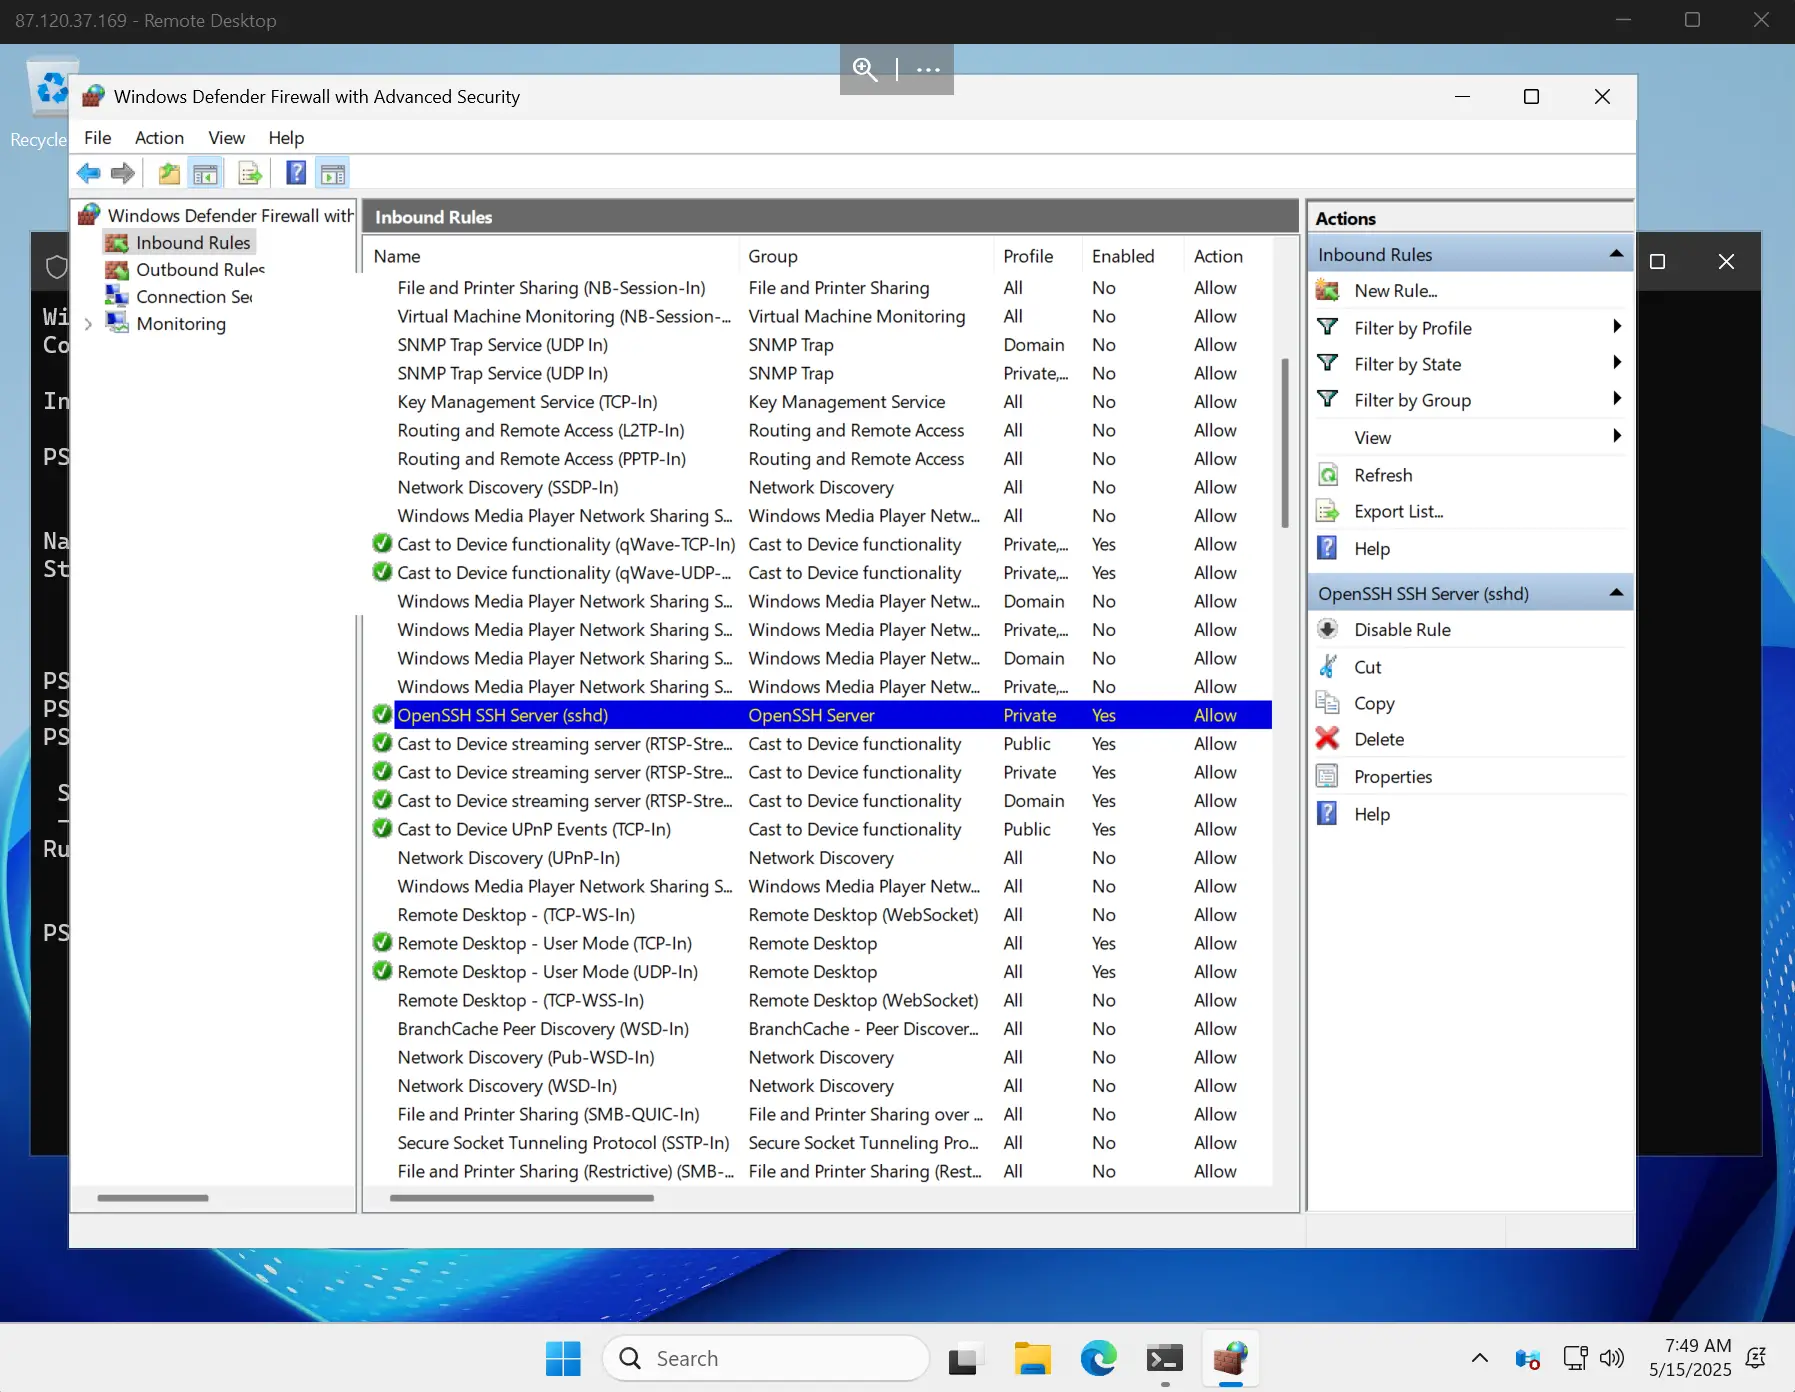
Double-click to open the rule’s properties, navigate to Advanced tab and edit the profiles to also include the Public profile: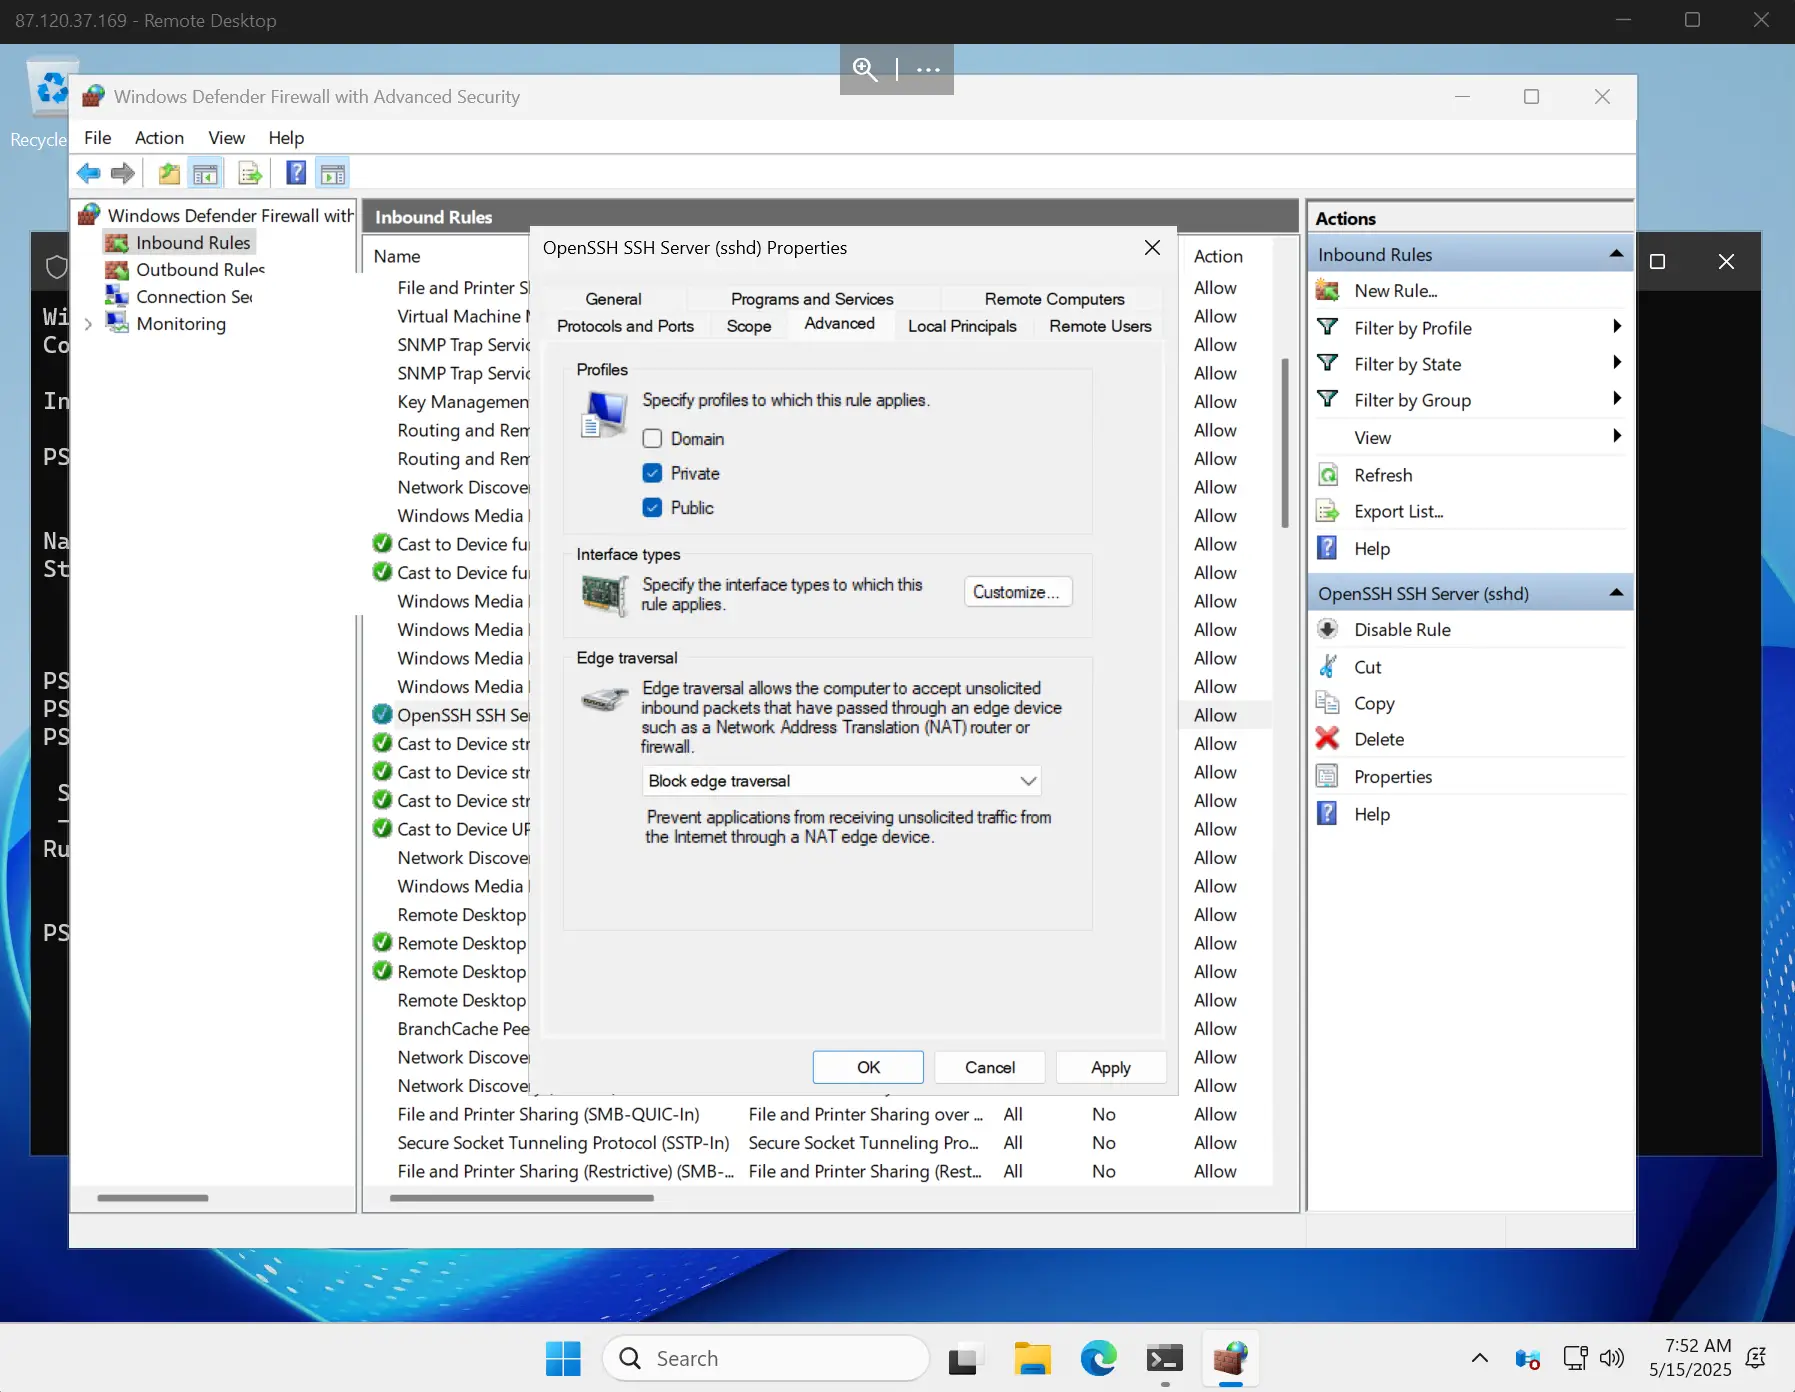
Then navigate to the Scope tab and in the Remote IP Addresses tab, click on These IP addresses and add your home network IPv4 address:
Finally, save the firewall settings by clicking OK. That’s everything that we needed to set up on the Windows VPS.
Note: You could also leave the Any IP address checkbox checked, but this will allow port 22 access to everyone on the public internet. This means that if anyone cracks your Windows username and password, they’d be able to connect to you machine via port 22 and potentially access sensitive data. Because of this, we recommend you only configure your home IP address to be able to connect to port 22.
How to connect to your Windows VPS proxy server
Now that we’ve set up the Windows VPS, it’s time to connect from your home computer. On your home Windows PC, search for "PowerShell” in the Start Menu and open it. Next, type in the following command:
ssh -D 1080 Administrator@<VPS-IP-address>where <VPS-IP-address> should be the IPv4 address of your Windows VPS: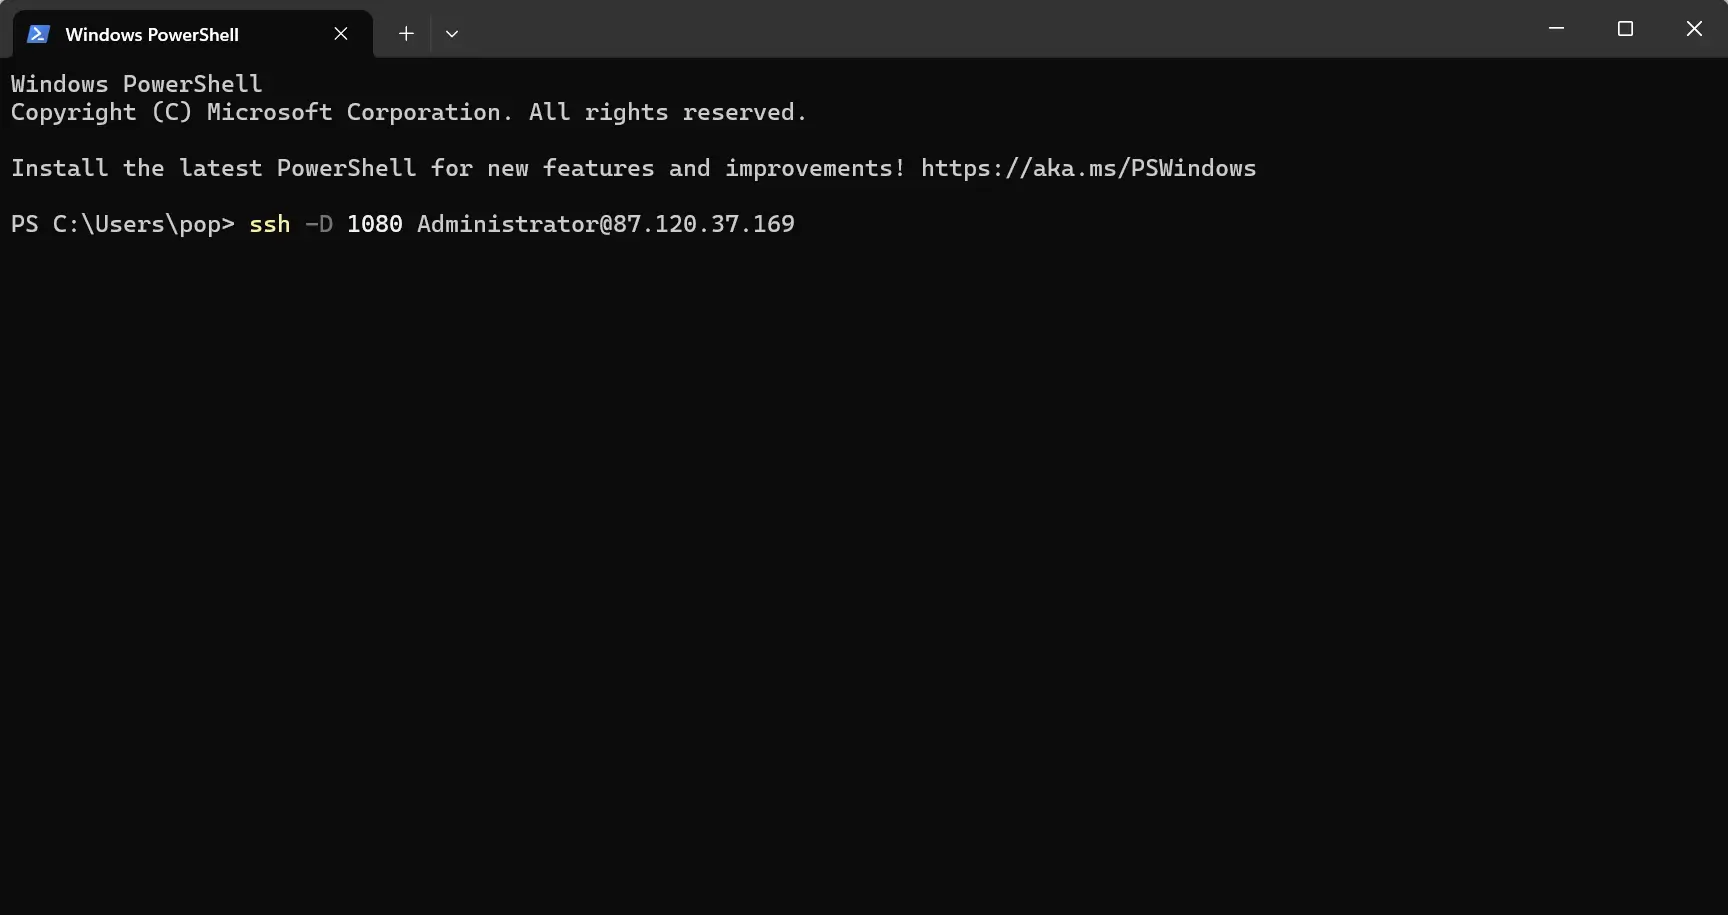
Note: -D 1080 specifies the port your SOCKS proxy will listen to on your local PC. A common choice is 1080. You can also use 8080 or 9090.
After running the command, you will be prompted to confirm that you want to connect to this host. This is a normal procedure when connecting to a SSH server for the first time. Type yes and press Enter: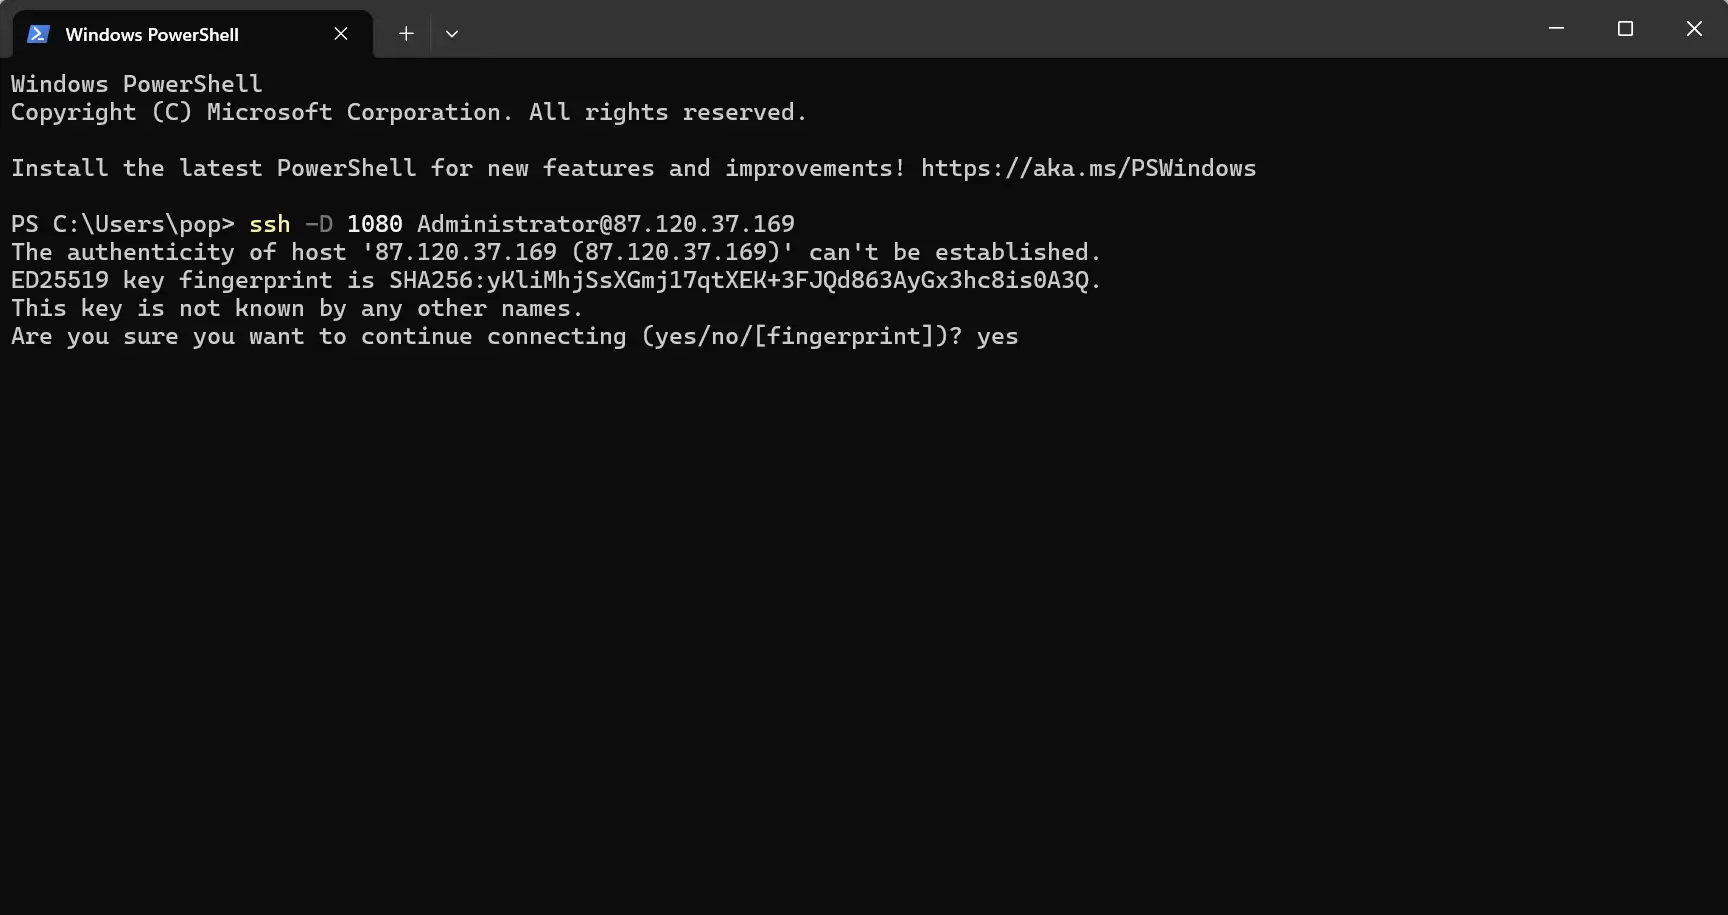
Then, you will be prompted to enter your Windows VPS password. Simply type it and press Enter. If the login is successful, you’d be presented with the administrator@<Windows-VPS-name> shell: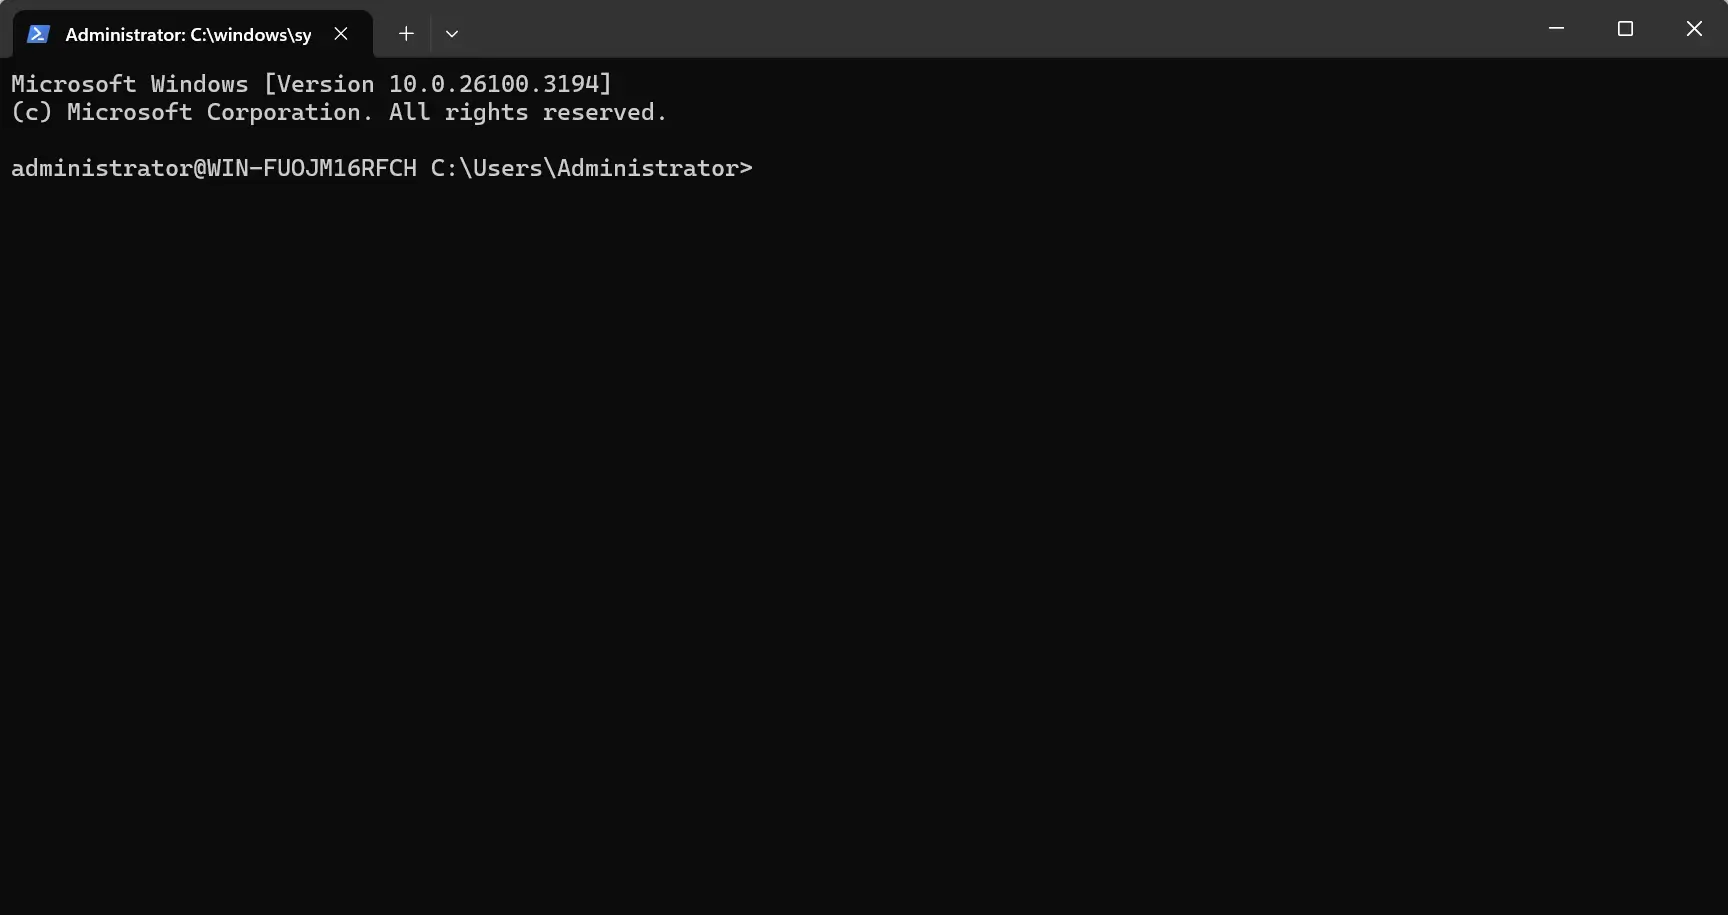 That’s it! Your local PC now has a SOCKS5 proxy running on 127.0.0.1 (localhost) at the port you specified (1080 in our case).
IMPORTANT: Once logged in, you won't see much happening in this window, but YOU MUST keep this PowerShell window open! If you close it, the SSH tunnel and your SOCKS proxy will be terminated!
Finally, it’s time to configure your Windows OS to use the proxy. You can do this via Start Menu -> Change Proxy Settings. Once there, click on Manual Proxy Setup -> Set up:
Enable Use a proxy server, then inside the Proxy IP address, input the following address: socks=127.0.0.1 and for Port use “1080” (the port that you’ve chosen). Finally, click on Save:

To confirm the new proxy settings, restart your browser and search for your IP address online. If everything is working correctly, the Windows VPS server’s IP address will be displayed in your browser:

Success! Your traffic is now being securely tunneled through your VPS!

