How to check how much resources my server is using
Published: 16 January 2020 • Updated: 02 October 2025 • 4 min read
Keeping track of your server’s resources is incredibly important as it can help you not only optimize your cloud instance, but also help you optimize it in order to guarantee better performance and faster loading times. In addition to improving the overall user experience of your hosted website or application, optimizing your server’s resources will make it easier for you when making changes, installing software or upgrading your server.
In this tutorial, we are going to show you how you can monitor your Linux server’s resources including CPU usage, storage space and RAM consumption in order to identify potential issues and areas that can be further optimized to improve your server’s performance.
IMPORTANT: The following tutorial refers to Linux-based servers only. Cloud instances that run on the Windows Server OS have an integrated resource monitoring system of their own.
How to monitor your server’s resources
Start by navigating to the Console, which is the place from where you can manage and customize your services. This is also where you can find more information about each of your servers including its resource usage. All of your services’ data is updated in real-time, meaning that you can always keep track of how each resource is being utilized.
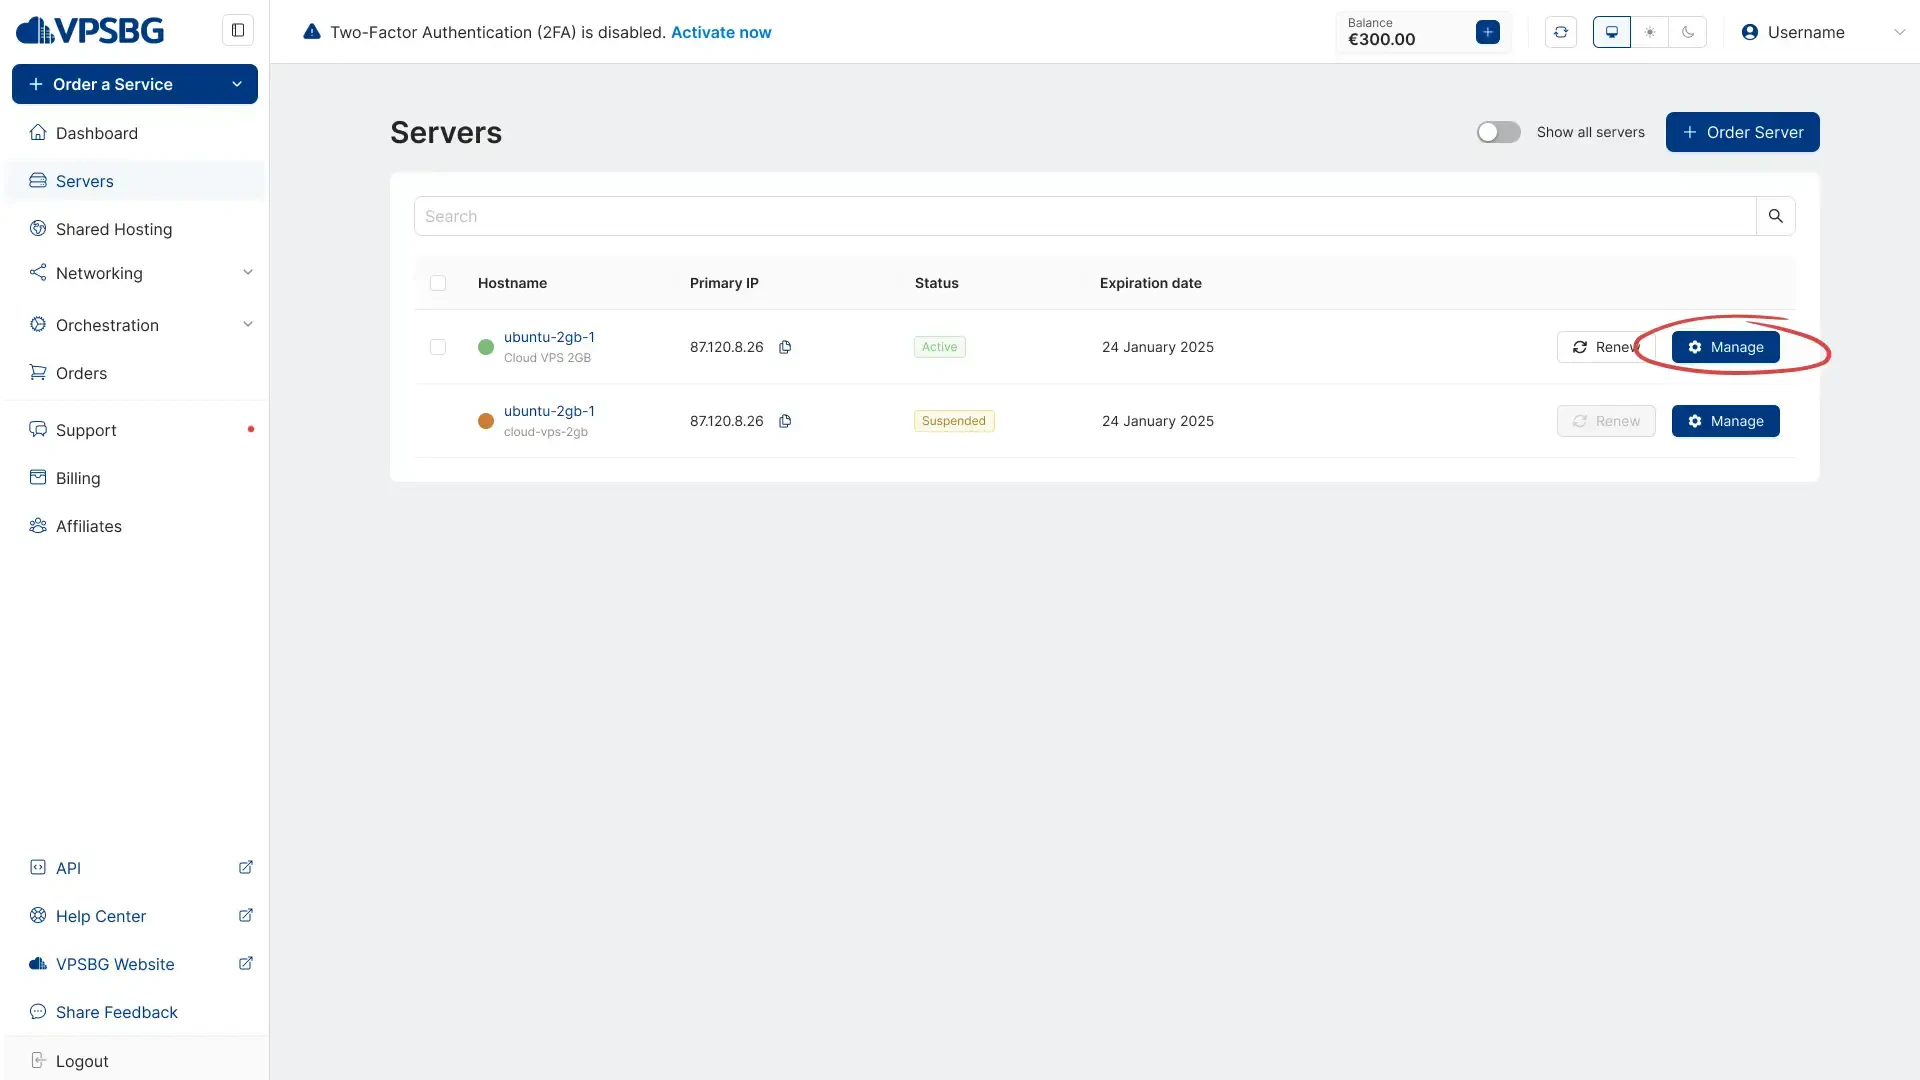
After logging into your account, click on the 'Servers' tab and then click the 'Manage' button for the server that you want to check the resources.
To check how much resources is currently using, simply look to the 'Resources' section.
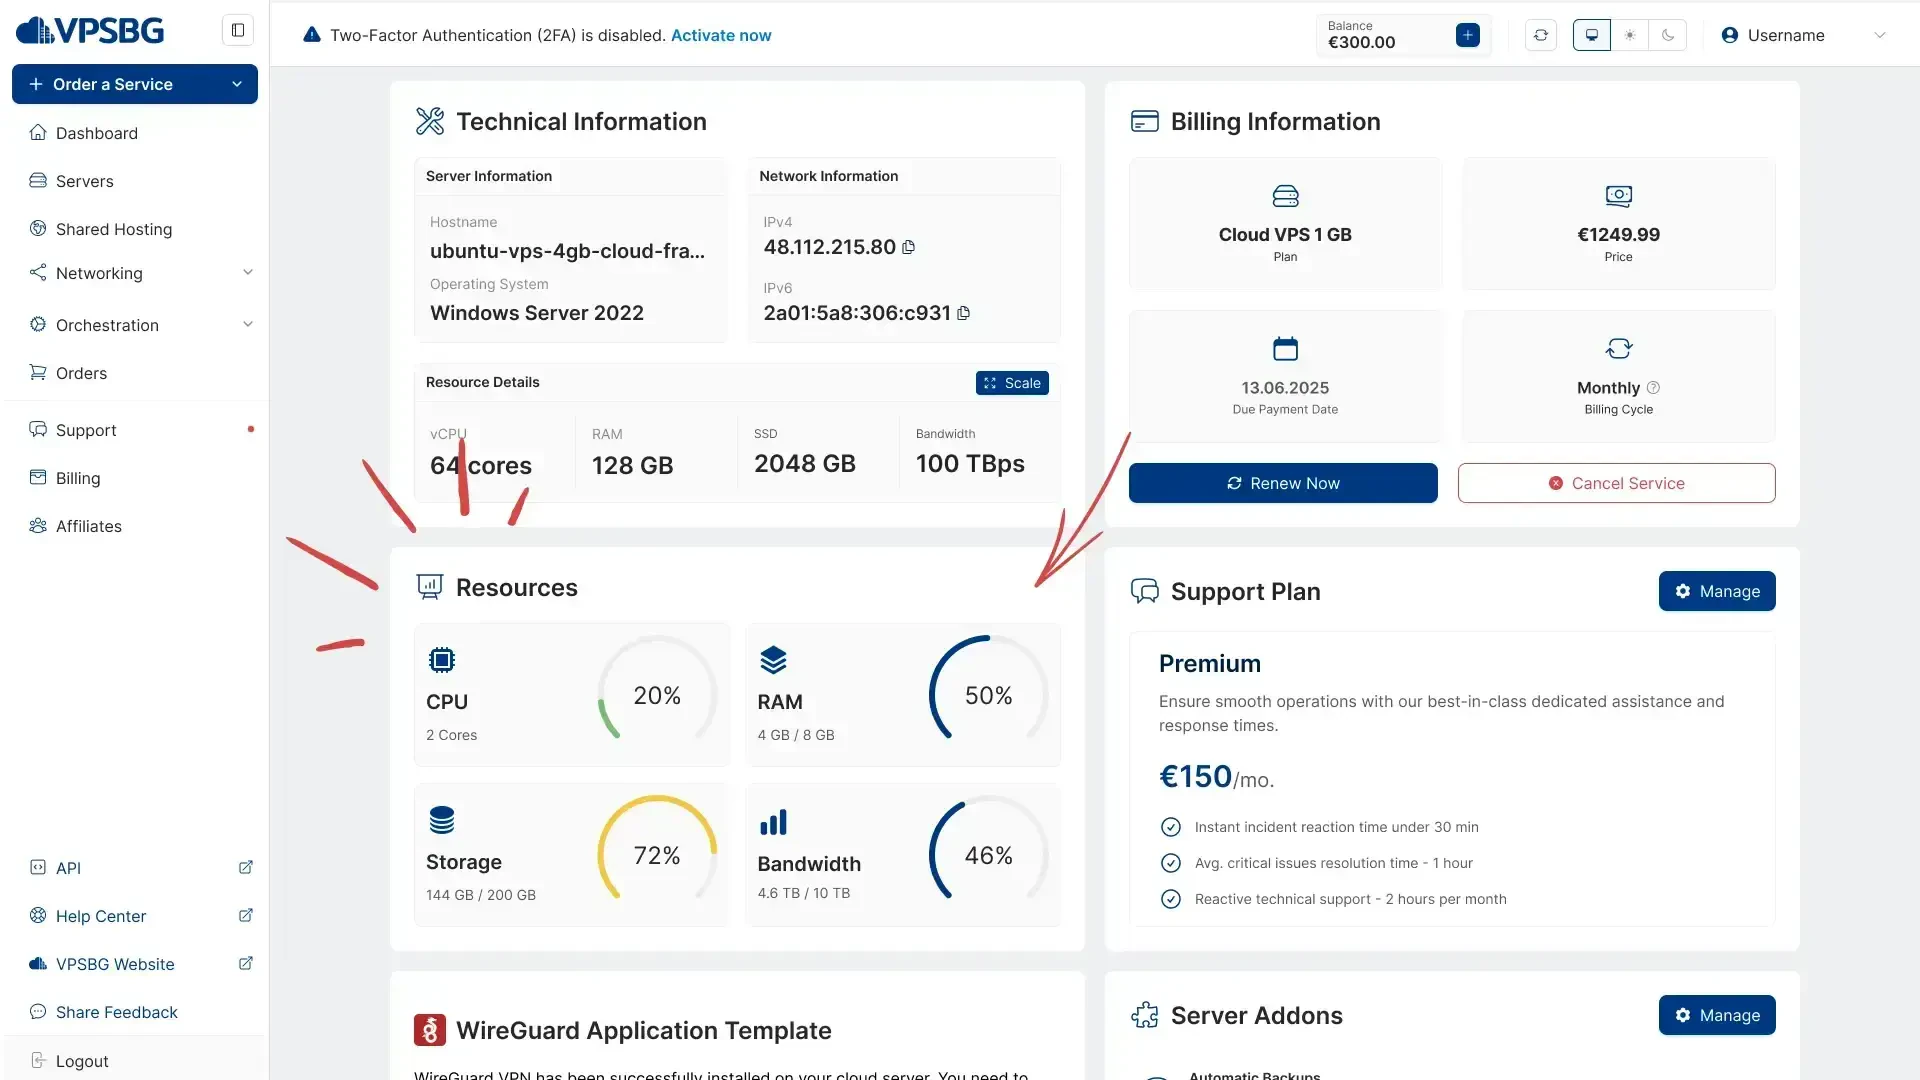
As mentioned already, all of the information updates in real-time, meaning that you don’t need to refresh the page - everything happens dynamically.
How to manually monitor your CPU usage
If you want to manually check how much CPU your server is using, you will need to first log into your server via SSH. Next, type this command into the terminal:
topThe application that we will be using is included in every Linux distribution. Because of this, you don’t need to install any additional packages in order to use it. When you run the aforementioned command, you will get a list of all active processes that are currently running on your server. This list changes dynamically when certain background tasks start and finish. If you wish to hide all idle processes you can simply add -i to the command as show in this image:

You can now see the total CPU usage. If you wish to check how many resources each CPU is using, you can press 1. Additionally, if you would like to learn more about the ‘top’ command, simply type in this into your terminal:
man topHow to check RAM consumption
Checking your RAM consumption is as easy as checking the CPU usage as you can once again use the ‘top’ command. Another way of monitoring your RAM is by typing this command into your terminal:
free -mThe output will look similar to this:

The -m parameter is used in order to show RAM consumption in megabytes.
You might also want to look at the Mem line and view both the free and the occupied columns. In our example the server says that it is using 5776 MB of RAM, whereas the amount of free RAM is only 4596 MB. This is in fact incorrect. The server is actually using 6774 MB and has a total of 8609 MB free RAM. These differences occur because of Linux’s overall structure and design. The operating system uses the free memory disk for caching in order to improve performance.
How to keep track of your storage space
To check your server’s storage, simply type this command into the terminal:
df -hThe -h parameter is used to display the disk values in gigabytes. The output of the command should look like so:

In our case, the server currently has 26GB of free disk space.
How to monitor your network consumption & bandwidth
Unfortunately, there is no built-in tool for Linux that can help you monitor your network activity and bandwidth consumption. There are a number of other tools that you can install that can be instead used to keep track of your network. One such tool is ‘iftop’ which you can use to get a quick overview of your network activities and their expenses through a good interface.
You can install iftop on Debian or Ubuntu by using the following command:
apt-get install iftopAlternatively, you can also get it on RHEL and CentOS with this command:
yum install epel-release
yum install iftop
Once the installation has successfully concluded, you can type this command in order to run the application:
iftopThe output will look similar to this:

If you happen to encounter any problems while monitoring or while trying to monitor your VPSBG server, please do not hesitate to contact us. Our support team will help you resolve any issues as fast as possible.