Adding new user accounts on a Windows VPS is a fundamental administrative task for managing access and security. As a matter of fact, it is a really simple task that can be quickly done through the graphical interface of your VPS.
Setting up the user credentials
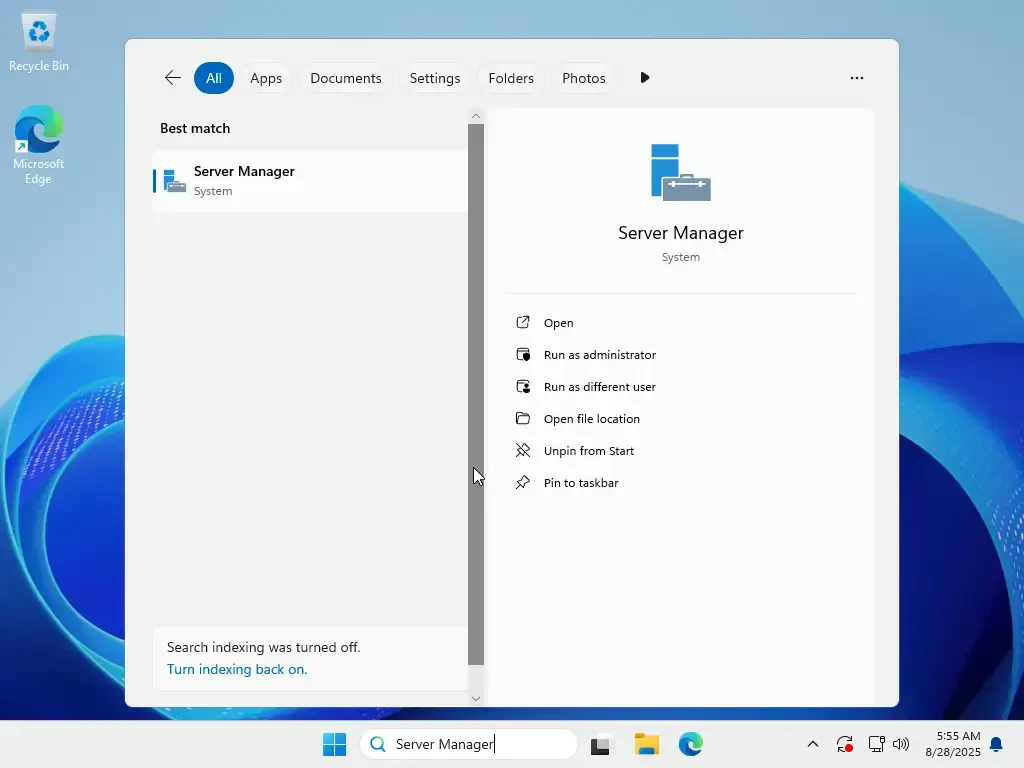
Start by opening the Start Menu and typing Server Manager in the search bar. Next, click on the application to open it.
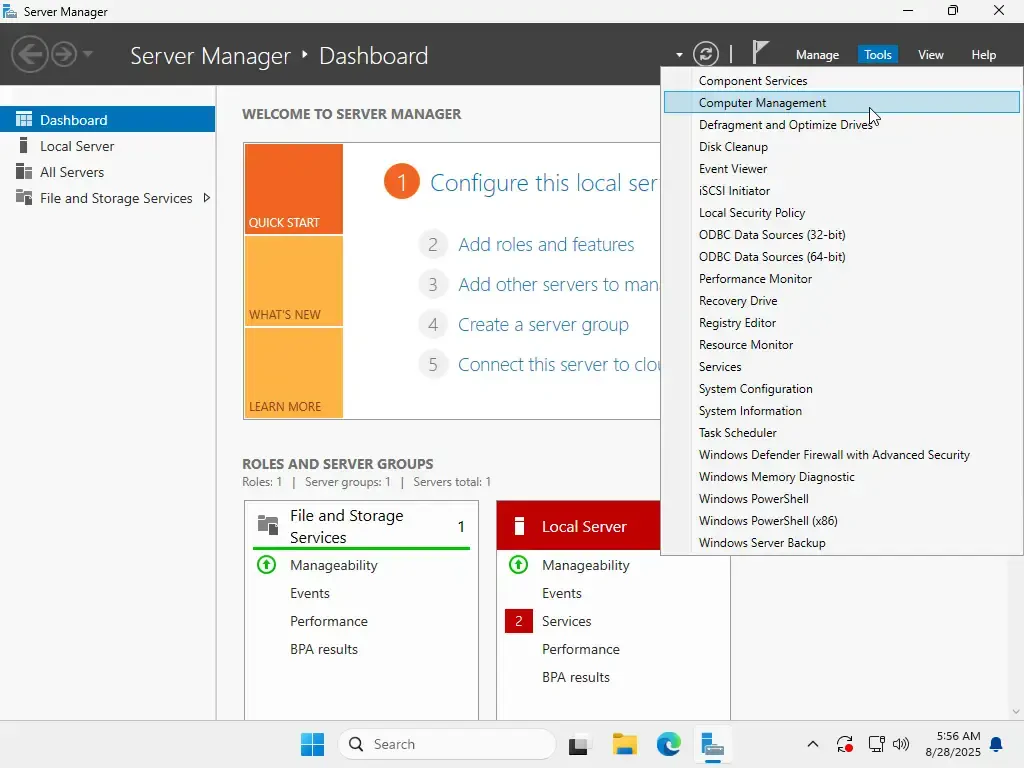
Here, in the Server Manager window, click on the Tools menu in the top-right corner and select Computer Management from the drop-down list.
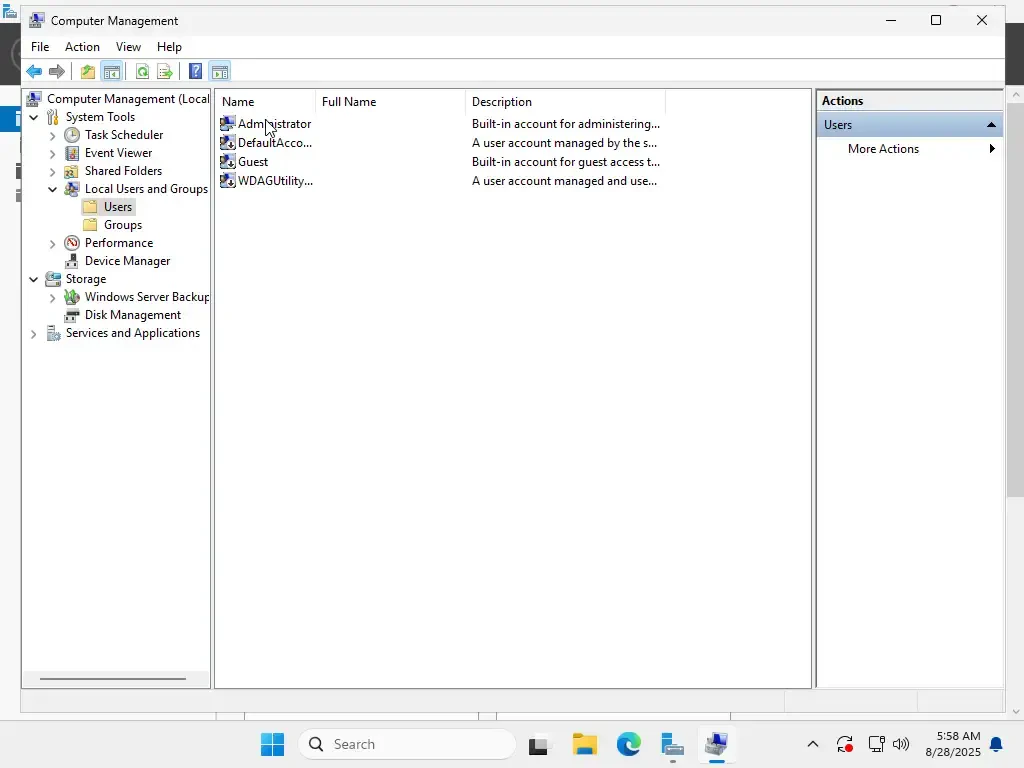
After that, in the Computer Management window, navigate to System Tools > Local Users and Groups > Users. This will display a list of all current users for the server.
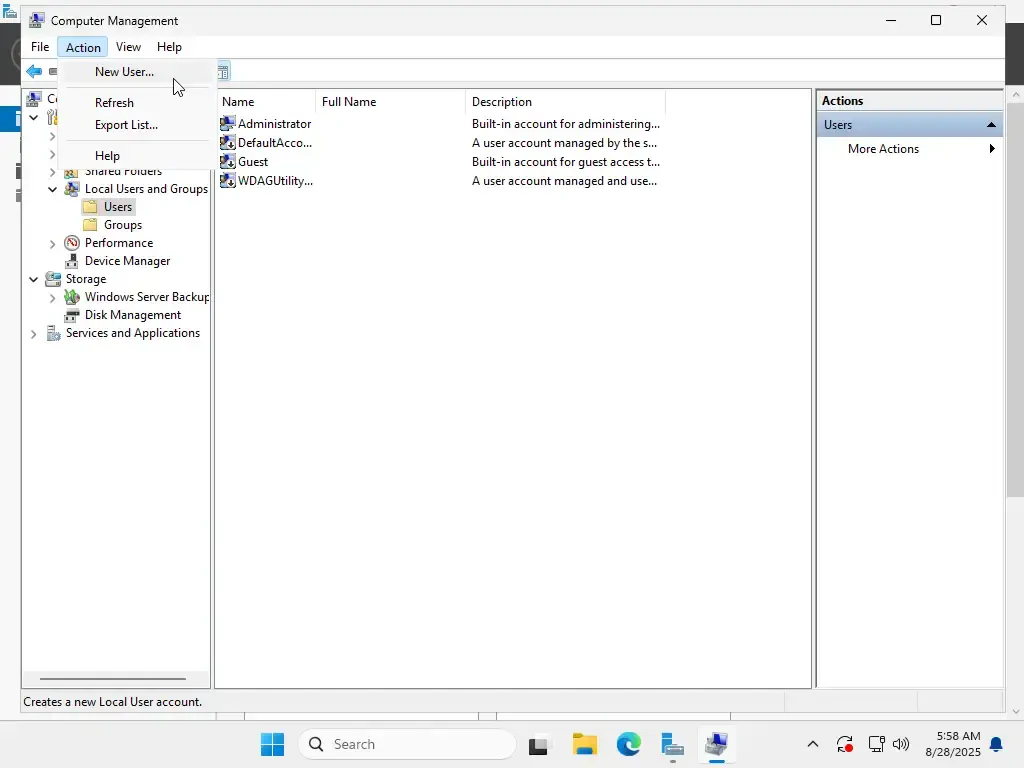
From the top menu, simply click on Action and then select New User....
A New User dialog box will appear. Enter a Username and a make sure to choose a secure Password. It is recommended to leave the User must change password at next logon checkbox ticked for security. Click Create when you are done.
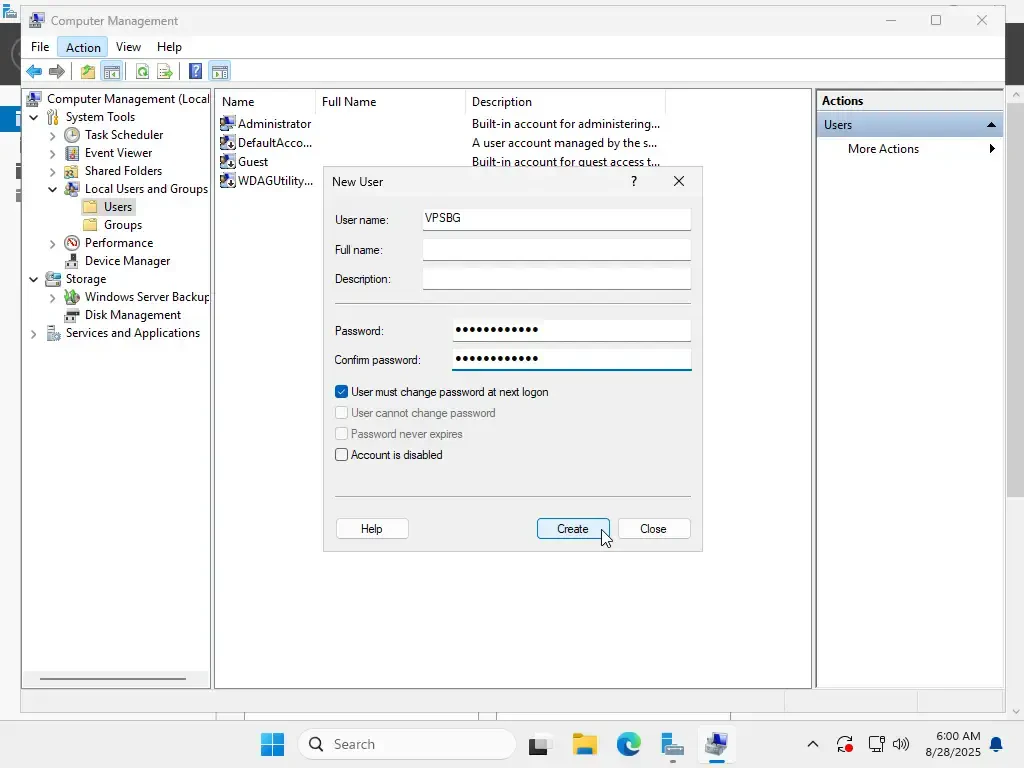
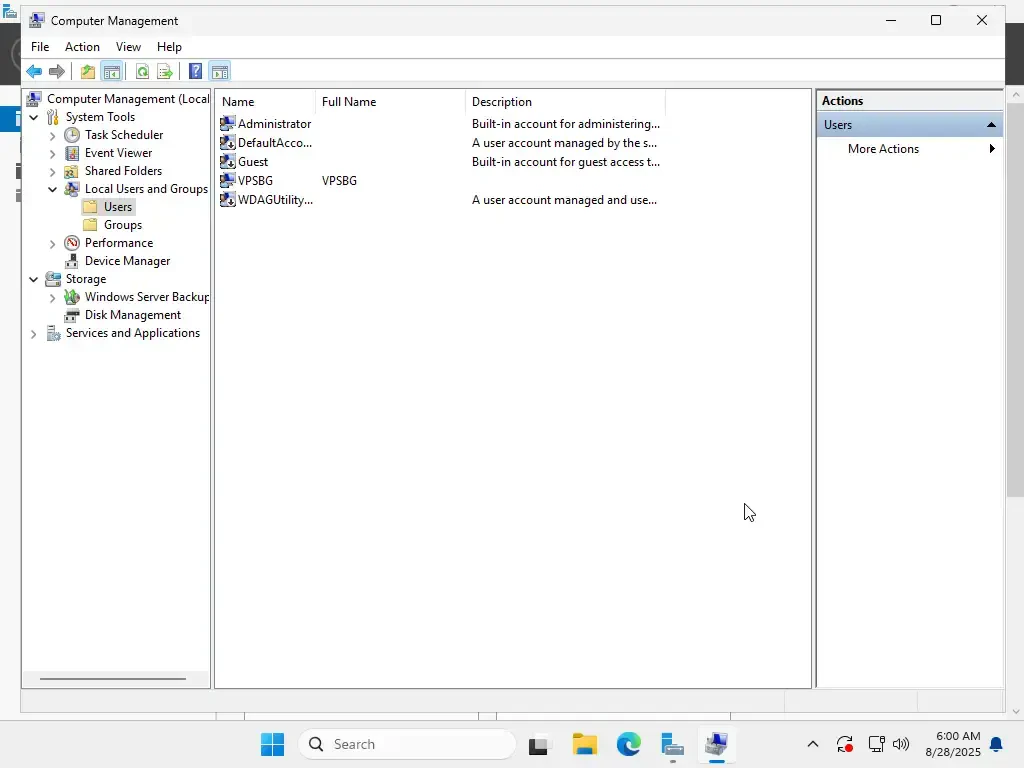
After clicking Create and then Close, you will see the new user has been added to the list of users.
Testing the new user
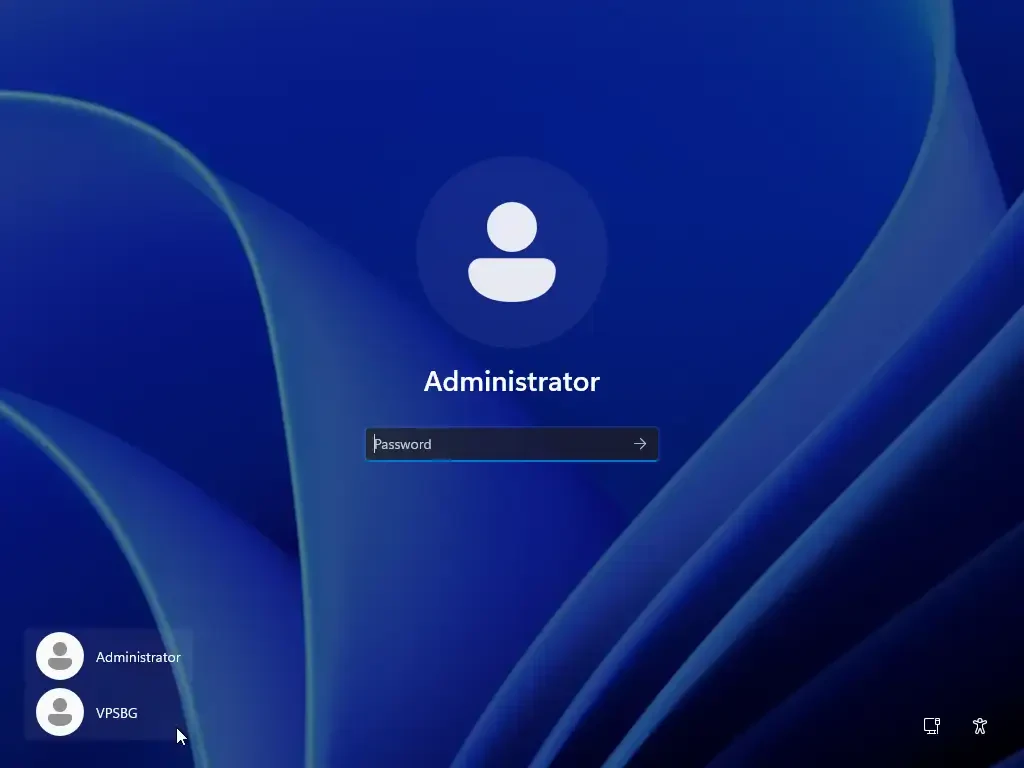
To test the new account, sign out of the Administrator profile. When on the login screen, select the new user account to log in.
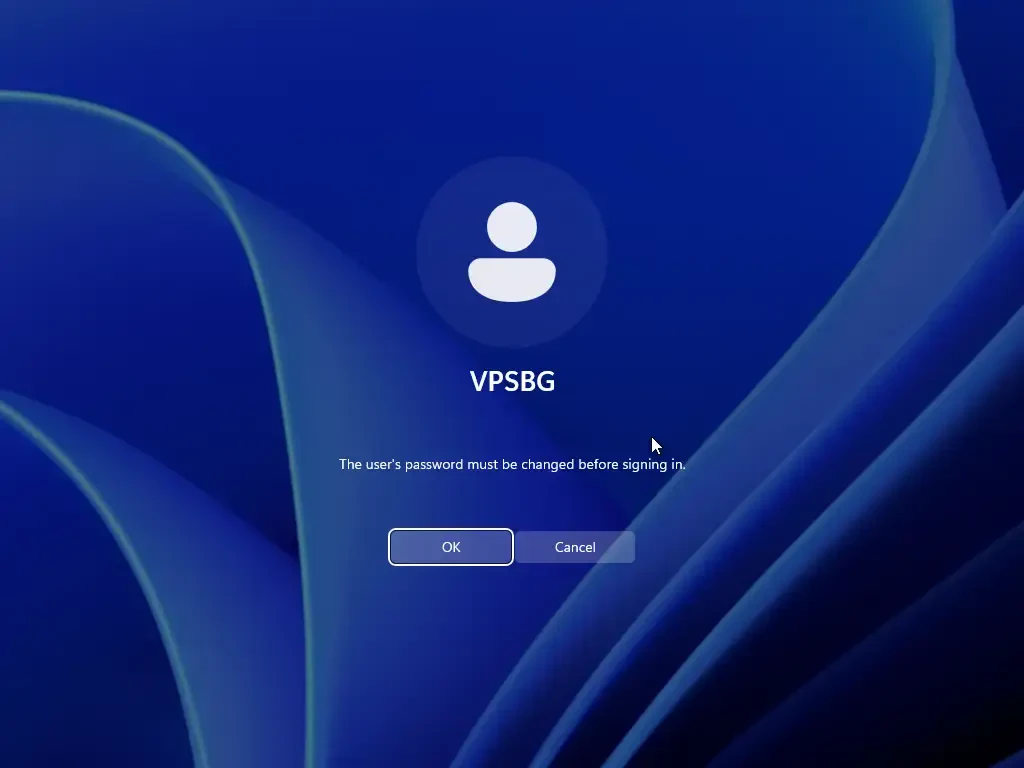
Because the User must change password at next logon option was enabled, you will be prompted to update the password immediately. Click OK to proceed.
Once the password has been changed, you will be successfully logged into the new user's desktop environment.
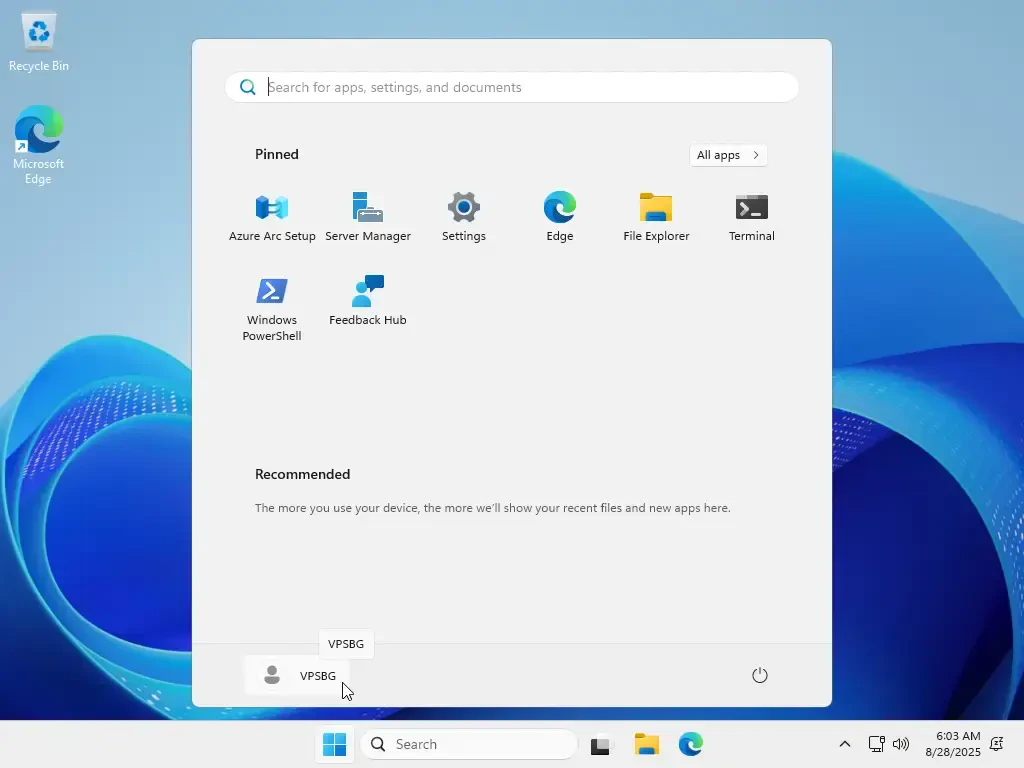
That’s it! You have successfully created a new user on your Windows VPS!


