How to install WireGuard VPN & add users on Linux OS
Published: 27 March 2023 • 6 min read
Wireguard is a fast and modern VPN protocol that allows you to securely connect to remote servers or devices over the Internet. Due to its popularity and ever-increasing presence on the market, we will explain how to install Wireguard VPN on a Linux server using the command-line interface.
How to install WireGuard VPN
First and foremost, you need to connect to your virtual server via SSH or VNC, as we are going to be using the terminal.
After successfully establishing a connection, you will need to update the packages list using the “apt update” command as shown in the image below:
apt update
In this tutorial we will be using the “apt” package manager on an Ubuntu 22.04 OS. If you’re using a Red Hat-based Linux distribution such as CentOS, Fedora or AlmaLinux, you will need to use the “yum” package manager.
Next, we need to install the WireGuard package with the help of this command:
apt install -y wireguardIt is available in the default package repositories of most modern Linux distributions, including Ubuntu, Debian, Fedora and CentOS. You can see the installation details for all supported Linux distributions on WireGuard’s official website. Once you have executed the command, you should see the following:

After successfully installing WireGuard, we will continue by setting up a private-public key pair for the server. However, before we do that, we will firstly run the umask 077 command, which limits access to the newly-created files to the current user only, which is an important step that needs to be taken as an additional security measure. The commands that you need to enter are:
umask 077wg genkey > privatekeywg pubkey < privatekey > publickey
This will create the files “privatekey” and “publickey” in your current directory. You can take a look at their contents using the “cat” command like so:
After obtaining the public and private keys, we need to create a configuration file for the server. We are going to do this using the “nano” text editor, which you can open up with the following command:
nano /etc/wireguard/wg0.confNext, paste the following information, but make sure to change the content of the <PRIVATE_KEY> command with the information from your corresponding “privatekey” file that you previously generated:
[Interface]
Address = 10.8.0.1/24
PrivateKey = <PRIVATE_KEY>
PostUp = iptables -A FORWARD -i %i -j ACCEPT; iptables -t nat -A POSTROUTING -o eth0 -j MASQUERADE
PostDown = iptables -D FORWARD -i %i -j ACCEPT; iptables -t nat -D POSTROUTING -o eth0 -j MASQUERADE
ListenPort=51820When you paste the commands, make sure to save the file by using the following key combinations: “CTRL+x” followed by “y” and Enter.
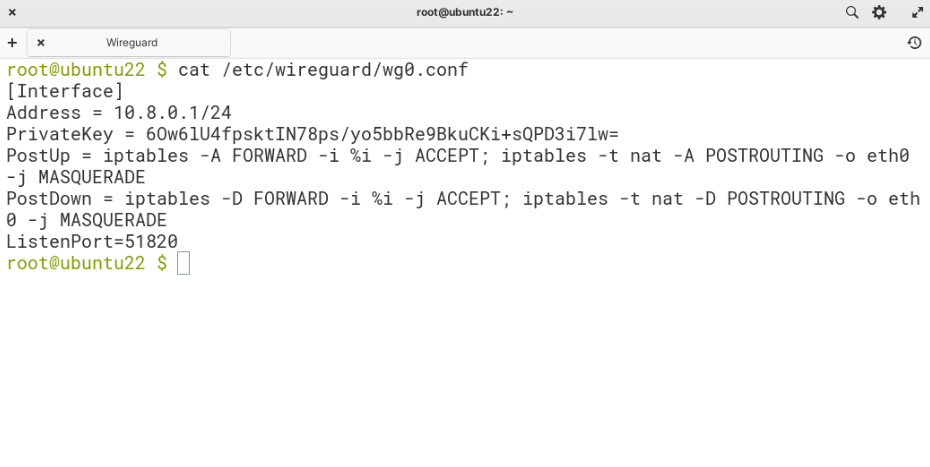
The final file should look similar to this:
How to create clients
Next, we have to define the clients (peers) that will be able to connect to the server. For each peer we need a different pair of keys. Let’s create a new client using the following commands:
mkdir client1cd client1/wg genkey > privatekeywg pubkey < privatekey > publickey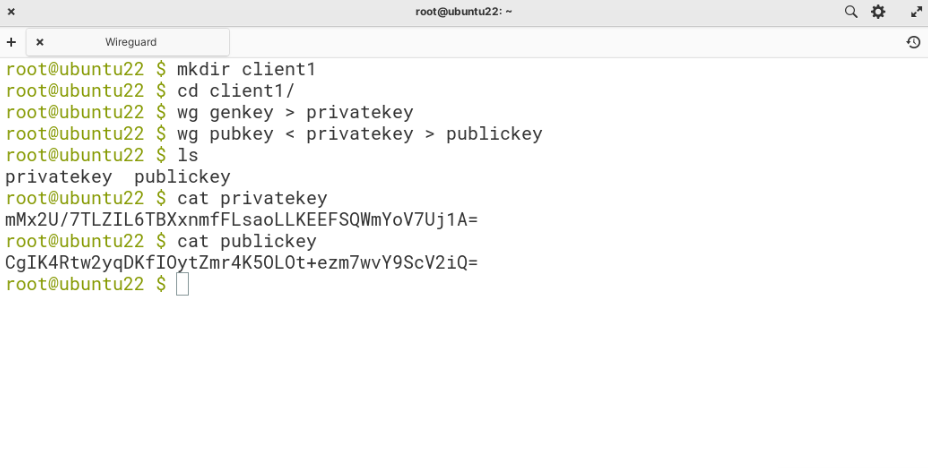
We created a new folder client1, which is not mandatory, but helps when you are making your way around the files. Once you have entered the directory, you will need to only repeat the last step to generate new keys rather than having to go through the entire process.
To add the new client, open up the wg0 configuration file again using the command from before:
nano /etc/wireguard/wg0.confNext, append this block at the end of the file:
[Peer]
PublicKey = <client1’s PUBLIC KEY>
AllowedIPs = 10.8.0.2/32Again, before pasting make sure to edit the <client1’s PUBLIC KEY> section with your actual public key for client1, which you previously defined in the publickey file inside the client1 folder.
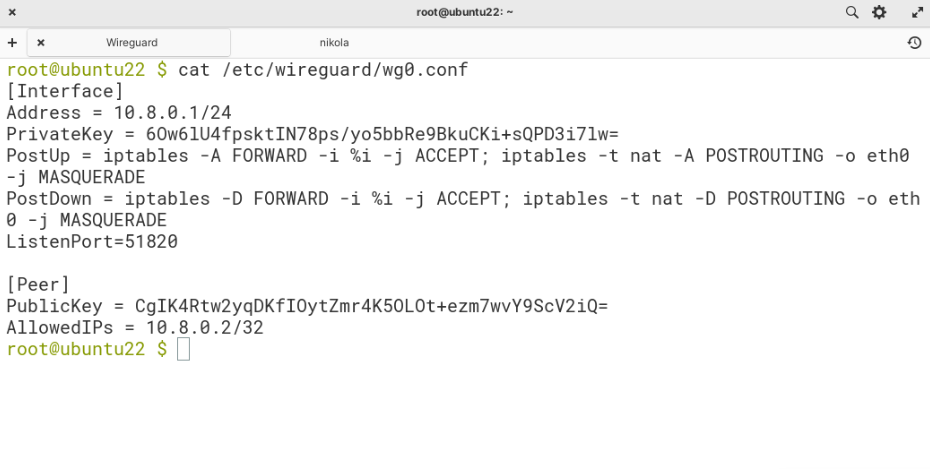
The final wg0.conf should look similar to this:
We need to create one last configuration file, which the client will use to connect to the server.
In the client1 folder, create a file client1.conf:
nano client1.confThen, add the following block:
[Interface]
Address = 10.8.0.2/24
PrivateKey = <client1’s PRIVATE_KEY>
[Peer]
PublicKey = <SERVER_PUBLIC_KEY>
AllowedIPs = 0.0.0.0/0
Endpoint = <SERVER_PUBLIC_IP>:51820
PersistentKeepalive = 25Here we are also using client1’s private key and server’s public key from before. You also need to enter the server's public IP address.
The final client1.conf should look similar to this:
If you want to add more than 1 client, simply repeat the previous steps as many times as needed. Just make sure to increment the address by 1 in the last octet. For example, if client1 has an address of 10.8.0.2, then client2 needs to have an address 10.8.0.3 and so on. This also applies for the [Peer] section in the wg0.conf and the [Interface] section in the clientX.conf.
What is left now is to start the WireGuard network interface. We will do this with the “wg-easy” tool. The command that we are going to be using is wg-quick up wg0 as wg0 is the name of the configuration file we created in the previous step.
wg-quick up wg0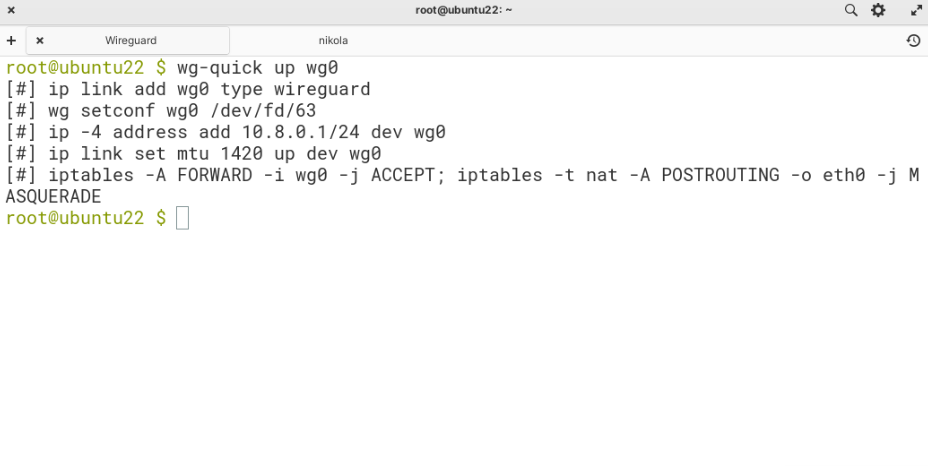
As an optional step, you can also run the systemctl enable wg-quick@wg0.service command, which will automatically start the wg0 interface after a server restart.
systemctl enable wg-quick@wg0.serviceBy default, Linux servers do not allow packet forwarding between different network interfaces, so we need to disable this restriction before starting the WireGuard interface. To do this, open the sysctl.conf using nano /etc/sysctl.conf and uncomment #net.ipv4.ip_forward=1 by removing the ‘#’ in front. Save the file with “CTRL+x” followed by “y” and Enter.
nano /etc/sysctl.confFinally, to apply the changes type:
sysctl -pTo confirm that the changes have taken effect, use this command:
sysctl -n net.ipv4.ip_forward
Connecting to your WireGuard VPN server
You can now begin using your VPN server! You should be able to import the client1.conf into the client that you will be using to connect. For example, if you want to protect your home computer which is running Windows OS, you would need to download the windows client from WireGuard’s installation page and import the client1.conf that you have generated. In order to import the client, you can simply copy and paste the file from the terminal into the filesystem on your personal computer.
Another option that you can use to connect to your server is to generate a QR code, which is extremely helpful when connecting a mobile device. To do this, you will need to install the “qrencode” package:
apt install -y qrencode
After installing the package, run the following command:
qrencode -t ansiutf8 < client1.conf