QEMU Guest Agent (QGA) Troubleshooting Guide
Published: 02 February 2026 • 5 min read
The QEMU Guest Agent (QGA) is a small daemon (service) that runs inside your VPS and enables direct communication between the virtualization platform/host hypervisor and the guest operating system on your virtual machine.
QGA is required for several important management features such as changing your server’s hostname, changing your root (administrator) password, managing SSH keys, executing basic guest commands from outside your virtual machine and many others.
This guide will help you troubleshoot some of the most common QGA problems and will help you get thing up and running.
Most Common QGA Problems
When trying to perform actions that require QGA, you might get an error that QGA cannot be reached. This is because QGA was most likely not properly installed or isn’t running inside of your virtual machine.
The most common reason for this is if the QEMU Guest Agent is missing, stopped, disabled or if the server was restored from an image or a backup that did not include it. On Windows VPS instances, QGA may also be unavailable if the VirtIO drivers are not installed.
How to fix QGA Problems on Debian, Ubuntu
Being a popular choice for an OS, let’s start by focusing on problems that are usually found on Ubuntu/Debian virtual machines. Remember to log in to your VPS via SSH or console access in order to run any of the following commands.
Try Starting QGA
If by some reason, QGA has been stopped or it is disabled, you can simply run this command to try and start the agent:
systemctl start qemu-guest-agentIf you don’t get any output, then you should try to see if QGA is installed on your virtual machine.
Check if QGA is Installed
The most common cause for a QGA unreachable error is that the agent hasn’t been installed on the virtual machine. This could happen during installation or it might be missing if you have previously removed it.
First, run the following command:
dpkg -l | grep qemu-guest-agentIf QGA is installed, you should see an output similar to the one from the screenshot below:

While your output might resemble this, that doesn’t mean you have QEMU guest agent up and working. For example:
Notice how this output begins with “rc”. That means that QGA was previously installed but has been removed and only its configuration files remain on your system.

How to Install QGA
If there is no output from the command above, you need to install QGA by running the following command:
apt-get install qemu-guest-agentWait for the installation to complete successfully. After that you should start the daemon:
systemctl start qemu-guest-agentThen enable the service to autostart (permanently) with:
systemctl enable qemu-guest-agentFinally, You can check whether the installation was successful by running:
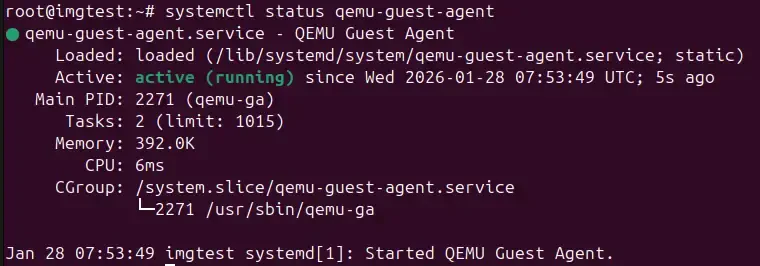
systemctl status qemu-guest-agentYour CLI output should resemble the one below and the service should show Active: active (running).
How to fix QGA Problems on RHEL, AlmaLinux, Rocky Linux & Fedora
Similarly to Ubuntu and Debian, you need to log into your virtual machine to ensure that you can run the following commands.
Try Starting QGA
Again, the first thing that you need to try is to attempt to start QGA using this command:
systemctl start qemu-guest-agent
If you get a positive output, then QGA was basically stopped or disabled. If you don’t get any output, then you can proceed to checking whether QGA is installed on your virtual machine.
How to check if QGA is installed
Firstly, run this command:
rpm -qa | grep qemu-guest-agentIf QGA is installed, the package name will be listed.

How to Install QGA
If the package is not present, install it using:
dnf install -y qemu-guest-agentAllow the installation to complete then proceed with:
systemctl start qemu-guest-agentFinally, you can check the status of the service with:
systemctl status qemu-guest-agentYour CLI output should resemble the one below and the service should show Active: active (running).

How to Fix QGA Problems on Windows Server
On Windows VPS instances, QGA is included as part of the VirtIO drivers package and runs as a Windows service.
How to check if the QGA service is running
- Open the Start Menu
- Type services
- Press Enter
In the Services window, locate QEMU Guest Agent. It should be tucked in right around the red highlighter in the screenshot below.
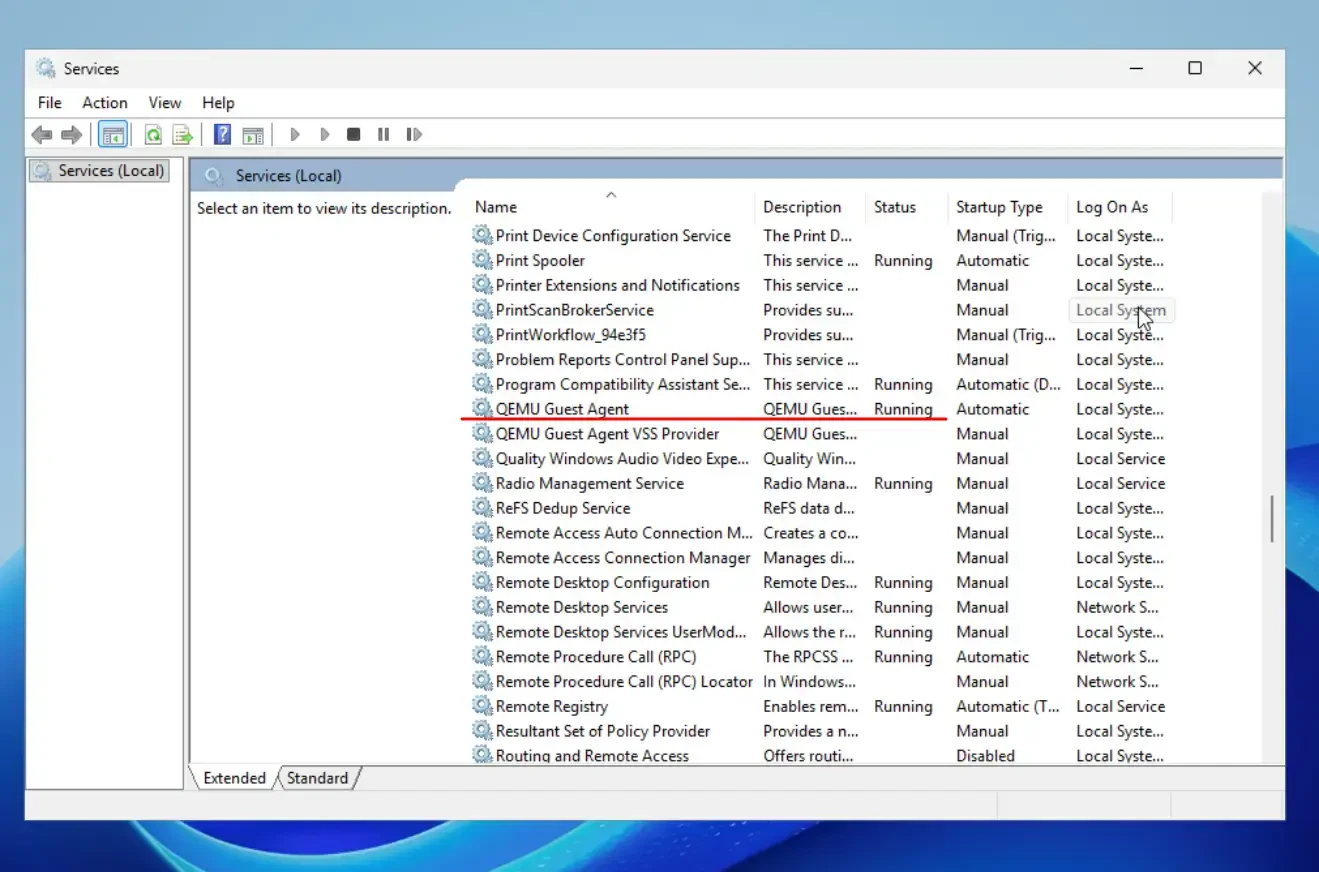
Check the Status column. If the service is Running, QGA is working correctly but if the service is Stopped, it must be started manually. If that is the case, then QEMU guest agent should be started manually.
To activate the agent, simply right-click on the the QEMU Guest Agent service and click Start.
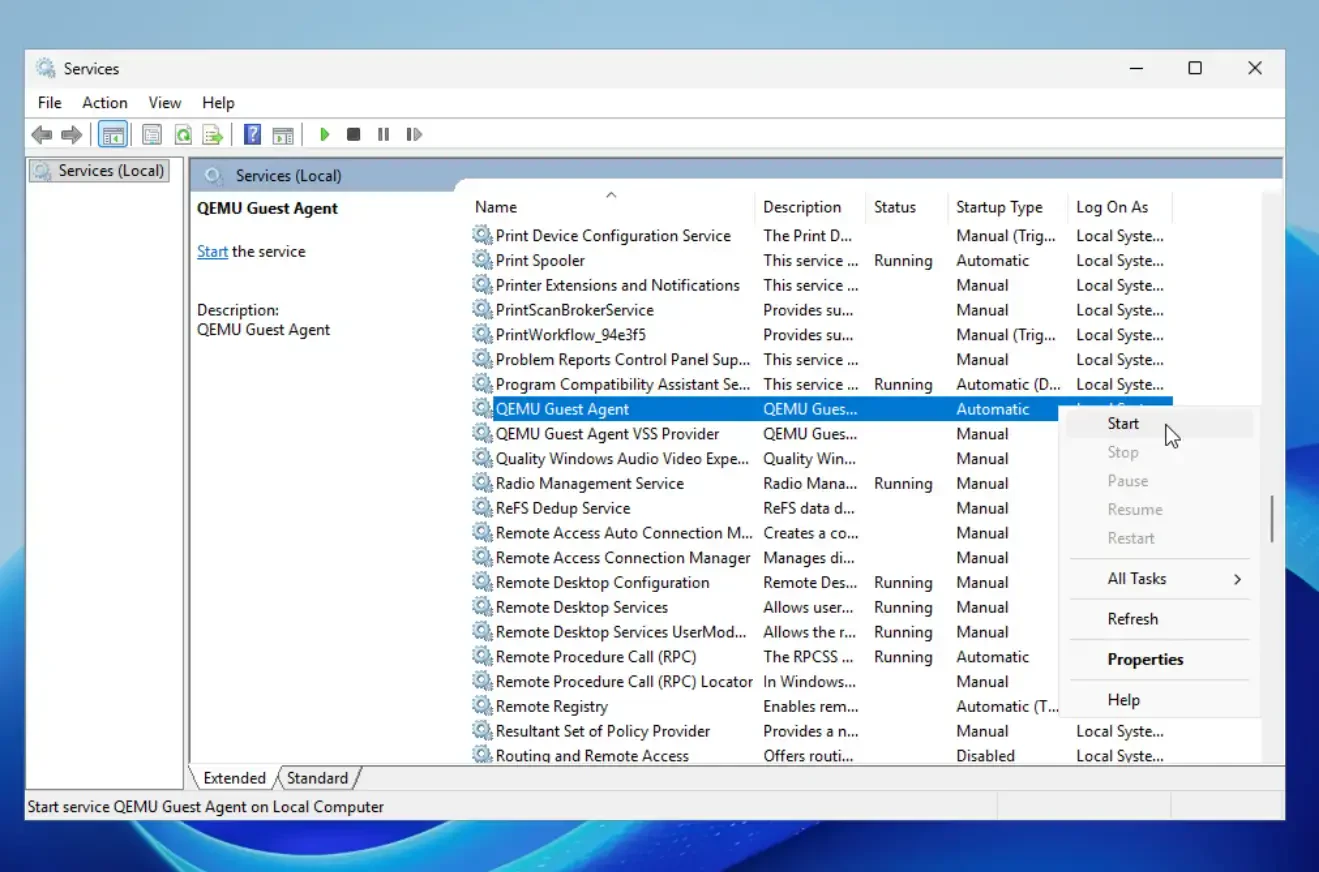
Once started, the status should change to Running.
How to Install QGA
If the QEMU Guest Agent service is not present, the VirtIO drivers/Virtio-win-guest-tools may not have been properly installed. If that’s the case, then you will need to download an official VirtIO driver ISO and manually install it. You can utilize the following link from the FedoraPeople group.
After downloading the ISO file with your preferred version, you can now mount it to your VPS by right-clicking on your file.
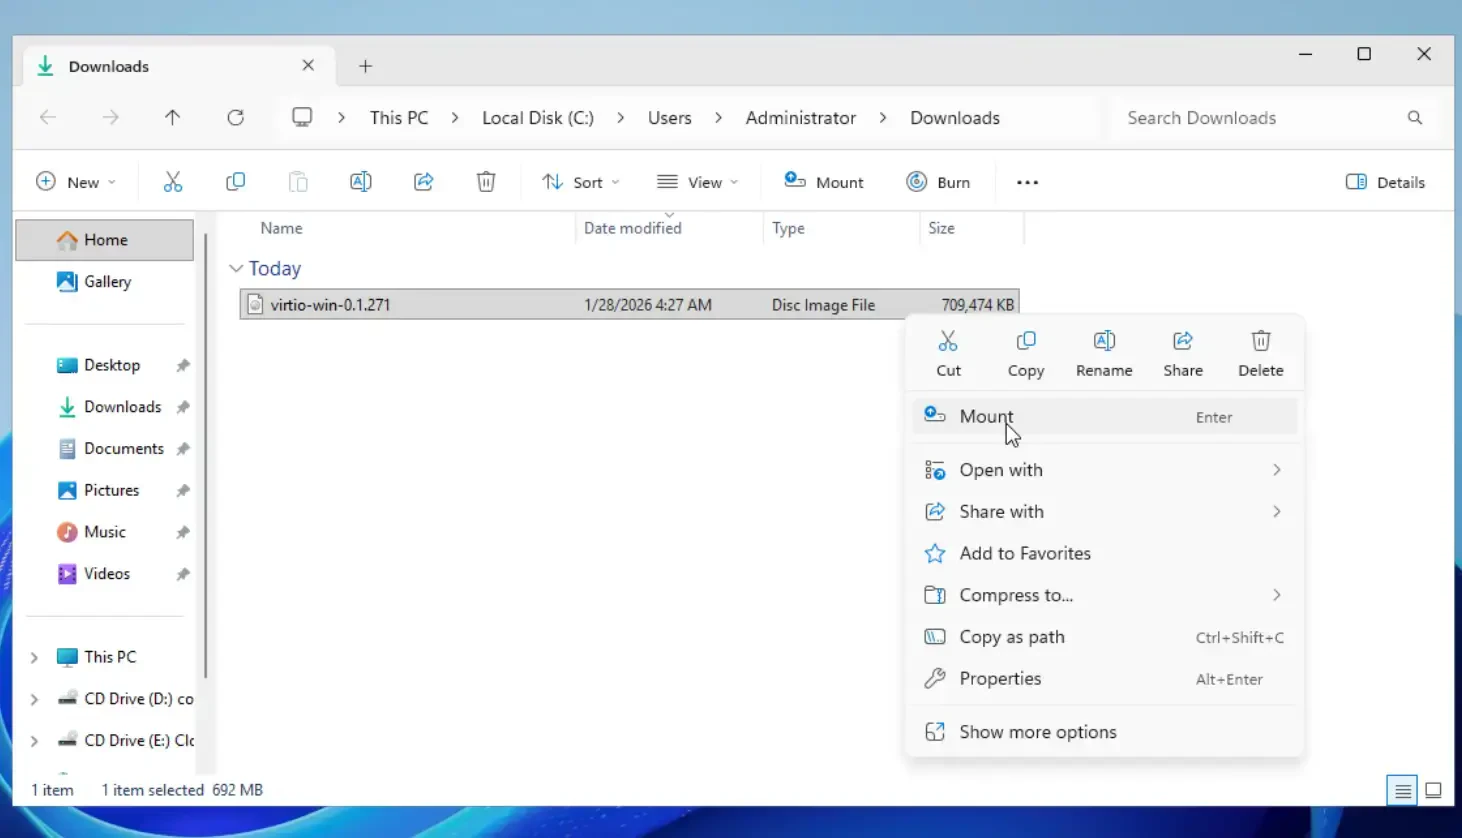
After the process has finished the ISO will appear as a new CD/DVD drive in This PC.
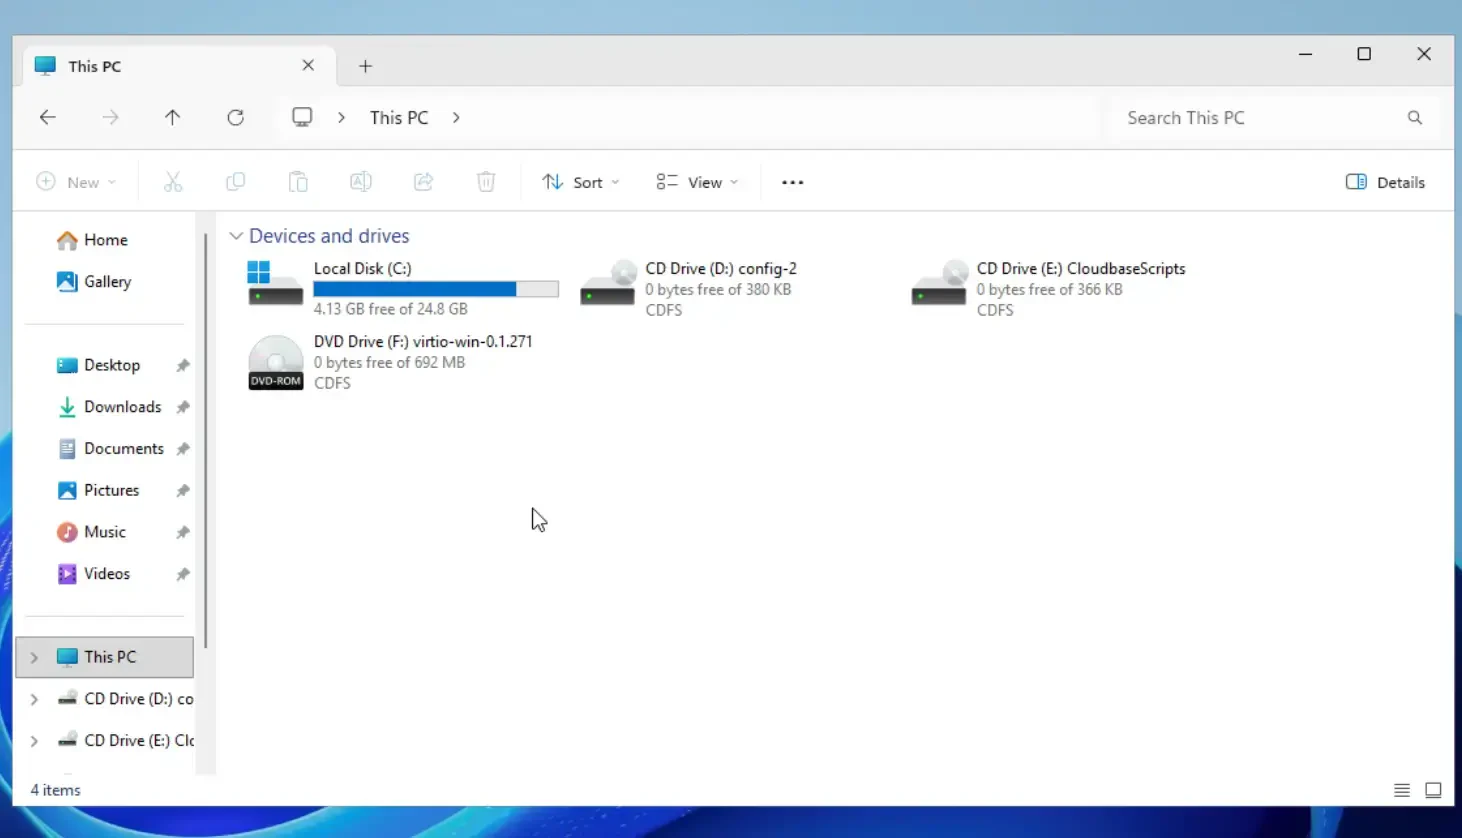
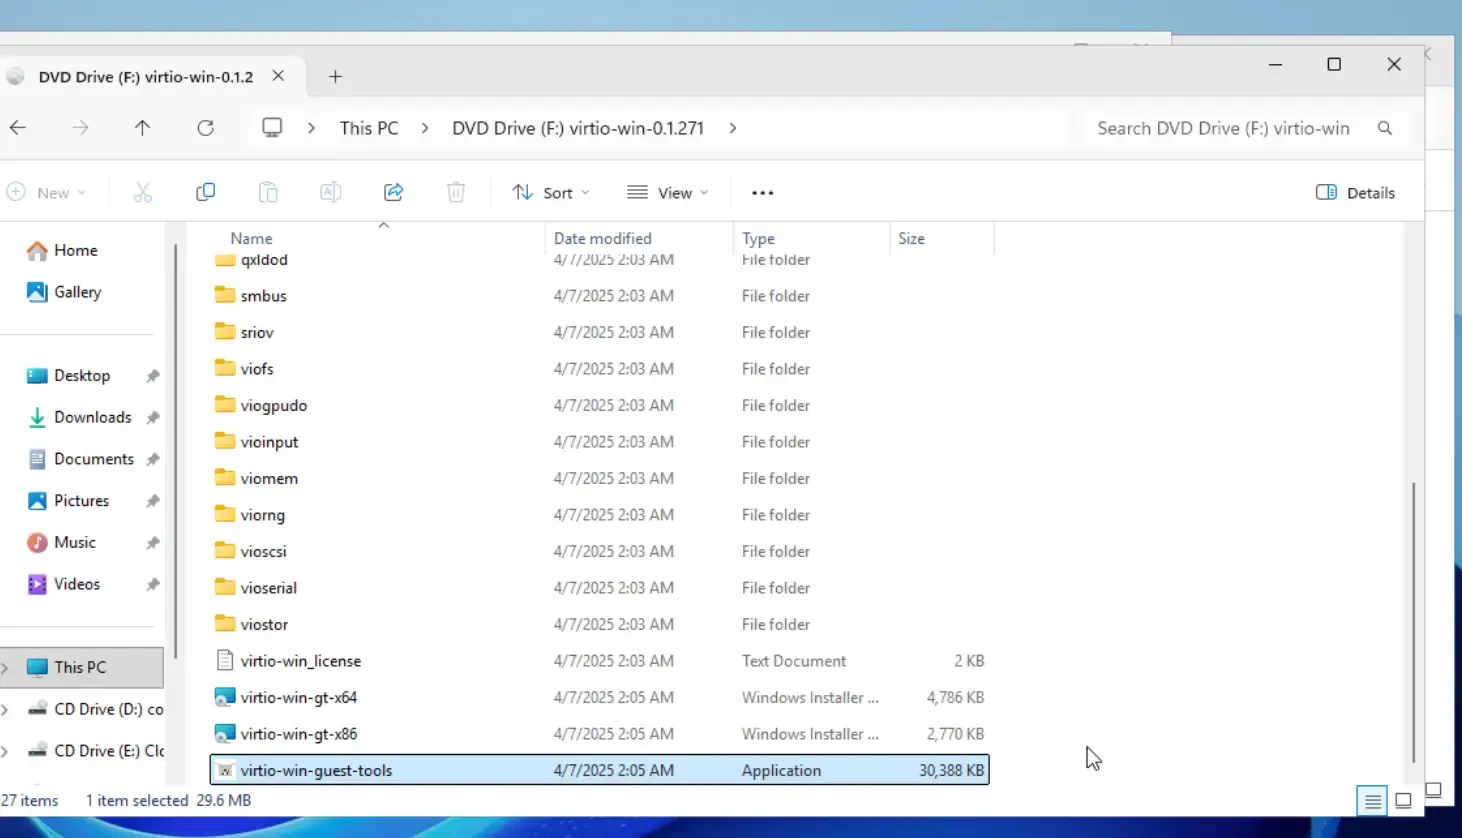
Finally you need to install VirtIO Guest Tools (that includes the QEMU Guest Agent). Simply open the mounted VirtIO CD/DVD drive and run virtio-win-guest-tools.exe.
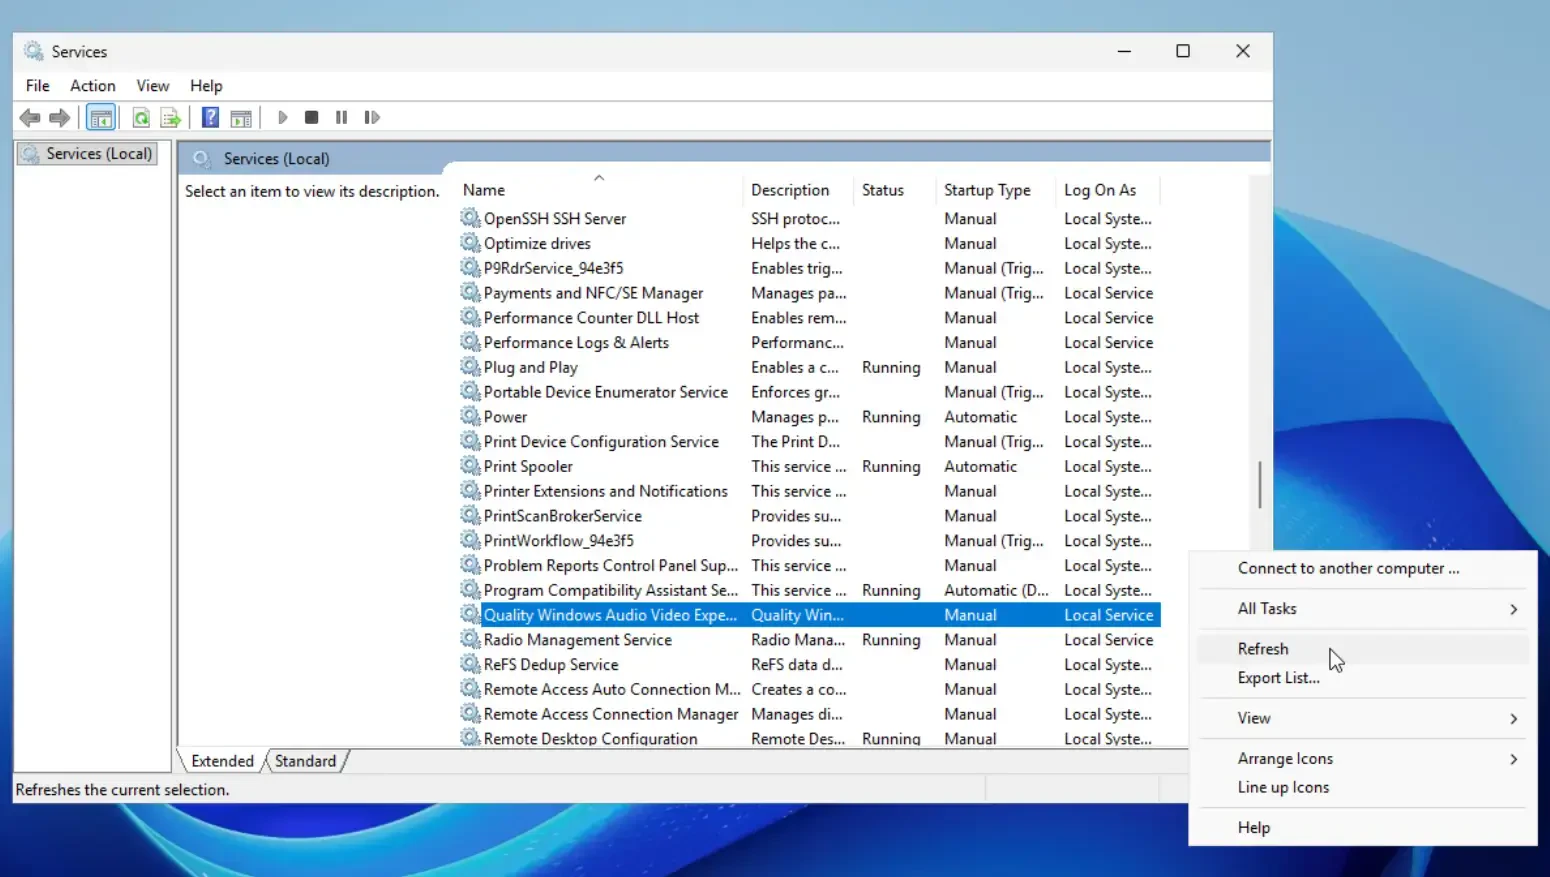
After the installation is completed you can verify if qemu-guest-agent has been installed by navigating back to the Services window. If it still doesn’t appear make sure you right-click somewhere inside the list of services and click Refresh as shown below.
That’s it! We hope that you have managed to get QGA up and running for your virtual machine. If these solutions have still not fixed your problem, you can always reach out to our dedicated support team.