NewExtra server protection with Measured Boot & UKI images.View Measured Boot
BlogDocumentationFAQNo Third-Party CookiesContact Us
  • Pricing
Log inSign up
Cloud VPSVDSMemory-Optimized VDSStorage-Optimized VDSWindows VPSBitcoin VPSDDoS ProtectionPrivate Networking (VPC)Floating IPsAdditional Server SupportMicrosoft LicensesDatacenterNetworkDocumentationFAQNo Third-Party CookiesConfidential ComputingSelf-Hosted VPNBlogAboutBrand GuidelinesAffiliatesContact UsLegal & Compliance

Products

  • Pricing
  • Cloud VPS
  • VDS
  • RAM-Optimized VDS
  • Storage-Optimized VDS
  • Windows VPS
  • Bitcoin VPS
  • DDoS Protection
  • Private Networking (VPC)
  • Floating IPs
  • Microsoft Licenses
  • Additional Server Support

Explore

  • Documentation
  • Developers API Docs
  • FAQ
  • Datacenter
  • Network
  • Looking Glass
  • Confidential Computing
  • Cookie Policy
  • Self-Hosted VPN

Company

  • Blog
  • Contact Us
  • About Us
  • Brand Guidelines
  • Affiliates

Legal & Compliance

  • Terms of Service
  • Privacy Policy
  • Data Processing Agreement
  • Acceptable Use Policy
  • Microsoft Software Terms of Use
  • Refund Policy
  • Report Abuse

Products

  • Cloud VPS
  • VDS
  • RAM-Optimized VDS
  • Storage-Optimized VDS
  • Windows VPS
  • Bitcoin VPS
  • DDoS Protection
  • Private Networking (VPC)
  • Floating IPs
  • Microsoft Licenses
  • Additional Server Support
Pricing

Explore

  • Documentation
  • Developers API Docs
  • FAQ
  • Datacenter
  • Network
  • Looking Glass
  • Confidential Computing
  • Cookie Policy
  • Self-Hosted VPN

Company

  • Blog
  • Contact Us
  • About Us
  • Brand Guidelines
  • Affiliates

Legal & Compliance

  • Terms of Service
  • Privacy Policy
  • Data Processing Agreement
  • Acceptable Use Policy
  • Microsoft Software Terms of Use
  • Refund Policy
  • Report Abuse

© VPS.BG Ltd. 2026 · All rights reserved!

Made with passion in Bulgaria · VAT ID: BG203144520

Contents

  • Setting up the user credentials
  • Testing the new user

Subscribe to Our Newsletter

Join 5000+ subscribers and receive helpful content, deals and more! We promise no spam - 100% great content. Unsubscribe anytime.

Share Article

#Windows
  1. Documentation
  2. /
  3. #Windows
  4. /
  5. How to add another user to your Windows VPS

How to add another user to your Windows VPS

Published: 29 August 2025 • Updated: 05 July 2026 • 1 min read

#Tutorial#Windows

Adding new user accounts on a Windows VPS is a fundamental administrative task for managing access and security. As a matter of fact, it is a really simple task that can be quickly done through the graphical interface of your VPS once you have logged in.

Setting up the user credentials

Start by opening the Start Menu and typing Server Manager in the search bar. Next, click on the application to open it.
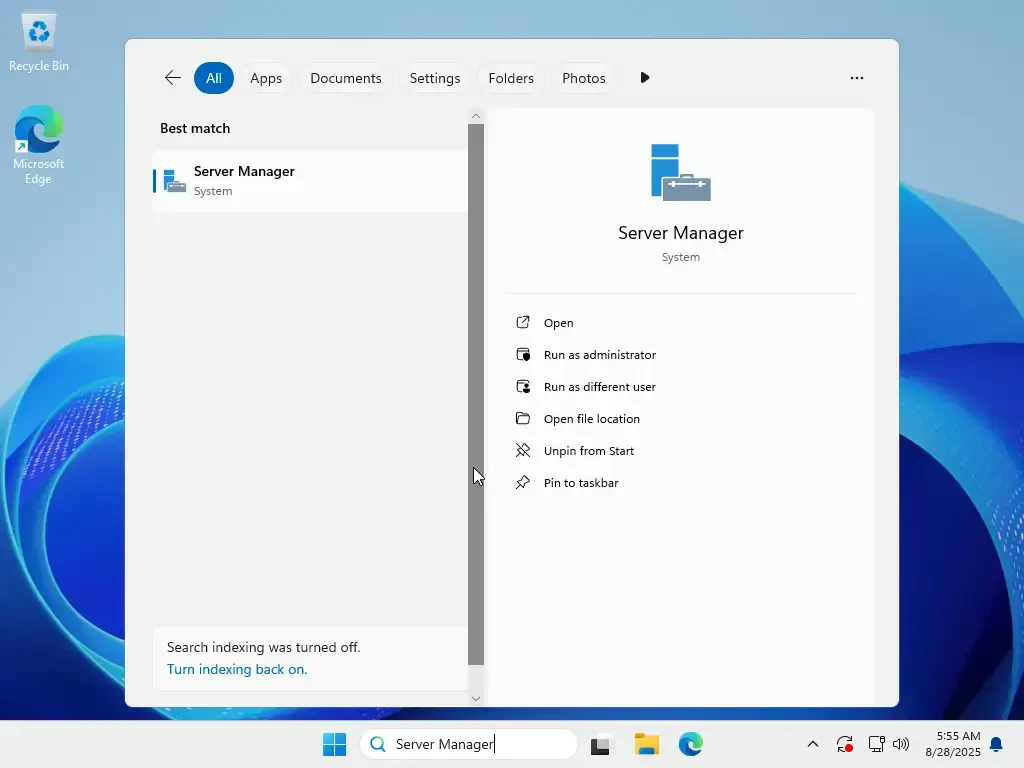
open server manager

Here, in the Server Manager window, click on the Tools menu in the top-right corner and select Computer Management from the drop-down list.
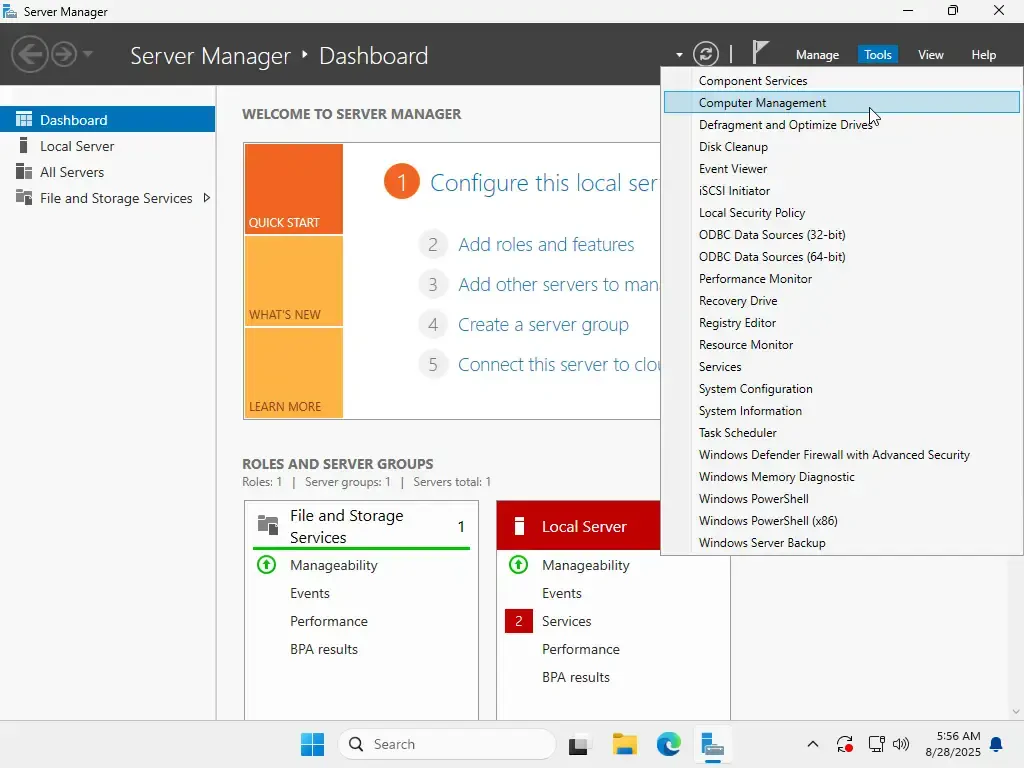
open computer management

After that, in the Computer Management window, navigate to System Tools > Local Users and Groups > Users. This will display a list of all current users for the server.
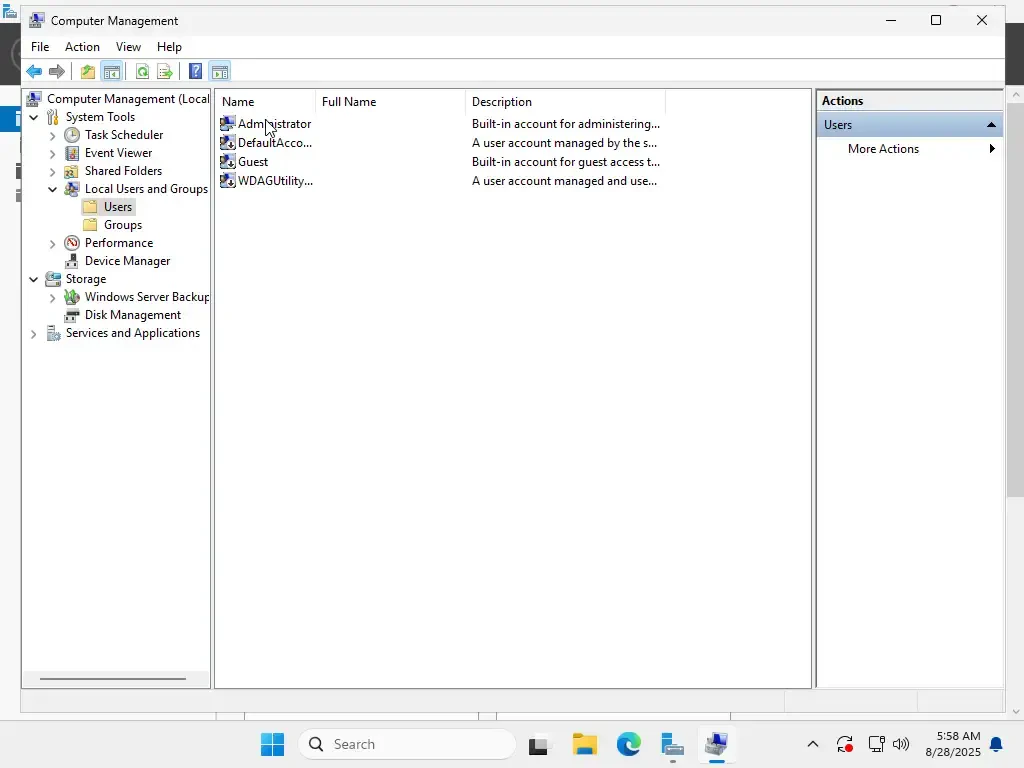
view current users

From the top menu, simply click on Action and then select New User....
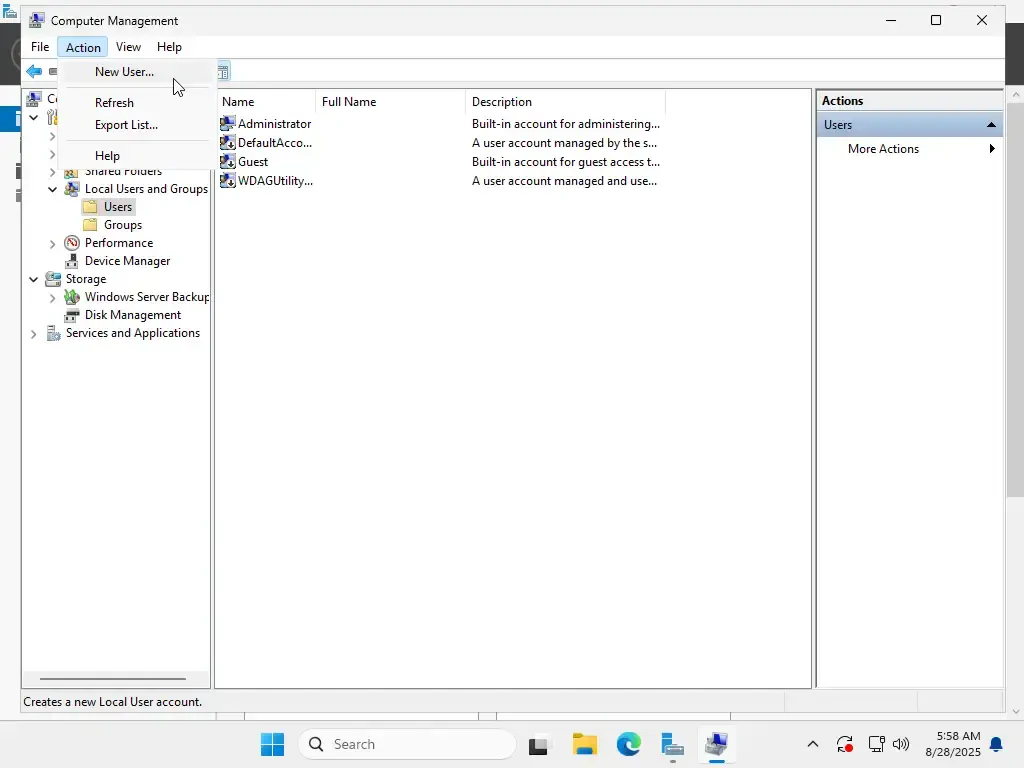
add new user

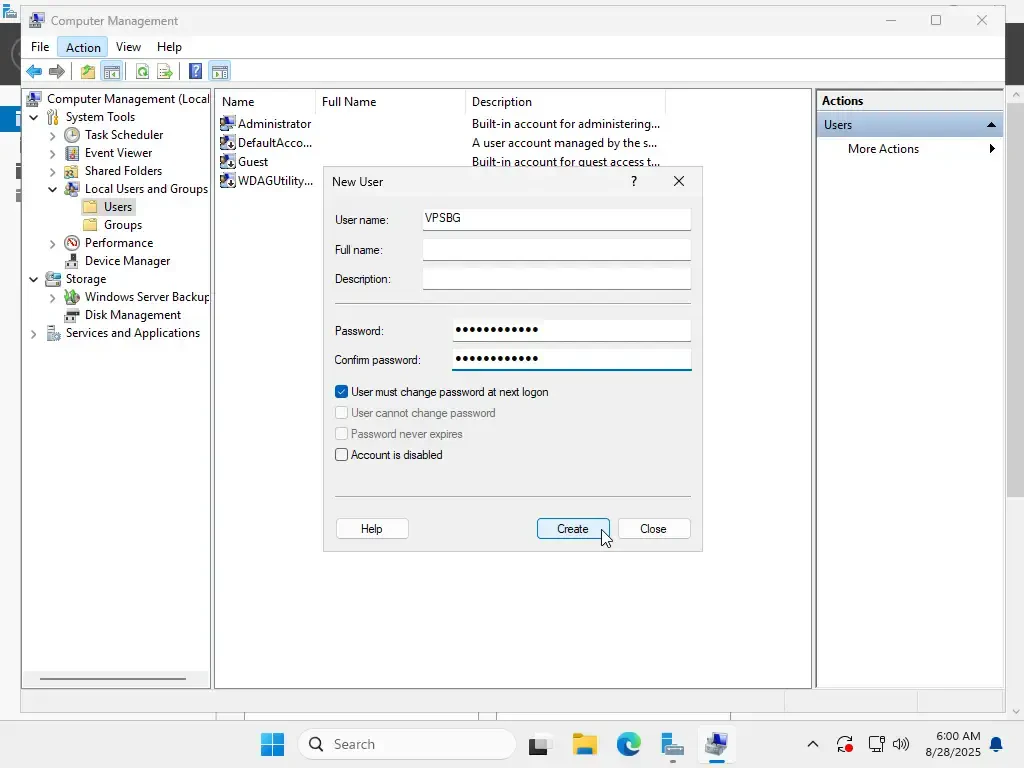
A New User dialog box will appear. Enter a Username and a make sure to choose a secure Password. It is recommended to leave the User must change password at next logon checkbox ticked for security. Click Create when you are done.
added new user

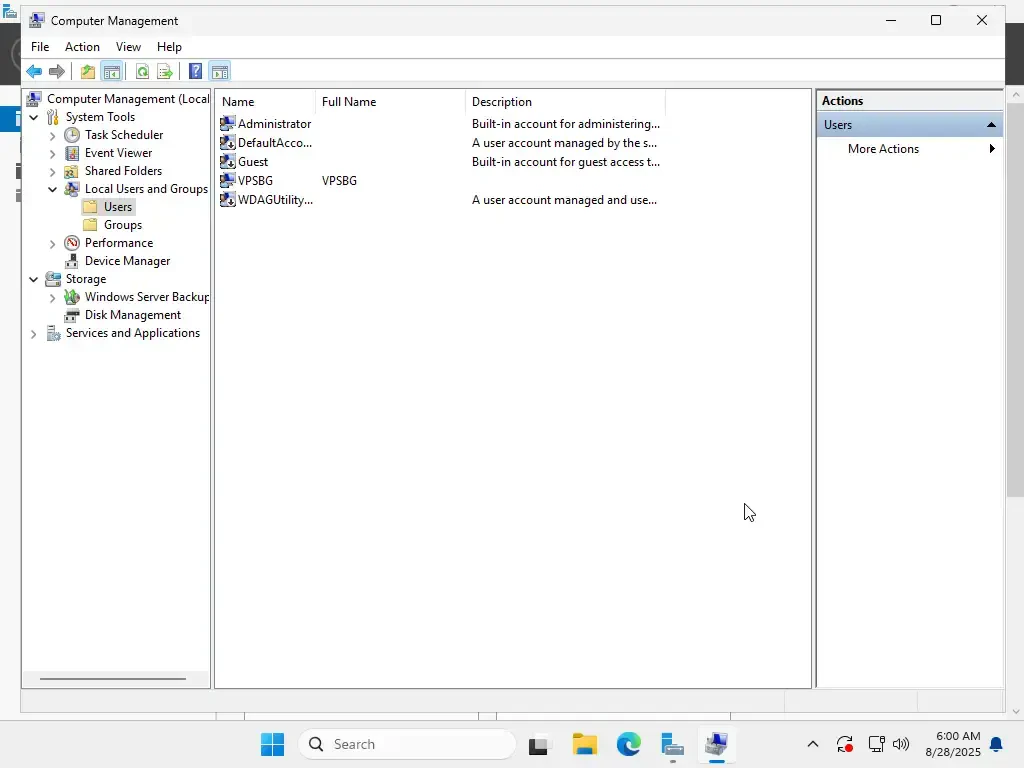
After clicking Create and then Close, you will see the new user has been added to the list of users.
verify user

Testing the new user

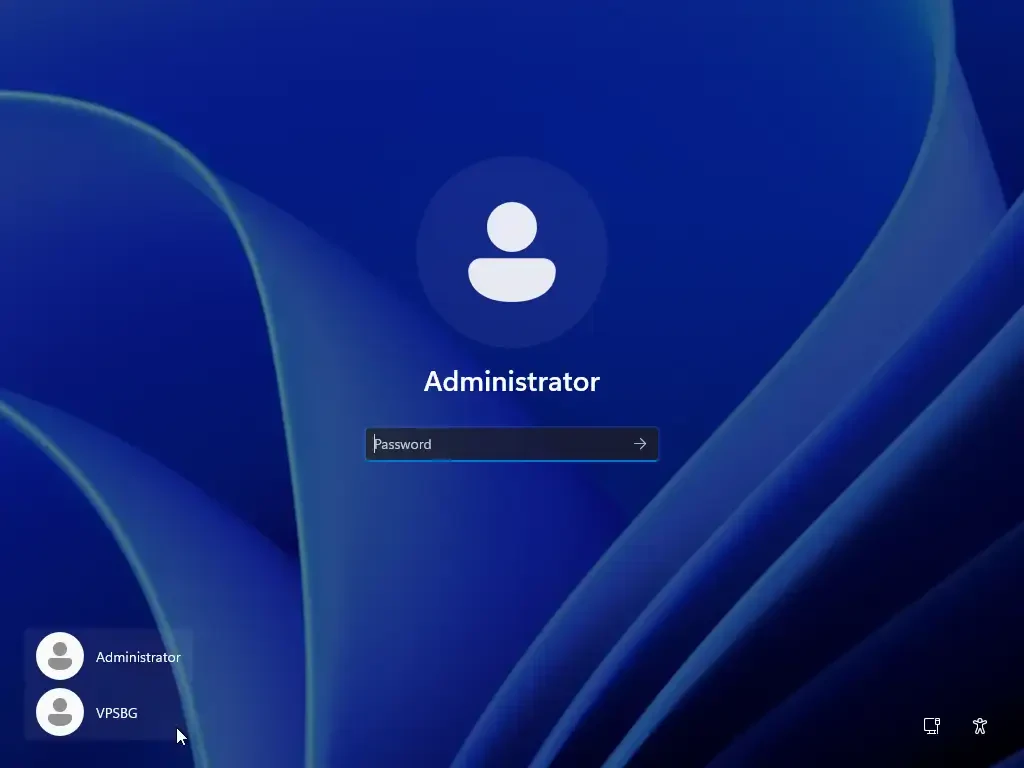
To test the new account, sign out of the Administrator profile. When on the login screen, select the new user account to log in.
change users

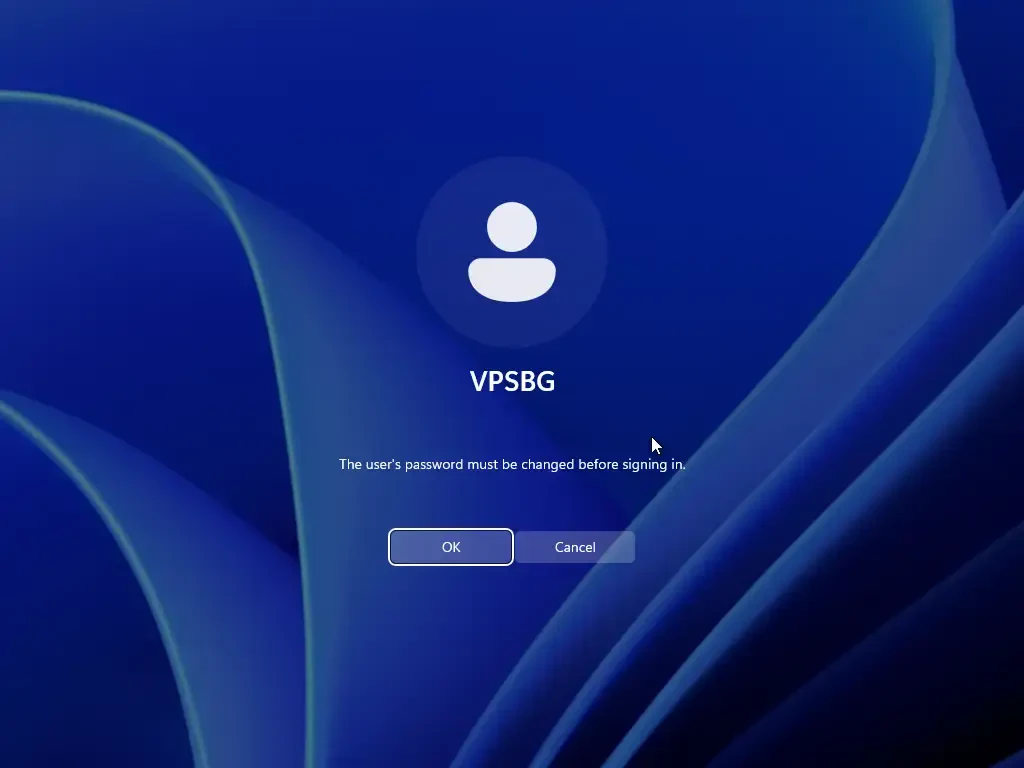
Because the User must change password at next logon option was enabled, you will be prompted to update the password immediately. Click OK to proceed.
change password

Once the password has been changed, you will be successfully logged into the new user's desktop environment.
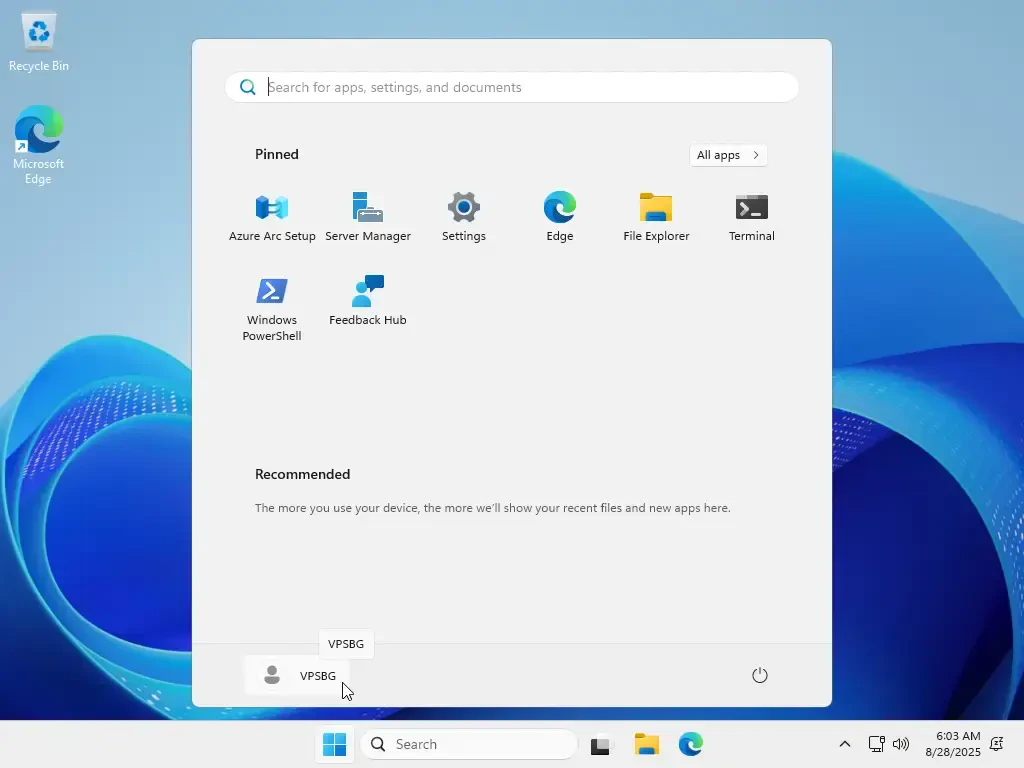
new user added

That’s it! You have successfully created a new user on your Windows VPS!

Subscribe to Our Newsletter

Join 5000+ subscribers and receive helpful content, deals and more! We promise no spam - 100% great content. Unsubscribe anytime.

Share Article

Related Content

16 May 2025

How to use a Windows VPS as proxy server

In this tutorial, we are going to show you how to set up a Windows VPS as a proxy server to securely route your traffic and protect your privacy.

#Tutorial#Windows
26 June 2025

3 ways to transfer files to your Windows VPS server

Here are 3 different easy methods that you can use to transfer files from your local machine to your Windows VPS server!

#Windows#Tutorial
26 September 2024

How to speed up your Windows VPS

Learn how to speed up your Windows VPS by monitoring your server resources, changing your power management plan or scaling your server.

#Tutorial#Windows
13 February 2026

How to connect to your Windows VPS

Learn how to connect your Windows VPS or VDS through the remote desktop service for Windows, macOS and Linux-based machines.

#Windows#Tutorial

Powerful & Secure Windows VPS Servers

Grab a Windows VPS with free RDP access and an affordable server license! Powerful Windows VMs ready for different types of workloads.

Configure Windows VPSContact Us